logotype
  • Asanas
  • Pranayamas
  • Meditation
  • Blog
  • About Us
  • Contacts
make an appointment
logotype
logotype
  • Asanas
  • Pranayamas
  • Meditation
  • Blog
  • About Us
  • Contacts
Blog001
HomeBlog001
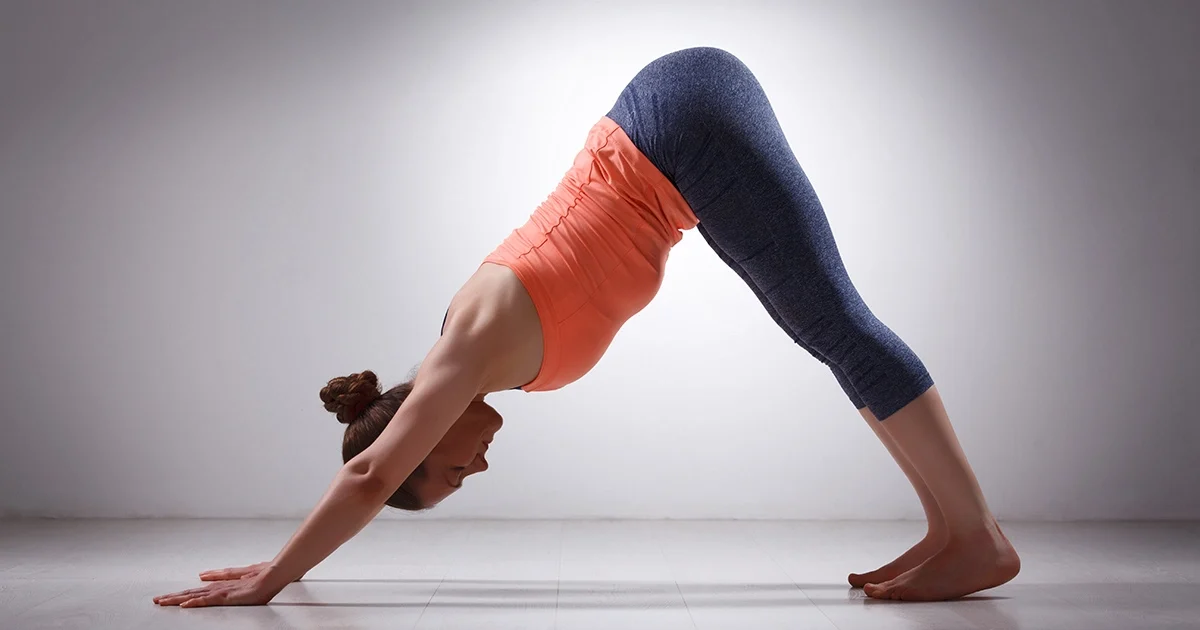
A yoga practitioner demonstrates correct alignment in Adho Mukha Svanasana, extending the spine and heels while pressing firmly through the palms.
Blog
May 30, 2026By bharatyogas0 Comments

Adho Mukha Svanasana-Downward Facing Dog

Adho Mukha Svanasana (Downward Facing Dog)

Table of Contents

  1. Introduction
  2. How to Do Adho Mukha Svanasana
  3. Benefits
  4. Tips for Better Practice
  5. Why Learn with a Yoga Teacher or Instructor
  6. Cautions and Contraindications
  7. Conclusion
  8. FAQS

Introduction

Adho Mukha Svanasana is so ubiquitous that an active practitioner likely completes between 5 and 15 repetitions per class. It is foundational to almost all vinyasa yoga poses, yet over a year of regular practice, that high volume can breed a particular kind of carelessness. People stop feeling the pose because they’ve done it so many times that it’s become automatic. The heels hover, the elbows collapse inward, the weight dumps into the wrists, the hips don’t quite reach where they could — and none of it gets noticed because Down Dog stopped being a pose people pay attention to somewhere around session thirty.

Adho means downward. Mukha means face. Svana means dog. The shape really does look like a dog stretching with its hindquarters elevated. It is a brilliant asset among common yoga inversions (heart above head), functioning as a forward fold — spine in flexion (the forward bending movement that decreases the angle between the bones) relative to the hips — and an arm-strengthening posture (hands bearing significant weight) simultaneously.

Done with genuine attention, it’s one of the most comprehensive single postures in yoga. Done automatically, it’s just something you do between things.

How to Do Adho Mukha Svanasana

Start in a tabletop position — hands under shoulders, knees under hips. Spread the fingers wide and press through all four corners of each hand, particularly the first knuckle of the index finger (which tends to lift). Tuck the toes.

Exhale and press into the hands, lift the knees off the floor, and send the hips up and back. The body creates an inverted V shape — hips at the apex, hands and feet at the base.

Aim for a long, straight spine. The hamstrings will limit this — most people’s heels won’t reach the floor, and that’s fine. Knowing how to do Downward Dog with tight hamstrings simply means prioritizing a long, flat back over straight legs. A slight bend in the knees can help if very tight hamstrings are forcing the lower back to round.

Arms are straight but not locked. Shoulder blades draw together slightly and then widen — the external rotation of the upper arm creates the shoulder-width that the pose needs. The head hangs between the arms, ears in line with the biceps.

Hold for 5 to 10 breaths.

Benefits

Full posterior chain stretch. The hamstrings, calves, glutes, and the muscles along the entire length of the spine all stretch simultaneously. For most people this is the most comprehensive single posterior-chain stretch available in the practice.

Arm and shoulder strengthening. The hands bear a significant portion of body weight in an overhead position. The rotator cuff, deltoids, triceps, and serratus anterior all work to stabilize and maintain the arm position. Over time, consistent Down Dog practice builds meaningful shoulder strength.

Mild inversion benefits. With the heart above the head, blood flows toward the brain and upper body. The calming effect of mild inversions on the autonomic nervous system is real and compounds over regular practice.

Wrist conditioning. The sustained load on the wrists in extension conditions the wrist joint and the flexor and extensor tendons of the forearm. This is preparatory for more demanding arm-balancing postures.

Spinal traction. With the hands pressing the floor and the hips lifting upward, the spine is gently tractioned — the vertebral spaces open slightly as gravity pulls the torso toward the floor between the fixed hands and feet. Many practitioners feel their back decompress in Down Dog in a way that’s immediately noticeable.

Tips for Better Practice

  • Press through the first knuckle of the index finger. This is the knuckle that habitually lifts, creating a dead spot in the hand-to-floor connection that loads the outer wrist. Pressing it down distributes the weight more evenly.
  • Externally rotate the upper arms. Turn the inner elbow creases to face forward (not inward). This widens the shoulder position and creates the correct shoulder girdle alignment for the pose.
  • Bend the knees if the lower back rounds. Soft knees allow the pelvis to tilt forward and the spine to lengthen, which produces more actual spinal stretch than straight-legged Down Dog with a rounded lumbar.
  • Let the head hang. The neck shouldn’t be holding any tension. The ears should be in line with the biceps, the head completely released.
  • Walk the dog. Alternately bending one knee and then the other — “walking” in the pose — helps open the calves and hamstrings gradually before static holding.

Why Learn with a Yoga Teacher or Instructor

The external rotation of the upper arms is the most technically nuanced alignment point in Down Dog and the hardest to feel without guidance. A teacher can physically adjust the arm rotation, turning the elbow creases forward, which immediately changes the shoulder position and the whole feel of the pose.

Teachers also address the wrist-weight distribution, the index-knuckle pressing, and the relationship between hamstring flexibility and lumbar curve — the interconnected set of decisions that determines whether Down Dog is actually decompressing the spine or just rounding it in a different direction.

Cautions and Contraindications

  • Wrist injuries or carpal tunnel syndrome: Significant wrist load. Practitioners should explore Downward Facing Dog modifications for wrist pain such as dropping down to Dolphin Pose (forearms on the floor) or using yoga blocks under the hands as modifications.

    High blood pressure or late-stage glaucoma: The mild inversion and cardiovascular demand may be contraindicated. Check with a doctor.

    Shoulder injuries: The load on the rotator cuff is real. Dolphin Pose removes the wrist extension and shoulder load if needed.

    Pregnancy: The pose is generally appropriate during pregnancy with modifications in later trimesters. A wider stance helps accommodate the growing abdomen.

    Vertigo: The head-below-heart position can trigger dizziness. Come down immediately if this occurs.

Conclusion

Downward Dog is the posture most yoga practitioners stop really practicing after a few months. It becomes automatic — a shape that happens between other things. That’s a reasonable outcome if you’ve been practicing for years; the body knows the shape.

But there’s always something to find in it. The first knuckle that’s lifting. The upper arm rotation that’s not quite there. The hamstrings that could release a little more if you bent the knees first. The spine that could lengthen more fully with one small adjustment.

A thousand Down Dogs. Each one is an opportunity to pay attention.

FAQS

Q: My heels don’t reach the floor. Am I doing it wrong?

A: No. Heels off the floor is fine and extremely common, especially in the beginning. The priority is a long spine — if you have to round your back to push the heels down, keep them up.

Q: How long should I hold Down Dog?

A: In a Vinyasa flow it’s often 5 breaths. In a more exploratory practice, 1 to 2 minutes lets the shoulders and hamstrings open more fully. Neither is wrong.

Q: My wrists hurt in Down Dog. Is that normal?

A: Common, but worth addressing. Spread the fingers wide, press into the base of each finger, and shift a little more weight toward the upper hand. Regular wrist mobility work helps a lot.

Q: Is Down Dog a rest pose or an active pose?

A: Both, depending on where you are in your practice. For beginners it’s demanding. For experienced practitioners it genuinely becomes a resting pose between more intense postures.

Q: Should my back be flat in Downward Dog?

A: A long, neutral spine is the goal. Not necessarily flat — the natural lumbar curve is fine. What to avoid is rounding the upper back or collapsing into the shoulder joints.

Q: Can I do Down Dog every day? A: Yes. Many practitioners consider it a daily maintenance pose for shoulders, hamstrings, and spinal length. It’s worth doing even on low-energy days.

Q: Why do my arms shake in Down Dog?

A: Shoulder stabilizer fatigue — common in earlier practice. It improves. Focus on pressing the floor away with straight arms rather than passively hanging in the shoulder joints.
READ MORE
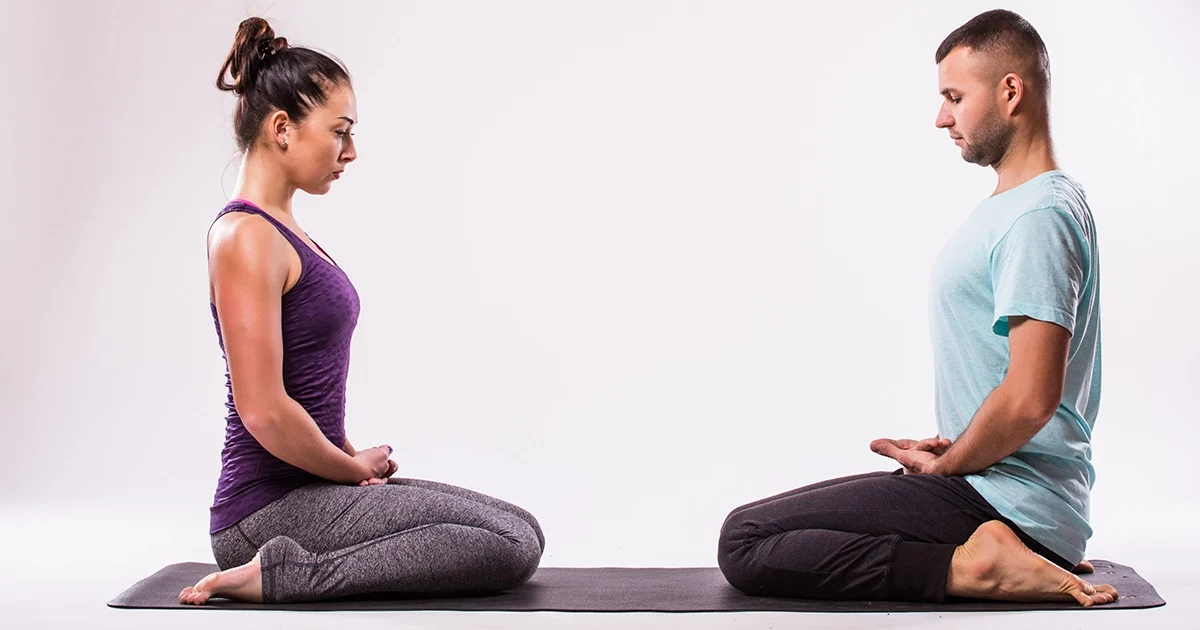
A practitioner demonstrates proper alignment in Virasana on a purple mat, using a yoga block under the hips to make Hero Pose more comfortable.
Blog
May 30, 2026By bharatyogas0 Comments

Virasana-Hero Pose

Virasana (Hero Pose)

Table of Contents

  1. Introduction
  2. How to Do Virasana
  3. Benefits
  4. Tips for Better Practice
  5. Why Learn with a Yoga Teacher or Instructor
  6. Cautions and Contraindications
  7. Conclusion
  8. FAQS

Introduction

Virasana looks a lot like many traditional resting yoga postures, but it can be surprisingly deceptive. You’re sitting on the floor between your heels — or on a block between your heels — spine upright, hands on the thighs. There’s nothing visually demanding about it.

But spend five minutes in it with tight quadriceps (the large muscles on the front of the thighs) and limited ankle flexibility, and you’ll discover it’s one of the more challenging sustained holds in the practice.

Vira means hero or warrior. The name implies a quality of sustained courage — the kind that isn’t about dramatic action but about staying present with difficulty. This pose requires that quality. It stands out as an excellent element of yoga for tight quadriceps, as the intense front-thigh stretch, the ankle extension, and the knee flexion (the bending action of the knee joint) under load are all things that modern bodies resist. Sitting in the pose for extended periods is exactly the work of opening those resistances gradually.

The posture is distinct from Vajrasana — in Vajrasana, you sit on the heels; in this shape, you sit between them, with the heels on either side of the hips rather than under them. The difference in ankle and quadriceps demand is significant.

How to Do Virasana

Kneel with knees together. Turn the feet slightly outward so the toes point back and slightly to the sides. Widen the feet so they’re just wider than hip-width.

Slowly lower the hips toward the floor between the heels. If the hips reach the floor comfortably and the lower back maintains its natural curve, this is the full pose. If you want to learn how to make Hero Pose more comfortable when your hips hover above the floor or if there’s discomfort in the joints, simply place a folded blanket or yoga block between the heels for the hips to rest on.

Hands rest on the thighs. Spine is upright. The lower back maintains its natural curve without excessive arching.

Hold for 1 to 5 minutes, building gradually over weeks.

To come out, place the hands on the floor beside the hips, lean forward onto them, and bring the legs out to one side before straightening them. Don’t straighten the legs abruptly without this transitional movement — the knee needs a gradual return from deep flexion.

Benefits

Deep quadriceps stretch. The rectus femoris (the central quadriceps muscle crossing both the hip and knee joints) gets one of its most complete stretches here. The knee is in flexion and the hip is in a relatively neutral position, which creates length along the full length of the muscle. This stretch is difficult to replicate in other common postures.

Ankle plantar flexion (the movement where the foot points downward, extending the ankle) stretch. The tops of the feet on the floor with the ankles extended stretches the tibialis anterior (the muscle running along the front of the shinbone) and the extensor tendons (the tissues connecting shin muscles to the toes) of the foot. For people who’ve worn shoes with elevated heels for years, the anterior ankle often has surprising restrictions that this posture gradually opens.

Incredible Hero Pose benefits for knees (when done correctly). This position compresses the knee joint, which some people find counterintuitive for a pose said to support knee health. The benefit is in the synovial fluid (the natural lubricating liquid found within joint cavities) stimulation — the compression and the weight in the position helps distribute synovial fluid to the joint surfaces. This requires the pose to be done within a comfortable range; forced deep flexion with knee pain is different from a manageable stretch.

Digestive support. Like Vajrasana, this posture is sometimes recommended after meals for its effect on increasing circulation to the abdominal region. The kneeling position affects digestion differently than sitting in a chair.

Meditation seat. For people whose hips and ankles have developed the necessary flexibility, this posture is a stable and comfortable meditation seat. The upright spine it creates naturally, without the external rotation challenge of cross-legged positions, makes it practically useful for extended seated practice.

Tips for Better Practice

  • Use a block. There’s no achievement in forcing the hips to the floor when they’re not ready. A block between the heels that holds the hips at whatever height is comfortable allows the pose to work without creating knee or ankle strain. Remove height gradually as flexibility develops over months.
  • Check the lower back. In the full pose, the natural lumbar curve should be maintained. If the pelvis tucks under and the lower back rounds, add more height under the hips.
  • Take the time coming out. The transition from deep knee flexion to straight legs should be slow and deliberate. Straightening the legs abruptly from Virasana can strain the knee joint or create sharp calf cramping. Come forward onto the hands first.
  • Build duration slowly. Two minutes this week, three next month. The quadriceps and ankle structures change slowly with consistent practice.
  • If the feet cramp, it’s usually the tibialis anterior struggling with the ankle extension. Come out briefly, flex the foot a few times, and return with slightly less ankle extension if needed.

Why Learn with a Yoga Teacher or Instructor

The prop decision — how high the block should be for a given student’s anatomy — is something teachers assess based on watching the knee position, the lower back alignment, and the ankle angle. Getting this right makes the difference between a pose that works and one that just hurts. Teachers also watch for lateral tilting of the pelvis (when one knee is more comfortable than the other) and can offer appropriate modifications.

For students using Virasana as a therapeutic practice for knee recovery (under physiotherapy guidance), a teacher can set appropriate depth and duration and track progress over time.

Cautions and Contraindications

  • Knee ligament injuries: The deep knee flexion in Virasana puts significant load on the medial structures of the knee. Active ligament injuries or post-surgical knees require clearance from a physiotherapist and significant prop support.
  • Severe ankle stiffness: Introduce gradually with blanket support under the ankles if needed.
  • Varicose veins: Prolonged compression in this position can be uncomfortable. Keep holds shorter.
  • Meniscal tears: Deep knee flexion may be contraindicated depending on the nature and location of the tear. Get physiotherapy guidance.

Conclusion

Virasana is the pose that teaches you where your body has been and where it’s going. The tight quadriceps from years of sitting, the stiff ankles from years of shoes — they show up clearly and immediately. And the patient, consistent work of opening them — through props, through breath, through showing up regularly — is exactly the kind of practice that changes the body over time.

Heroes don’t always move dramatically. Sometimes they just sit still and stay.

FAQS

Q: Virasana hurts my knees. Should I push through it?

A: No. Knee pain in Virasana usually means the knee joint is being stressed rather than the muscles being stretched. Place a block or folded blanket between the feet and under the sit bones. If the pain persists with props, skip it.

Q: Is Virasana the same as Vajrasana?

A: Similar, but not identical. In Vajrasana the feet are under the hips and you sit on the heels. In Virasana the feet are beside the hips and you sit between them on the floor or a prop. Virasana requires more knee and ankle flexibility.

Q: What does Virasana actually stretch?

A: The quadriceps and hip flexors primarily. The ankle extensors also get worked with sustained sitting. It’s one of the more effective quad stretches in yoga.

Q: Can I do Supta Virasana (reclined hero) without doing the sitting version first?

A: No — get comfortable sitting in Virasana before attempting the recline. Going back without hip flexor and quad preparation is how people hurt their knees and lumbar spine.

Q: Is it okay to sit in Virasana for meditation?

A: Yes, many practitioners prefer it to cross-legged positions because it keeps the spine naturally upright. Use props generously.

Q: How long can I sit in Virasana?

A: 5 to 15 minutes is reasonable once comfortable. Come out slowly and extend the legs to release the knees.

READ MORE
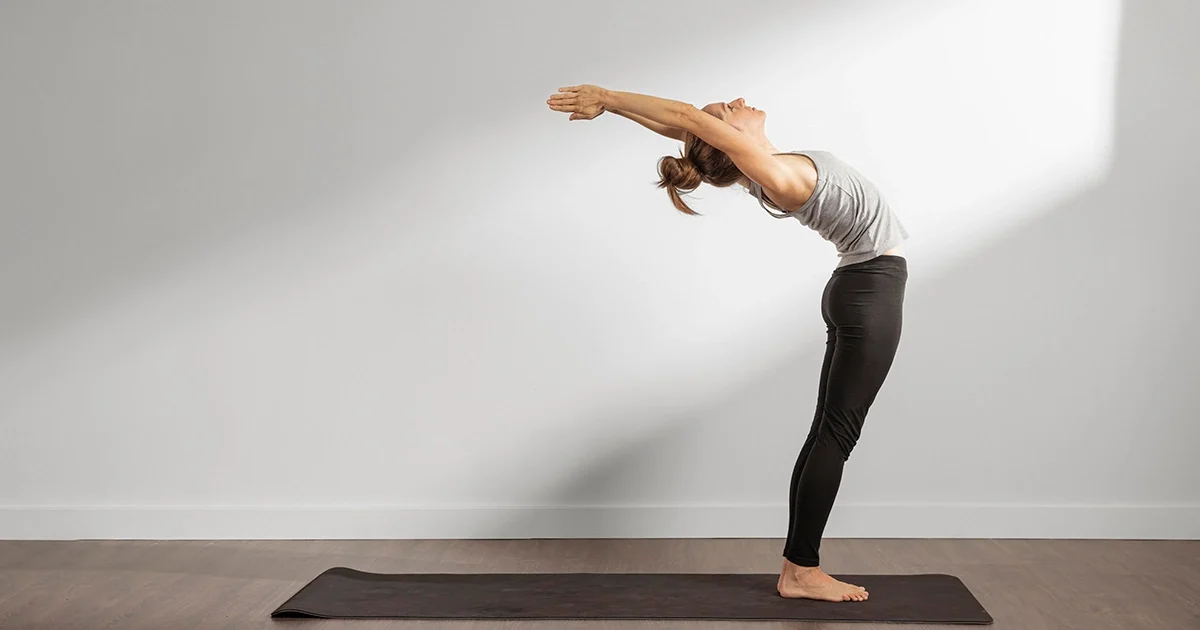
A practitioner demonstrates Ardha Chakrasana by supporting the lower back with both hands while gently arching the upper spine backward.
Blog
May 24, 2026By bharatyogas0 Comments

Ardha Chakrasana (Half Wheel Pose): A Backbend You Can Actually Do

Ardha Chakrasana (Half Wheel Pose): A Backbend You Can Actually Do

Table of Contents

  1. Introduction
  2. How to Do Ardha Chakrasana
  3. Benefits of Ardha Chakrasana
  4. Tips for Better Practice
  5. Why Learn with a Yoga Teacher
  6. Cautions and Contraindications
  7. Conclusion
  8. FAQS

Ardha Chakrasana is a highly effective posture for countering the physical toll of modern daily life, where most people’s spines spend the majority of the day in forward flexion. Sitting at a desk, hunching over a phone, driving, eating — almost all of it curves the spine forward. This posture offers the opposite direction: a standing backbend for posture correction that counteracts hours of forward bending in under a minute.

Ardha means half, chakra means wheel, asana means posture. The full Chakrasana (Wheel Pose) is an intense floor backbend. This standing version prepares the spine for deeper yoga backbends, works as a standalone corrective practice, and is accessible to most people from their first yoga class.

That accessibility is not a compromise. Done with proper technique, it delivers genuine benefits to the thoracic spine (the middle and upper back section of the spine), chest, and hip flexors — areas that rarely get the attention they need.


How to Do Ardha Chakrasana

Stand in Tadasana. Place both palms on the lower back, fingers pointing downward, to support the lumbar spine (the lower back region).

Inhale and lengthen the spine upward. On the exhale, gently push the hips slightly forward and begin arching the spine backward. Think about lifting the chest toward the ceiling first — the chest leads, not the lower back.

Let the head follow the natural arc of the spine. The gaze moves upward. Some practitioners drop the head all the way back; others prefer to keep a longer neck. Both are valid; choose based on how your neck feels.

Keep the legs straight with thighs engaged. Breathe steadily in the pose — 20 to 30 seconds is a reasonable hold.

To come out, exhale and slowly return to vertical, using the hands on the lower back as support throughout the movement. Don’t straighten suddenly.

Benefits of Ardha Chakrasana

Thoracic extension. The mid-back becomes stiff and rounded in most people, partly from genetics, mostly from habit. This pose specifically targets this region when practiced with attention to distributing the movement through the whole spine rather than hinging only at the lumbar.

Chest and shoulder opening. As the spine arches back, the pectoral muscles (the large muscles of the chest) and anterior deltoids (the front parts of the shoulder muscles) stretch. This directly counteracts the internal shoulder rotation and chest compression that desk work creates. Better shoulder mobility and easier breathing are practical results.

Hip flexor stretch. Pushing the hips forward in this pose stretches the iliopsoas (the deep inner hip flexor muscle running from the lower spine to the thigh) — the deep hip flexor that attaches from the lumbar vertebrae to the thigh bone. This muscle shortens with prolonged sitting and contributes to lower back tightness. Stretching it regularly helps.

Spinal mobility maintenance. Extension mobility in the spine declines significantly with age if it isn’t practiced. Even gentle chest openers among popular standing yoga poses, done consistently, maintain the range of motion that keeps the spine functional.

Energizing effect. Backbends generally have a mild stimulating effect on the nervous system. Standing backbend practice in the morning tends to increase alertness and lift mood, which many practitioners find more reliably effective than a second coffee.

Tips for Better Practice

  • Lead with the chest, not the lower back. The most common error is hinging sharply at the lumbar while the upper back stays flat. Focus on lifting the sternum up and back first.

    Keep the thighs engaged and avoid locking the knees. Soft engagement protects the knee joints and keeps the legs from buckling. If you are struggling with spatial awareness, utilizing an Ardha Chakrasana for beginners modification—such as widening your stance to hip-distance apart—can improve your balance.

    Don’t hold your breath. Backbends create a strong urge to brace — deliberately soften the breathing instead.

    If you feel compression in the lower back rather than a stretch in the front body, reduce the depth. A smaller backbend with less lumbar compression is more beneficial than a deeper one that crunches the lower spine.

    Pair it with a forward fold. Practicing this posture followed by Padahastasana gives the spine both directions of movement in one short sequence.

Why Learn with a Yoga Teacher

Teachers help distribute the backbend through the whole spine rather than concentrating all movement at the lumbar. This is the key technical issue in Ardha Chakrasana and most other backbends, and it’s very difficult to self-correct because you can’t see your own back.

They’ll also watch the knees, hips, and head position — the compensations that happen when the primary movement isn’t happening where it should. Ten minutes with a good teacher on this pose can fix alignment issues that months of self-practice perpetuates.

Cautions and Contraindications

  • Lumbar disc herniation or spondylolisthesis: Backbends load the posterior structures of the lumbar spine. Get clearance from a physiotherapist and work only within a safe range.
  • Neck injuries: Keep the head neutral rather than dropping it back. The head is heavy; dropping it unsupported stresses the cervical discs.
  • High blood pressure and heart conditions: Approach backbends cautiously; consult a doctor if you’re unsure.
  • Vertigo: The head movement and change in body orientation can trigger dizziness. Reduce the range of motion and keep the eyes open with a fixed gaze.

Conclusion

Ardha Chakrasana is one of the most practical postures in yoga for modern bodies. It takes less than a minute, requires no equipment, and directly addresses the postural patterns that cause the most widespread discomfort — forward head position, rounded upper back, shortened hip flexors.

Done daily, it works. Quietly, without drama, it counterbalances the hunching that modern life accumulates. That’s worth more than it sounds.

FAQS

Q: Is Ardha Chakrasana the same as a standing backbend?

A: Yes. You stand, place your hands on your lower back, and arch backward. It’s a gentler version before moving to full Chakrasana.

Q: My neck hurts when I drop my head back. What should I do?

A: Keep your chin slightly tucked rather than fully dropping the head. Open the chest first; the neck doesn’t need to be the deepest point of the bend.

Q: Who should avoid Ardha Chakrasana?

A: People with lower back injuries, vertigo, or high blood pressure should be cautious. Pregnancy — especially after the first trimester — is also a contraindication.

Q: Will this help my posture if I sit at a desk all day?

A: It’s one of the better counterpostures for desk posture. It opens the chest and stretches the hip flexors, which tighten with prolonged sitting.

Q: How many times should I practice it?

A: 3 to 5 repetitions in a session is enough. Hold each for about 15 to 30 seconds.

Q: Is it okay to do Ardha Chakrasana before warming up?

A: Not ideal. Do some gentle movement first. Cold backbends are how lower back tweaks happen.

READ MORE
bharatyogas.com
BlogLife StyleTrendingYoga
May 20, 2026By bharatyogas0 Comments

Chakrasana-Wheel Pose

Chakrasana (Wheel Pose)

Table of Contents

  1. Introduction
  2. How to Do Chakrasana
  3. Benefits of Chakrasana
  4. Tips for Better Practice
  5. Why Learn with a Yoga Teacher or Instructor
  6. Cautions and Contraindications
  7. Conclusion

Introduction

Chakrasana is the pose that appears in people’s yoga goals — sometimes spoken, often quietly held. The full wheel backbend, the body arched overhead, arms and legs fully extended: it looks both athletic and graceful, and it’s one of those postures that takes months or years to achieve safely.

The time investment is not an accident. Chakrasana is demanding across multiple physical parameters simultaneously. Shoulder flexibility, thoracic extension, hip flexor length, wrist mobility, arm strength, leg strength — all of these need to be reasonably developed before the pose comes together without strain. Attempting it before they are is how people hurt their lower backs and wrists.

Chakra means wheel in Sanskrit. The body creates a full circular arc, like a wheel. When practiced correctly, the shape is actually beautiful — a smooth, even curve from hands to feet. When practiced incorrectly, it’s a sharp hinge in the lower back with straight-ish arms above it. The difference is significant.

How to Do Chakrasana

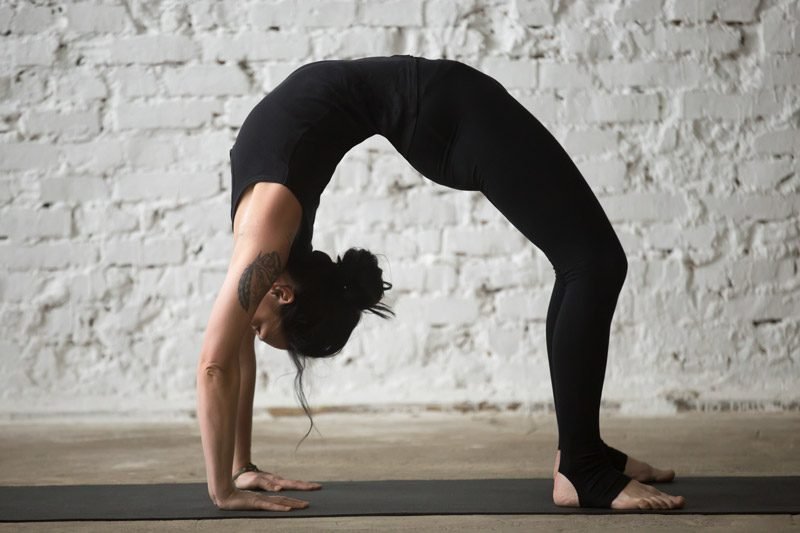
Lie on your back with knees bent, feet flat on the floor, hip-width apart. Place the hands beside the ears, fingers pointing toward the shoulders, elbows pointing straight up.

Press the feet firmly into the floor and lift the hips — this is Bridge Pose. Then, pressing through the hands, begin to straighten the arms. The crown of the head may briefly touch the floor as you push up.

In the full pose: arms are as straight as flexibility allows, hips are lifted high, legs are active. The body creates a smooth arc from hands to feet. The head hangs between the arms.

Hold for 10 to 30 seconds. To come down: tuck the chin to the chest, bend the elbows, and lower the back of the head to the floor first, then roll down through the spine. This is the moment most injuries happen — don’t drop out of the pose; lower with complete control.

Counterpose immediately: Apanasana (knees to chest) or Shavasana. The spine needs the opposite direction promptly.

Benefits of Chakrasana

Complete anterior body stretch. Throat, chest, abdomen, hip flexors, quadriceps — the entire front of the body opens simultaneously in Chakrasana. No other posture creates this much anterior length in a single shape.

Thoracic extension. The full wheel requires genuine extension through the thoracic spine, not just the lumbar. When practiced correctly — with a smooth arc rather than a sharp lumbar hinge — Chakrasana develops thoracic mobility that is difficult to access in other postures.

Arm and shoulder strengthening. Pressing into full arm extension against the weight of the body requires significant shoulder and arm strength, particularly in the triceps, deltoids, and rotator cuff.

Spinal extensor strength. The back muscles work hard to maintain the arc of the pose. Over time, this builds the kind of spinal extension strength that makes everyday posture and movement feel easier.

Energizing effect. Chakrasana tends to produce a noticeable increase in alertness and energy. The stimulating effect of a strong backbend on the sympathetic nervous system is real, which is why it’s generally better practiced in the morning or afternoon than immediately before sleep.

Hip flexor lengthening. The kneeling backbend position lengthens the hip flexors thoroughly. For people with hip flexor tightness contributing to lower back pain, strong backbend practice — when prepared for properly — can help.

Tips for Better Practice

  • Prepare thoroughly. The warm-up sequence for Chakrasana should be longer than for most poses: Bhujangasana, Shalabhasana, Setu Bandhasana, Ustrasana, shoulder openers. At least 10 to 15 minutes of preparation.
  • Work on the components separately. Shoulder flexibility (the ability to reach overhead with arms externally rotated) is often the limiting factor, not lower back stiffness. Identify what’s actually limiting your pose and work on that.
  • Keep the feet parallel. They tend to splay outward significantly in this pose, which compresses the outer ankle and shifts the load away from the posterior chain. Parallel feet and parallel knees keep the structural integrity of the pose.
  • Press through all four corners of both hands, especially the index finger base knuckle. This protects the wrists and helps distribute the hand load more evenly.
  • Don’t hold your breath. The impulse to brace is very strong. Deliberate, continuous breathing keeps the muscles from gripping and allows the chest to expand.

Why Learn with a Yoga Teacher or Instructor

Chakrasana is one of the postures where self-teaching carries real risk. The consequences of incorrect alignment — lumbar compression, wrist strain, rotator cuff stress — are significant and potentially cumulative. A teacher who knows backbend progressions can map out the right preparatory path for your specific body, identify the limiting factors (is it shoulder flexibility? thoracic stiffness? wrist weakness?), and supervise the early attempts in the full pose.

The counterpose sequencing also matters. How you come out of Chakrasana and what you do immediately after affects how the spine recovers. Teacher guidance on this is worth having.

Cautions and Contraindications

  • Wrist injuries or carpal tunnel syndrome: The wrist load in Chakrasana is substantial. Practice on fists if there’s wrist discomfort, and address any existing wrist condition before working toward this pose.
  • Shoulder impingement or rotator cuff injury: The shoulder position in Chakrasana requires external rotation and full flexion simultaneously. This is contraindicated with impingement. Work with both a physiotherapist and a yoga teacher.
  • Lumbar disc herniation: Deep backbends create significant posterior disc loading. Individual assessment is essential.
  • High blood pressure, heart conditions, or headache: Avoid on symptomatic days. Deep backbends are cardiovascularly demanding.
  • Pregnancy: Absolutely contraindicated.
  • Osteoporosis of the spine: Significant risk of compression fracture in deep spinal extension. Avoid without specialist clearance.

Conclusion

Chakrasana rewards the work required to approach it safely. The journey toward it — the months of backbend preparation, the shoulder opening work, the wrist strengthening — builds a physical capacity that shows up in everything else.

The pose itself is demanding in a way that most yoga postures aren’t. When it works — when the body genuinely opens into the full arc — it’s one of the more remarkable physical experiences yoga offers. The preparation is what makes that possible.

Patient preparation. Proper guidance. Then, when the body is ready, the wheel.

FAQS

Q: Is Chakrasana the same as Urdhva Dhanurasana?

A: Yes — the names are used interchangeably for the full wheel backbend where you push up with hands and feet.

Q: I can’t push up into Chakrasana yet. What should I do?

A: Work on bridge pose, camel pose, and shoulder flexibility first. Chakrasana requires strength and mobility across the whole body.

Q: My wrists hurt in Chakrasana. How do I fix it?

A: Turn your hands out slightly, or make fists. Wrist pain often comes from poor weight distribution — push through the base of the fingers, not just the heel of the hand.

Q: Who should avoid Chakrasana?

A: People with wrist injuries, shoulder impingements, spinal conditions, or glaucoma. It’s a demanding pose.

Q: How long should I hold wheel pose?

A: 15 to 30 seconds. Come down slowly and rest in a counter-pose (like knees-to-chest) afterward.

Q: How many times can I do Chakrasana in a session?

A: 2 to 3 times is plenty. It’s intense on the spine and arms.

READ MORE
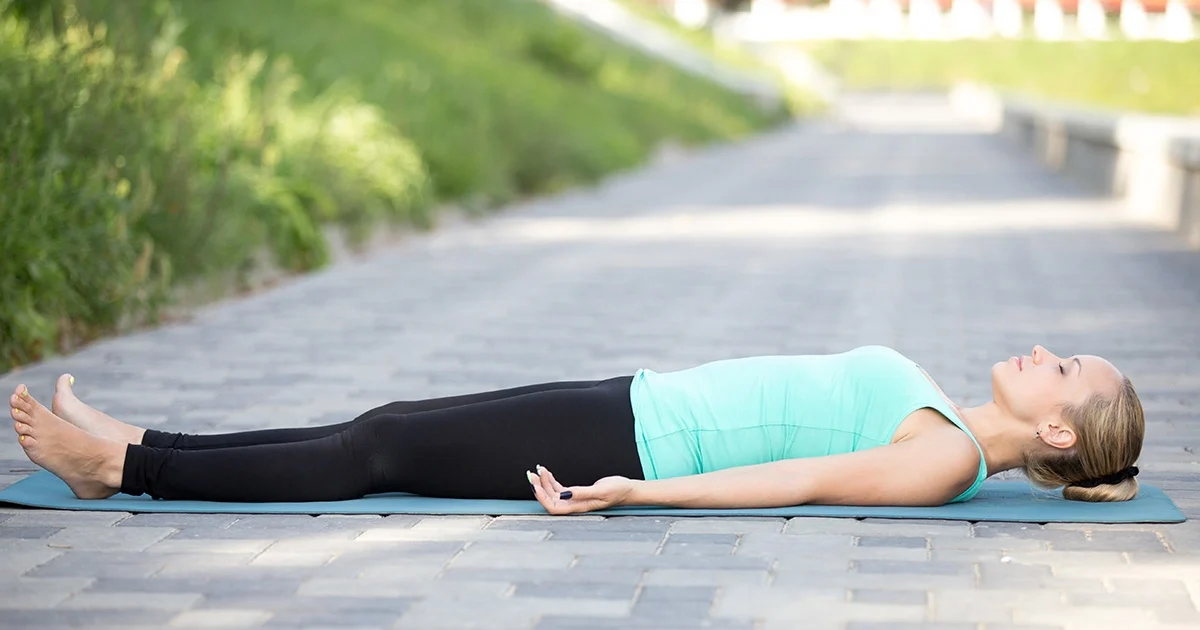
A yoga practitioner demonstrates perfect physical stillness and neutral alignment while resting in Shavasana.
Blog
April 11, 2026By bharatyogas0 Comments

Shavasana- Corpse Pose

Shavasana (Corpse Pose)

Table of Contents

  1. Introduction
  2. How to Do Shavasana
  3. Benefits of Shavasana
  4. Tips for Better Practice
  5. Why Learn with a Yoga Teacher or Instructor
  6. Cautions and Contraindications
  7. Conclusion
  8. FAQS

Introduction

Every yoga class ends with Shavasana. Beginners often treat it as the reward for surviving the class — finally, a chance to lie down. Experienced practitioners know it’s one of the most demanding postures in the practice, because what it asks for — genuinely releasing physical and mental activity — is something most people find genuinely difficult.

Shava means corpse. The name is meant to communicate complete stillness, complete release, a temporary letting go of every tension the body and mind habitually maintain.

In practice, most people lie in Shavasana while their minds run through tomorrow’s to-do list, their bodies twitch and fidget, and the five minutes feel simultaneously long and wasted. The gap between what Shavasana is supposed to be and what it usually is for most people is the whole practice.

Closing that gap is worth working on.

How to Do Shavasana

Lie flat on your back. Let the legs extend naturally, feet falling open. Arms rest slightly away from the body, palms facing up. Close your eyes.

The technical instruction is almost nothing. The actual practice is everything.

Begin with a systematic body scan — a deliberate progression of releasing tension from each body part in turn. Start at the feet. Let the toes go completely. Soften the soles of the feet, the heels, the ankles. Move up the calves, the shins, the knees. Release the thighs. Let the lower back feel heavy against the floor.

Soften the hands. The fingers often hold tension; let each one release. Let the arms be heavy. The shoulders — if you’ve been doing yoga for any length of time you know how much tension lives here — let them drop. Don’t manage them; let them be heavy.

The face: let the jaw drop slightly. Let the tongue rest on the floor of the mouth. Release the muscles around the eyes. Let the forehead be completely smooth.

Let the breath happen on its own. Don’t organize it. When thoughts arrive — and they will — notice them and return to the body without self-criticism.

Stay for 5 to 15 minutes. Come out slowly: first deepen the breath, then wiggle the fingers and toes, then roll to one side and rest briefly before pressing up to seated.

Benefits of Shavasana

Physiological recovery. The practice that preceded Shavasana created physical demand — muscular work, breath changes, joint loading. The body needs time to integrate this, clear metabolic byproducts, and return the nervous system to baseline. Shavasana is that time. Skipping it is the equivalent of doing a hard workout and walking straight out of the gym without cooling down — technically possible, less effective.

Parasympathetic activation. Research on yoga consistently shows that Shavasana reduces cortisol, lowers heart rate and blood pressure, and activates the parasympathetic nervous system. These are measurable physiological changes, not metaphor. For people whose baseline state is chronically stressed, regular Shavasana practice gradually shifts the autonomic setpoint toward more parasympathetic dominance — a change that improves sleep, reduces anxiety, and lowers resting heart rate over time.

Mental integration. The practice works the mind as well as the body. Without a period of stillness at the end, the mental work of the practice — the concentration, the body awareness, the breath attention — doesn’t integrate into a lasting change. Shavasana is where it lands.

Conscious relaxation skill. Learning to deliberately release physical tension is a skill. It doesn’t happen automatically for most people. Regular Shavasana practice builds this skill in a way that transfers outside yoga — into the ability to release tension at a desk, before sleep, during stressful moments. The body learns what release feels like and becomes better at returning to it.

Sleep quality improvement. The Yoga Nidra tradition (which begins with Shavasana) has extensive research support for improving sleep quality and reducing insomnia. Even standard Shavasana — without the full Yoga Nidra protocol — tends to improve the ability to fall asleep in people who practice it regularly.

Tips for Better Practice

  • Use props. A folded blanket under the head reduces neck tension. A bolster or rolled blanket under the knees relieves lower back pressure. Physical comfort is not indulgent — it’s the condition that makes mental release possible. You cannot relax deeply while your lower back hurts.
  • Use an eye pillow. The gentle weight across the closed eyes reduces the optical fidgeting that keeps the mind active, and the darkness adds to the quieting effect.
  • Set a timer. Checking whether it’s time to get up yet activates exactly the anticipatory mind state you’re trying to quiet. Set a gentle alarm and then genuinely let go of time.
  • If the mind is very active, give it a task: count breaths backward from 50. The low-level engagement of counting is enough to stop the to-do list without requiring real mental effort.
  • Extend the exhale slightly. An exhale longer than the inhale activates the parasympathetic system. You don’t need to force this — just letting the exhale be a little longer than it wants to be is enough.

Why Learn with a Yoga Teacher or Instructor

The guided Shavasana that a good teacher offers is genuinely different from lying down alone. Specific, sequential body-release instructions, breath guidance, and sometimes hands-on adjustments (gentle cradling of the head, traction of the feet) can bring a depth of relaxation that self-guided practice rarely reaches.

For students who struggle with Shavasana — who can’t stop fidgeting, whose minds race, who feel anxious lying still — a teacher can suggest specific techniques (Yoga Nidra, breath counting, rotation of awareness) that make the practice accessible rather than frustrating.

Cautions and Contraindications

  • Late-stage pregnancy: Lying flat on the back compresses the inferior vena cava after approximately 20 weeks of pregnancy. Side-lying Shavasana (left side is preferred) is the appropriate modification.
  • Severe lower back pain: A bolster under the knees, or even lying with the knees bent and feet flat, changes the lumbar position enough to make the pose comfortable for most back presentations.
  • Trauma responses: For some people, lying still with eyes closed in a group setting activates anxiety or trauma responses. Seated Shavasana (sitting upright, eyes open or softly focused) is a completely valid alternative. A trauma-informed yoga teacher can offer appropriate modifications.
  • GERD or acid reflux: Lying completely flat may worsen reflux for some people. A slight incline using a bolster can help.

Conclusion

Shavasana is the pose that reveals how much work the rest of the practice still has to do. When you can lie still for ten minutes, genuinely at rest, without fighting the stillness — not managing it, not performing it, but actually in it — the whole preceding practice has done its job.

Most people aren’t there yet. That’s fine. The practice of approaching it is the practice.

FAQS

Q: Is Shavasana really that important? It’s just lying down.

A: It’s the pose most people underestimate and most teachers consider non-negotiable. The nervous system needs time to absorb the work of a practice. Skipping Shavasana is like leaving bread in the oven and calling it done at 80%.

Q: I can’t stop my thoughts in Shavasana. Am I doing it wrong?

A: No. The goal isn’t an empty mind — it’s a relaxed, non-reactive one. Thoughts coming and going without you chasing them is already Shavasana working.

Q: How long should Shavasana be?

A: At least 5 minutes. 10 to 15 minutes is better after a full practice.

Q: Can I fall asleep in Shavasana?

A: Falling asleep occasionally is fine. If it happens every time, you might need more sleep in general.

Q: Is a pillow under my head okay in Shavasana?

A: Yes, especially if you have a stiff neck or are pregnant. A thin pillow or folded blanket works.

Q: Can pregnant women do Shavasana?

A: In later pregnancy, lying flat can compress the vena cava. A left-side lying position (like Anantasana alignment) is better.

READ MORE
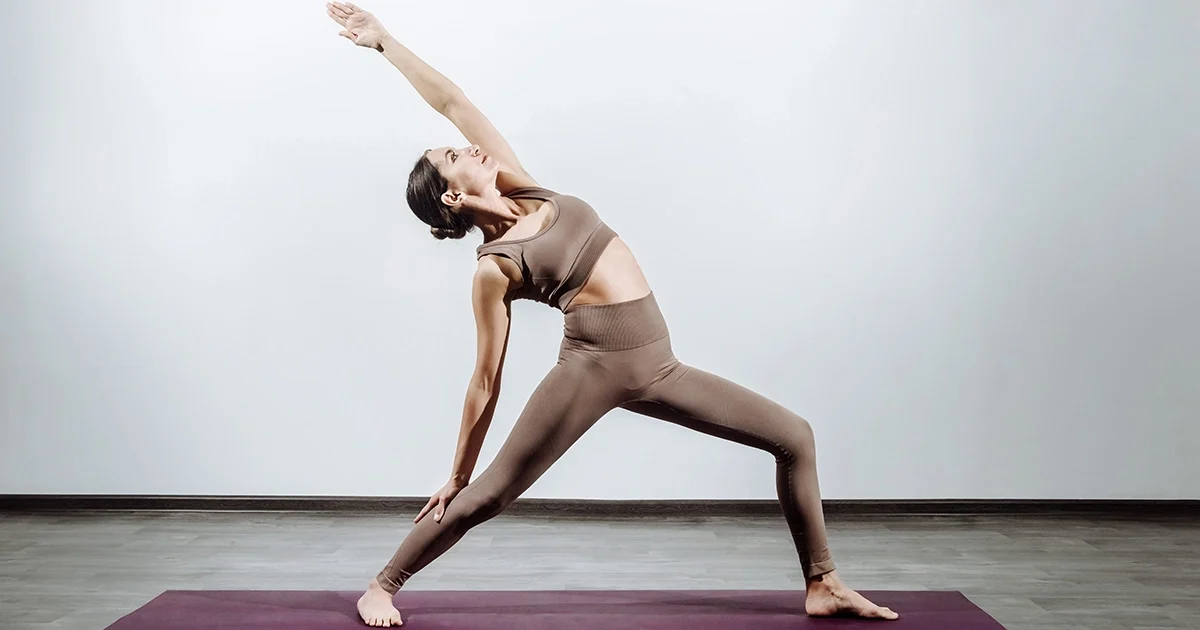
A yoga practitioner demonstrates the correct alignment of Viparita Virabhadrasana on a mat with a deeply bent front knee and a lateral side stretch.
Blog
April 10, 2026By bharatyogas0 Comments

Viparita Virabhadrasana (Reverse Warrior Pose)

Viparita Virabhadrasana (Reverse Warrior Pose)

Table of Contents

  1. Introduction
  2. How to Do Viparita Virabhadrasana
  3. Benefits
  4. Tips for Better Practice
  5. Why Learn with a Yoga Teacher or Instructor
  6. Cautions and Contraindications
  7. Conclusion
  8. FAQS

Introduction

Viparita Virabhadrasana doesn’t appear in classical Hatha yoga texts. It’s a modern pose — developed and popularized through vinyasa toga poses and flow traditions — and yet it fills a gap in the traditional standing sequence that most practitioners don’t notice until they’ve practiced it regularly and then stopped.

The gap is lateral spinal extension. Warrior II opens the hips and builds leg strength. Trikonasana creates length through the side body in a lateral bend. But the transition between those two postures — staying in the wide-leg stance and arcing the torso backward with the front arm sweeping overhead — creates a specific stretch through the intercostals, the lateral abdominals, and the whole side of the torso that neither of its neighbors quite achieves.

Viparita means reversed or inverted. The “reversed” quality is the front arm moving backward and overhead rather than reaching forward as in Warrior II. The back leg and hips stay in the Warrior II position — it’s essentially a lateral backbend added to that base.

Simple to describe. More to it than it looks.

how to do Reverse Warrior Pose

Start in Warrior II with the right foot forward: wide stance, right knee bent over the right ankle, arms extended to the sides at shoulder height, hips and chest open to the long side of the mat.

On an inhale, flip the right palm upward and sweep the right arm up and back, arching the torso into a lateral backbend. The left arm slides down the back left leg — hand resting lightly on the calf or thigh, not gripping or pulling. The head can follow the right arm if the neck is comfortable, gaze upward or back.

The right knee stays bent. The right leg doesn’t straighten. The wide-leg stance holds. The backbend happens above the hip line — in the side body and thoracic spine — not by collapsing into the lower back.

Hold for 3 to 5 breaths. Return to Warrior II on an exhale. Repeat on the left side.

Benefits

Intercostal and lateral torso stretch. The muscles between the ribs — the intercostals — and the external obliques along the side of the torso stretch significantly in this pose. These muscles are rarely stretched deliberately and tend to compress with prolonged sitting and forward-bent posture. The lateral arc of Reverse Warrior opens them in a way that feels noticeably different from anything else in a standard standing sequence.

yoga backbends The backward sweep of the arm combined with the lateral arc creates extension through the thoracic spine that most standing poses don’t access. For practitioners working to develop thoracic mobility for deeper backbends, Reverse Warrior is a useful intermediate step that loads the thoracic spine less than prone backbends but more than upright standing.

Anterior shoulder stretch. The arm sweeping overhead and back stretches the pectoral and anterior deltoid on that side. Combined with the chest opening of the lateral backbend, practitioners consistently report a sense of the chest and shoulder opening in this pose.

Hip flexor and inner thigh work. The Warrior II base continues its hip flexor and inner thigh demands. The leg work from the base pose doesn’t disappear when the arm arc is added — the front leg still bends, the back leg still presses outward, the hip still works.

Breathing expansion. The opening of the ribcage in the lateral arc creates more space for the lungs on the upper side. Practitioners who focus on breathing specifically into the upper, arcing side of the torso in this pose find it noticeably expands the breath capacity there.

Tips for Better Practice

  • The front knee should stay bent throughout. The temptation when the arm swings back and the focus shifts upward is to let the front leg begin to straighten. Don’t. The leg work of Warrior II is still the foundation of this pose.
  • The back hand on the leg is a rest, not a support. It shouldn’t be pressing down on the calf or thigh to get more arc. The backward-sweeping arm and the thoracic extension create the lateral bend; the back hand just has somewhere to be.
  • Keep the gaze comfortable. Looking straight up or back is fine; cranking the neck into an uncomfortable position to see the ceiling is not. Let the head go where the neck can take it without strain.
  • The arc comes from the side body, not the lower back. This is the same instruction as in all backbends — distribute the extension through the whole spine, not just the lumbar. Feel the intercostals stretch; that’s where the pose lives.
  • Breathe into the opening on the inhale. This is one of the few poses where deliberately breathing toward the stretch — into the expanding side of the ribcage — is both possible and genuinely productive.

Why Learn with a Yoga Teacher or Instructor

The most common error in Reverse Warrior — letting the front knee straighten as the focus shifts to the arm arc — is easy to miss without someone watching. A teacher can also observe whether the extension is happening in the thoracic side body or mostly in the lumbar, which determines whether the pose is opening what it’s supposed to open.

For practitioners using this pose in a flow sequence, a teacher can help with the breath timing and the transitions into and out of it, which are often rushed in ways that lose the pose’s specific benefit.

Cautions and Contraindications

  • Lower back injuries: The lateral backbend arc can concentrate in the lumbar rather than the thoracic with tight side bodies. Keep the range modest and ensure the lower hand on the back leg isn’t pulling the torso into excessive lumbar compression.
  • Neck problems: Skip the head-back option. Keep the gaze forward or to the side.
  • Front knee problems: The sustained Warrior II knee bend continues in this pose. Track the knee carefully and reduce depth if pain arises.
  • Shoulder injuries: The overhead arm sweep may aggravate rotator cuff issues or shoulder impingement. Modify by keeping the arm at a forward diagonal rather than fully overhead.

Conclusion

Reverse Warrior earns its place in a flow sequence not because it’s dramatic but because it fills a specific gap. The lateral expansion of the ribcage, the intercostal stretch, the thoracic arc — these are things the body needs and rarely gets. Done slowly, with breath into the opening and the front leg still working, it’s more useful than it looks in the Instagram version where the arm just sweeps back and the knee forgets what it was doing.

Stay in your legs. Open your side. Breathe there.

FAQS

Q: What is the secret of how to do Reverse Warrior Pose with proper alignment?

A: The secret lies in your foundation. Keep your front knee deeply bent over your ankle at a 90-degree angle while arching your upper torso backward from your side body, rather than dumping your weight into your lower back.

Q: Are there safe Reverse Warrior modifications for lower back pain?

A: Yes. If you experience discomfort, reduce the depth of your backbend, keep your back hand lightly resting on your thigh without pressing down, and focus on lengthening upward through your ribcage rather than bending deeply backward.

Q: Is my front knee supposed to stay bent the whole time? A: Yes. That’s the whole point. The bend in the front knee shouldn’t change when you go into the reverse — a lot of people accidentally straighten it as they lean back. Keep it tracking over the ankle throughout.

Q: My lower back crunches when I lean back. What’s happening?

A: You’re likely hinging at the lumbar instead of opening the side body. Think of reaching the raised arm up and over rather than just dropping backward. Length first, then lean.

Q: Can beginners do Reverse Warrior? A: Yes — it’s accessible once you have basic Warrior 2 stability. The side bend is mild and doesn’t demand extreme flexibility.

Q: Is it good for the obliques?

A: The side body — obliques, intercostals, lats — all get a decent stretch on the upper side and activation on the lower side. Not a strength pose exactly, but it works those muscles.

Q: How long should I hold it?

A: 30 to 60 seconds per side. It flows naturally in and out of Warrior 2 and Extended Side Angle, so it’s often held briefly within a sequence.

READ MORE
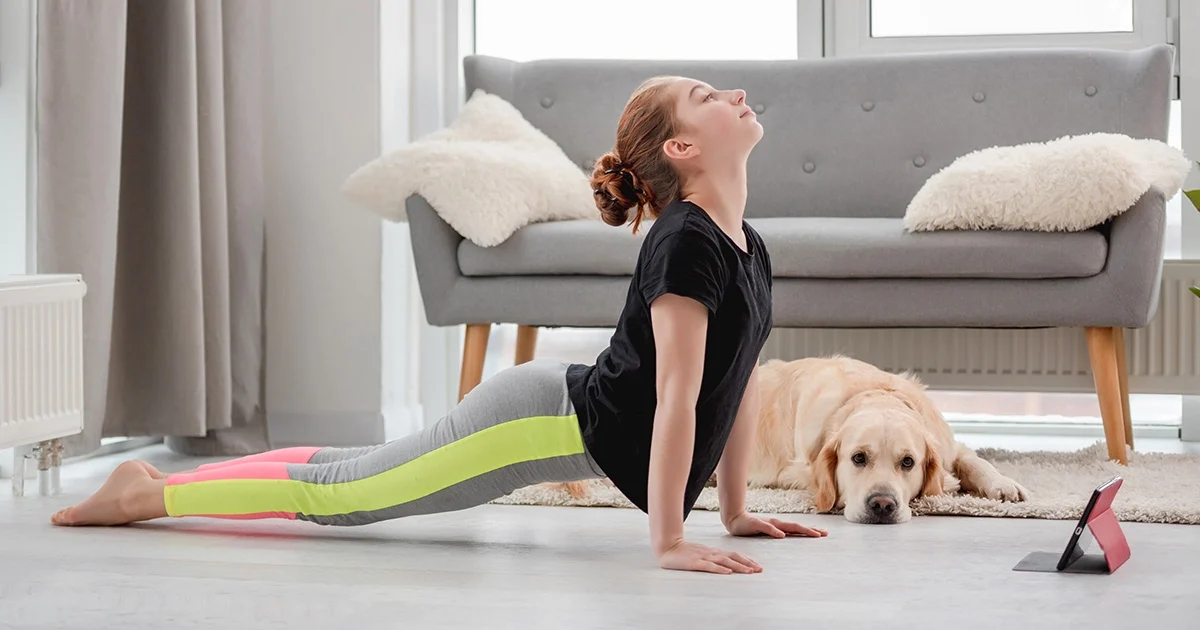
A practitioner demonstrates correct alignment in Urdhva Mukha Svanasana with active thighs lifted off the mat and shoulders stacked above the wrists.
Blog
April 9, 2026By bharatyogas0 Comments

Urdhva Mukha Svanasana-Upward Facing Dog

Urdhva Mukha Svanasana (Upward Facing Dog)

Table of Contents

  1. Introduction
  2. How to Do Urdhva Mukha Svanasana
  3. Benefits
  4. Tips for Better Practice
  5. Why Learn with a Yoga Teacher or Instructor
  6. Cautions and Contraindications
  7. Conclusion
  8. FAQS

Introduction

Urdhva Mukha Svanasana appears in almost every Sun Salutation and every vinyasa yoga poses sequence. It’s one of the most practiced postures in modern yoga. It’s also one of the most commonly done poorly — collapsed through the shoulders, passive through the core, hanging in the lower back rather than extending through it.

That’s partly because it moves fast in a flow. By the time you’ve arrived, you’re already leaving. But even in slower practices, the specific details of Up Dog — thighs off the floor, arms straight, weight on tops of feet and hands, chest opening through genuine thoracic extension (the backward bending or straightening of the middle and upper spine) rather than just lower back compression — are things many practitioners have never been taught clearly.

Urdhva means upward. Mukha means face. Svana means dog. The pose mimics a dog stretching with its face lifted. Which it does, if the dog is doing it correctly.

Up Dog is not a passive resting position between Chaturanga and Downward Dog. It’s an active shape that stands out among standard yoga backbends because it requires work from the arms, the core, the thighs, and the back muscles simultaneously. When it’s given that work, it’s genuinely valuable. When it’s treated as a brief shape to pass through, it mostly compresses the lower back and undersells everything it could do.

How to do Upward Facing Dog safely

Lie face down with hands placed beside the lower ribs, fingers pointing forward. Tops of the feet are on the floor, legs extended.

Press into the hands and inhale as you straighten the arms. Here’s the key: as the arms push you up, the thighs also lift off the floor. The entire lower body is supported on the tops of the feet only — not the shins, not the knees. The thighs are active and lifting.

The chest moves forward and up. The shoulder blades draw together and slide down the back, away from the ears. The shoulders themselves are directly over the wrists — not in front of them. The gaze moves forward or slightly upward; the head doesn’t crank sharply back.

The body is supported in three places: the two hands and the tops of the two feet. Everything else is off the floor.

Hold for 1 to 3 breaths. Transition to Downward Dog by tucking the toes and lifting the hips.

Benefits

Thoracic and lumbar extension. Up Dog is a full spinal backbend that, when practiced correctly, distributes extension through the whole spine rather than just hinging at the lumbar. The chest-forward movement engages the thoracic extensors; the shoulder blade action opens the upper back.

Arm and shoulder strength. The straight arms supporting the body weight build triceps, deltoid, and rotator cuff strength progressively. Every Sun Salutation practiced correctly is a round of arm strengthening.

Posterior chain engagement. The thighs lifted off the floor require the glutes and hamstrings to engage. This is a detail most practitioners skip — allowing the thighs to rest on the floor — but including it changes the muscular demand of the pose entirely.

Chest and anterior shoulder opening. The chest-forward movement stretches the pectoral muscles and the anterior deltoids, creating the same counter-movement to forward-rounding posture that other backbends provide.

Wrist strength and preparation. The weight-bearing on the hands with the wrist in extension builds wrist and forearm strength that prepares for more demanding arm-balancing poses.

Tips for Better Practice

  • Lift the thighs. This single adjustment changes Up Dog from a passive lower-back hang to an actual backbend. If you’ve been resting your thighs on the floor in Up Dog, try lifting them and notice what changes in the muscular demand.
  • Keep the shoulders over the wrists. If the shoulders drift in front of the wrists, the lower back compresses more and the chest opens less. The vertical forearm — wrist under shoulder — is the correct geometry.
  • Draw the shoulder blades down and together. The shrug-upward shoulder pattern is the most common compensation when the arms get tired. Actively counter it by sliding the shoulder blades down the back.
  • The chest leads. The motion of Up Dog should feel like the chest is pushing forward into a wall in front of you, not like the lower back is folding. Chest first, spine following.
  • Don’t hold it too long in a flow. In a vinyasa sequence, 1 to 2 breaths is appropriate. Quality in that brief window is what matters.

Why Learn with a Yoga Teacher or Instructor

Teachers watch for the thigh-on-the-floor version, the shoulder-shrug pattern, and the shoulders drifting past the wrists — three things that are very hard to self-assess at speed in a Sun Salutation. A teacher can pause the sequence and have a student hold Up Dog statically for a few breaths with specific adjustments, which teaches the active version of the pose far more effectively than flowing through it repeatedly.

The distinction between Up Dog and Cobra is also something teachers clarify: Cobra bends the elbows and uses the back muscles to lift; Up Dog straightens the arms and lifts the thighs. Both are valid; they’re different postures with different effects.

Cautions and Contraindications

Wrist injuries or carpal tunnel syndrome: The wrist extension under load is significant. Practice on fists or move to Sphinx Pose (forearms on the floor) as a modification.

Lower back injuries: Spinal extension can aggravate certain conditions. It is important to explore Upward Dog modifications for lower back pain under guidance, get physiotherapy clearance, and keep the range of extension modest.

Shoulder impingement: The shoulder-over-wrist position with arms straight may aggravate impingement. Cobra (bent-arm version) is often more appropriate.

Pregnancy: No prone lying after the first trimester.

Conclusion

Upward Facing Dog is not a transition. It’s a backbend, and it deserves to be treated as one — even when it lasts only two breaths in a flow. The thighs lifting, the chest moving forward, the shoulders staying down, the whole-spine extension rather than a lower-back hinge: these details are the difference between a pose that builds something and one that just fills a gap in the sequence.

Two breaths is enough to do it right. Most people take twenty breaths in Up Dog per class and never really arrive there. The first time you do it correctly — thighs up, chest forward, shoulders back — you’ll know the difference.

FAQS

Q: What’s the main difference between Upward Dog and Cobra?

A: In Upward Dog, the thighs and knees are off the floor — only the hands and tops of the feet touch the mat. The arms are straight. In Cobra, the hips and often the lower legs stay on the mat, and the arms may be bent. Upward Dog demands more wrist and arm strength.

Q: My wrists hurt in Upward Dog. What helps?

A: Distribute weight through the whole hand — especially the base of the index finger and thumb, not just the heel of the hand. Slightly turning the hands outward can also reduce wrist compression.

Q: Should my shoulders be by my ears in Upward Dog?

A: The opposite — draw them down and back, away from the ears. Shoulders creeping up is one of the most common form issues in this pose.

Q: Can I do Upward Dog if I have lower back pain?

A: Depends entirely on the type of pain. For disc-related issues it can help. For facet joint or extension-sensitive pain, it may aggravate things. Don’t use it as your own therapy without knowing what’s causing the pain.

Q: Is Upward Dog appropriate for beginners?

A: It’s part of Surya Namaskar, so beginners encounter it early. But it requires more strength and wrist mobility than Cobra. New practitioners often do better with Cobra until the arms are stronger.

Q: My feet slide on the mat in Upward Dog. How do I fix it?

A: Press down firmly through the tops of the feet. If the mat itself is slipping, try a sticky mat or position the pose near the front edge.

READ MORE
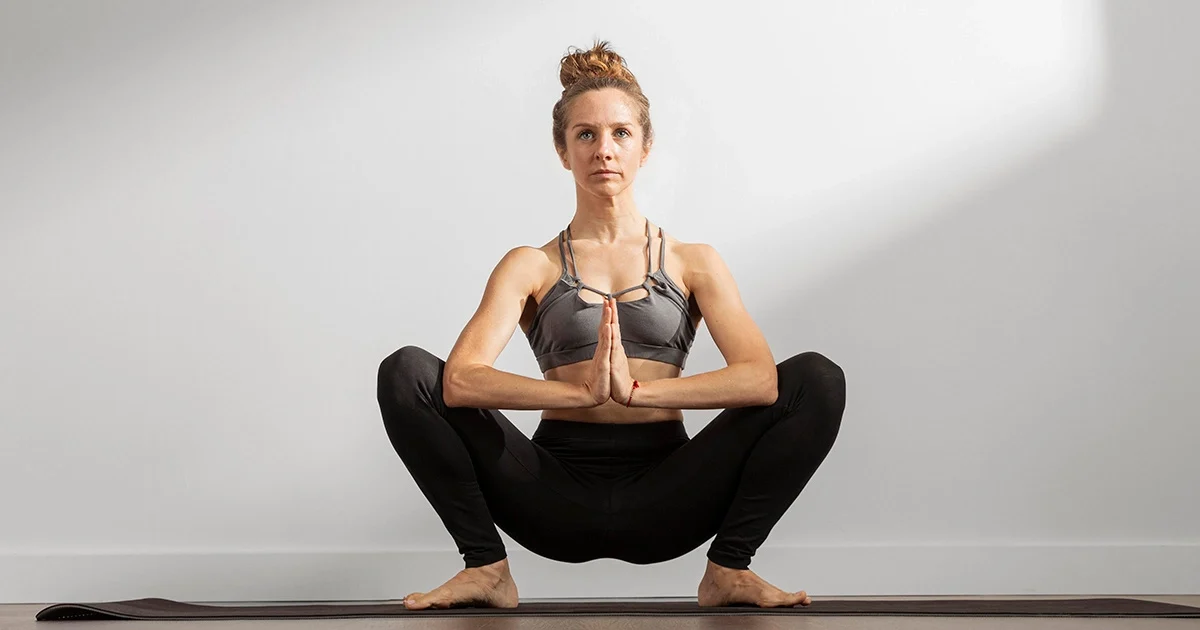
A practitioner sits in perfect alignment in Malasana on a mat, utilizing deep squat modifications for tight ankles to keep the heels firmly grounded.
Blog
April 7, 2026By bharatyogas0 Comments

Malasana-Garland Pose

Malasana (Garland Pose The)

Table of Contents

  1. Introduction
  2. How to Do Malasana
  3. Benefits
  4. Tips for Better Practice
  5. Why Learn with a Yoga Teacher or Instructor
  6. Cautions and Contraindications
  7. Conclusion
  8. FAQS

Introduction

Malasana is a powerful reminder that human beings evolved to squat, countering the stiffness caused by modern chairs. For most of human history, squatting was how people rested, worked, cooked, and eliminated. Full squats with heels on the floor were a daily occurrence for millions of years. Then came chairs, toilets, and elevated furniture, and within a few generations the deep squat became something most adults in chair-based cultures can no longer do.

It is just a squat. A full, deep, heels-down squat with the torso upright and the palms pressed together at the heart. But for the large proportion of adults whose ankles, hip flexors, and inner thighs have shortened enough to make this position difficult or impossible, practicing standing yoga poses like this one provides a significant stretch in multiple directions simultaneously.

Mala means garland or necklace. The hands pressed together in prayer, the arms inside the knees, the deep squat creating a rounded shape — there’s a version of the pose where the connection of all these elements resembles a garland of some kind. The name is more poetic than descriptive.

The practical truth of the pose is simpler: this is how your body was designed to sit at rest. Getting back there takes consistent work for modern adults, making it an indispensable choice in any routine centered around yoga for flexibility. Getting there is completely worth the effort.

How to Do Malasana

Stand with feet mat-width apart or slightly wider, toes turned out at roughly 45 degrees. Bring the hands together at the heart in Anjali Mudra.

Exhale and bend the knees, squatting the hips down toward the floor. Learning how to do Garland Pose for hip opening requires that the heels stay on the floor — this is the non-negotiable element of the pose. If they lift immediately when you try to squat, the ankles lack the dorsiflexion (the movement of the ankle that pulls the top of the foot closer toward the shin) range needed for a full squat.

In the full squat, the thighs are below horizontal and the torso is upright (or slightly inclined). The elbows press into the inner thighs, and the thighs press back against the elbows — this reciprocal pressure helps open the inner thighs and keeps the torso from collapsing forward.

Hold for 30 seconds to 2 minutes.

If the heels don’t reach the floor, incorporating customized deep squat modifications for tight ankles is essential: place a rolled blanket or a folded mat under the heels. This creates the ankle support that allows the body to get into the squat position while still working toward full heel-down flexibility over time.


Benefits

Ankle dorsiflexion restoration. The heels-on-floor position of a full squat requires significant ankle dorsiflexion — the ability of the ankle to flex so the shin moves forward over the foot. Modern footwear with elevated heels chronically shortens the Achilles tendon and calf musculature, reducing this range. Regular Malasana practice gradually restores it.

Hip flexor lengthening. The deep hip flexion of the full squat stretches the posterior hip capsule and the muscles at the back of the hip. The deep squat accesses a range of hip flexion that most yoga postures don’t reach.

Groin and inner thigh stretch. The wide-knee position combined with the deep hip flexion creates a stretch through the groin and adductors that very few other postures access in the same way.

Pelvic floor release. The deep squat position allows the pelvic floor muscles to lengthen and release. This is increasingly recognized in physiotherapy and pelvic health circles as important for overall pelvic floor function, particularly in people with pelvic floor overactivity or tension.

Digestive support. The compression of the lower abdomen in the deep squat position stimulates digestion and can help with bowel regularity. This is not mysticism; the mechanical pressure on the colon in the squatting position has a functional basis.

Tips for Better Practice

  • Use heel support. A rolled blanket under the heels is not admitting defeat. It’s the appropriate modification that allows you to work in the squatting position while the ankles gradually open. Remove height as your ankle dorsiflexion improves over months.
  • The elbows-into-inner-thighs pressure is bilateral. The elbows press the thighs outward; the thighs press the elbows inward. Both directions of pressure active simultaneously is what creates the stable, open version of the pose.
  • Keep the torso as upright as possible. The tendency is for the torso to lean heavily forward. Counter this by lifting the chest toward the ceiling and pressing the hands firmly together at the heart.
  • Practice squatting daily. Even 30 seconds a day builds the ankle dorsiflexion and hip flexibility that the full pose requires. Daily brief squats are more effective than infrequent long sessions.
  • If the inner knees feel strained (not just the inner thigh muscles), the feet may need to be wider or the toes turned out more.

Why Learn with a Yoga Teacher or Instructor

The heel-support setup and the appropriate level of support for a given student’s ankle and hip flexibility is something teachers can assess and adjust. They’ll also address the elbow-thigh pressure interaction, which most beginners don’t apply correctly and which changes the pose substantially when it’s right.

For practitioners using Malasana for pelvic floor health, a teacher with pelvic floor training can offer breath and position guidance that makes the pose therapeutically specific rather than generically helpful.

Cautions and Contraindications

  • Knee injuries: The deep knee flexion in a squat position loads the patellofemoral joint significantly. Those with kneecap tracking problems or meniscal injuries should approach carefully with heels elevated on support.
  • Ankle injuries: The dorsiflexion demand can be modified with heel support; monitor for any ankle discomfort.
  • Prolapse or pelvic organ conditions: The pressure dynamics of a deep squat can vary in effect for pelvic organ prolapse. Consult a pelvic floor physiotherapist before practicing.
  • Late pregnancy: As the uterus grows, the deep squat position can sometimes create discomfort. Some women find it helpful for labor preparation; others find it uncomfortable. Work with a prenatal yoga teacher.

Conclusion

Malasana is yoga’s reminder that some of what we’ve lost is recoverable. The deep squat was once natural. For most modern adults it isn’t anymore. But with consistent practice, patient work on the ankles and hips, and the willingness to use heel support without embarrassment, it comes back.

And when it does — when you can sit in a full, comfortable squat for a minute without thinking about it — you feel the difference in your whole lower body. Worth working for.

FAQS

Q: My heels lift in Malasana. How do I keep them down?

A: Hip flexor and ankle tightness. Work the pose with heels on a rolled blanket until the heels can ground. Over time, daily squatting practice helps considerably.

Q: Is Malasana good for tight hips?

A: It’s one of the more direct hip openers available. The deep squat position stretches the inner groins, glutes, and lower back in a way that few other standing poses achieve.

Q: I read that Malasana is good for digestion. Is there truth to that?

A: The position does compress the abdomen and stimulate the digestive organs. Whether that translates to clinical benefit is less clear, but it’s a traditional claim and not without logic.

Q: Can I hold Malasana for a long time?

A: Yes — 1 to 3 minutes works well for hip opening. Longer if it’s comfortable. It’s a natural human resting position; many people in parts of the world squat for 30 minutes or more without issue.

Q: My knees go past my toes in Malasana. Is that a problem?

A: Not inherently — knees-past-toes is problematic mainly under heavy load (like squatting with a barbell). In a body-weight squat like Malasana, it’s generally fine as long as there’s no knee pain.

Q: Who should avoid Malasana?


A: People with knee injuries or recent hip surgery. Those with lower back conditions should ease in carefully.

READ MORE
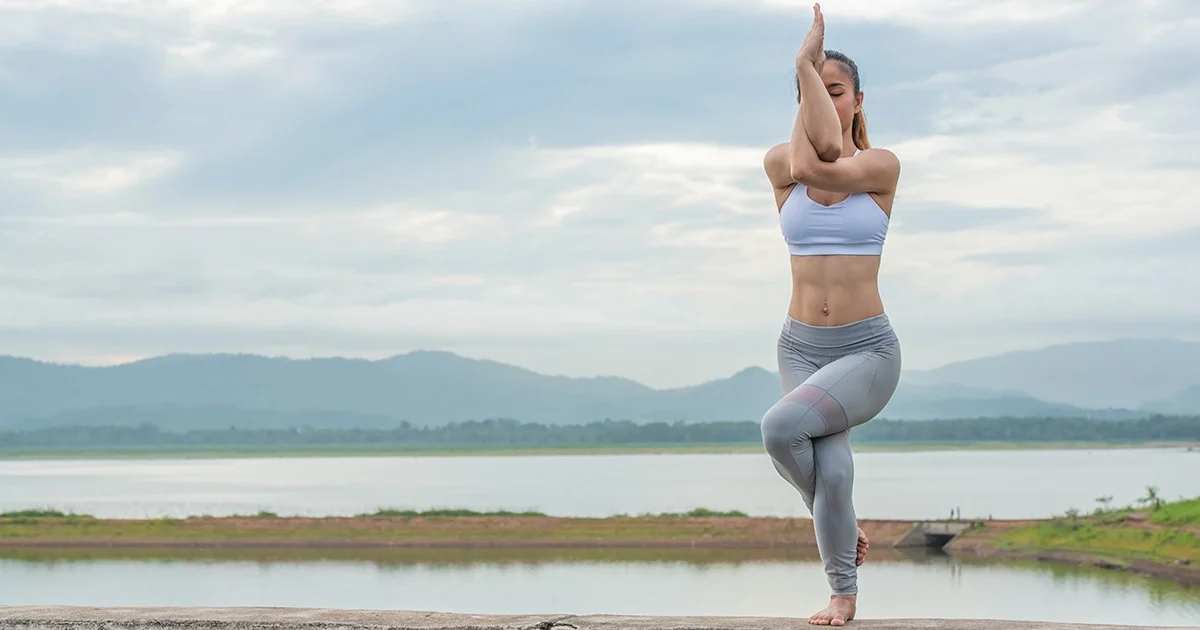
A yoga practitioner demonstrates the correct alignment of Garudasana on a mat by keeping the elbows lifted at shoulder height and sinking into a steady partial squat.
Blog
April 6, 2026By bharatyogas0 Comments

Garudasana-Eagle Pose

Garudasana (Eagle Pose)

Table of Contents

  1. Introduction
  2. How to Do Garudasana
  3. Benefits
  4. Tips for Better Practice
  5. Why Learn with a Yoga Teacher or Instructor
  6. Cautions and Contraindications
  7. Conclusion
  8. FAQS

Introduction

Garudasana is a highly effective element within traditional standing yoga poses that often makes people feel like they have too many limbs and not enough of them at the same time. The legs wrap around each other — one knee over the other, the foot hooking around the calf. The arms wrap too — one elbow over the other, the forearms rotating until the palms eventually press together. Then you balance on one foot in a partial squat, all of this simultaneously.

Garuda is the mythological eagle — the vehicle of Vishnu, described in Hindu texts as vast, powerful, and capable of blocking out the sun with its wings. Looking at this shape, the connection to an eagle is not immediately obvious. The arms, crossed and lifted to the side, might loosely suggest folded wings. The concentration required to hold the posture might loosely suggest the bird’s focused gaze.

Whatever the mythology, this posture is demanding in a specific and useful way. It stands out remarkably among challenging yoga balance poses because the unique hip stretch it creates — different from anything else in the standing sequence — the shoulder opening, and the single-leg balance under the wrapping weight of the body, make it genuinely distinct from its neighbors in a practice.

How to Do Garudasana

Stand in Tadasana. Fix the gaze on a single, still point.

Cross the right thigh over the left. If available, wrap the right foot behind the left calf, hooking the toes around the outer calf or ankle. Knowing how to do Eagle Pose for beginners safely means that if the foot-wrap isn’t accessible today, you should simply keep the right foot pointed toward the floor with the toes touching the left shin or resting on a block.

Bend the left knee slightly, lowering into a partial squat. The hips lower; the left thigh does most of the work.

Now the arms: extend both arms forward at shoulder height. Cross the right arm under the left at the elbow. Bend both elbows and bring the forearms vertical. If possible, rotate the forearms until the right palm faces left and the left palm faces right, and bring the palms together (or as close as they’ll come).

Lift the elbows to shoulder height. Hold for 20 to 45 seconds. Unwind and repeat on the other side — left thigh over right, left arm under right.

Benefits

IT band and outer hip stretch. The crossed leg position creates a specific stretch along the iliotibial band and the outer hip — the gluteus medius and the tensor fasciae latae. These muscles are notoriously tight in runners and cyclists and are rarely stretched directly in other yoga postures.

Shoulder and upper back opening. The arm wrap stretches the rhomboids and the muscles between the shoulder blades — the exact muscles that round forward in desk posture. Lifting the wrapped elbows deepens this stretch. Many practitioners feel a significant release in the upper back when this aspect of the pose works correctly.

Single-leg balance and ankle stability. The standing leg works to maintain balance with the additional weight and altered center of gravity created by the leg wrap. The ankle stabilizers, hip abductors, and all the small muscles of the foot are engaged throughout.

Hip flexor and glute engagement. The partial squat of the standing leg builds the same quadriceps and glute strength as Utkatasana, with the additional balance challenge of the leg wrap.

Concentration. Garudasana requires more sustained mental focus than most balance poses simply because there are more things to manage simultaneously. The wrapping, the balance, the arm position, the lifted elbows — all of it needs attention at once. This is exactly the kind of multi-target concentration that transfers to meditation practice.

Tips for Better Practice

  • The gaze point (drishti) matters more here than in most poses. The complexity of the wrapping gives the mind many things to think about; the fixed gaze point keeps the nervous system from getting overwhelmed. Find it before you wrap anything.

    If the foot doesn’t wrap around the calf, don’t force it. The crossed-thigh position with the toes touching the shin is a complete and effective version of the pose. The foot wrap is an addition that requires hip and ankle flexibility to do safely.

    Lift the elbows actively. The tendency is for the elbows to drop toward the chest when the arms get tired. Keep lifting them — the upper back opening happens when the elbows are at shoulder height, not below it. If you struggle with severe structural restrictions, utilizing Eagle Pose modifications for tight shoulders—such as gently hugging opposite shoulders instead of pressing the palms—can help create space without strain.

    Sink lower in the standing knee. Most people keep the standing leg too straight. A genuine partial squat creates the downward energy that makes the wrapping work more effective and the balance more stable.

    Switch sides and compare. The shape almost always feels very different on the two sides — the leg wrap is typically easier on one side, the arm wrap on the other. Noticing this asymmetry is informative.

Why Learn with a Yoga Teacher or Instructor

The arm and leg wrapping positions have enough variables — which arm goes under, which leg goes over, how deep the squat should be — that a teacher’s clear demonstration and adjustment is genuinely helpful, particularly for beginners encountering the pose for the first time. Teachers will also address the elbows-dropping pattern and the drishti quality, both of which make a significant difference in the pose’s effectiveness.

For practitioners who find the arm wrap doesn’t produce the upper back stretch, a teacher can identify whether the arm position or the elbow height is the issue.

Cautions and Contraindications

  • Knee injuries: The standing leg’s partial squat and the crossing thigh position both put demands on the knee. Reduce the squat depth and skip the leg wrap if there’s knee pain.
  • Shoulder injuries: The arm wrap position can aggravate rotator cuff impingement or AC joint issues. Modify with hands in prayer position rather than wrapped if shoulder pain arises.
  • Ankle instability: The single-leg balance on a potentially unstable ankle is risky. Practice near a wall.
  • Wrist injuries: The palm-pressing position in the arm wrap may not be appropriate. Wrap the arms and rest the hands on the shoulders instead.

Conclusion

Garudasana is chaotic the first few times. There are too many things to manage, and most of them fail simultaneously. That’s fine. The pose untangles gradually, over multiple sessions, as each element becomes a little more familiar and the balance starts to hold longer.

When it works — when the elbows lift, the gaze stays fixed, the standing leg is strong, and the whole wrapped shape holds for a breath or two — there’s a distinctly satisfying quality to it. Something like the eagle’s stillness, actually. Focused. Contained. Present.

FAQS

Q: I can’t wrap my foot around my standing leg. What do I do?

A: Hook the crossed foot in front of the standing calf rather than wrapping it all the way around. This is the correct starting point — the full wrap requires significant hip flexibility that takes time to develop.

Q: What does Eagle Pose actually do?

A: Single-leg balance, hip external rotation, shoulder and upper back stretch, and concentration. It’s doing several things at once, which is part of what makes it interesting and also why it’s frustrating at first.

Q: My standing knee hurts in Garudasana. Why?

A: The bent standing knee position puts the joint under load. Make sure the knee is tracking over the second toe and not collapsing inward. Reduce the depth of the bend if pain appears.

Q: Is Eagle Pose good for the shoulders?

A: Yes — the arm wrap creates an unusual stretch across the upper back and posterior shoulder that most poses don’t reach.

Q: How long should I hold Garudasana?

A: 30 to 60 seconds per side. Come out smoothly — don’t just drop out of it.

Q: Can I do Eagle Pose with knee problems?

A: Caution is warranted. The single-leg bend with the crossing of the other leg places torque on the knee. A gentle version with minimal bend may work; significant knee issues are a reason to skip it.

READ MORE
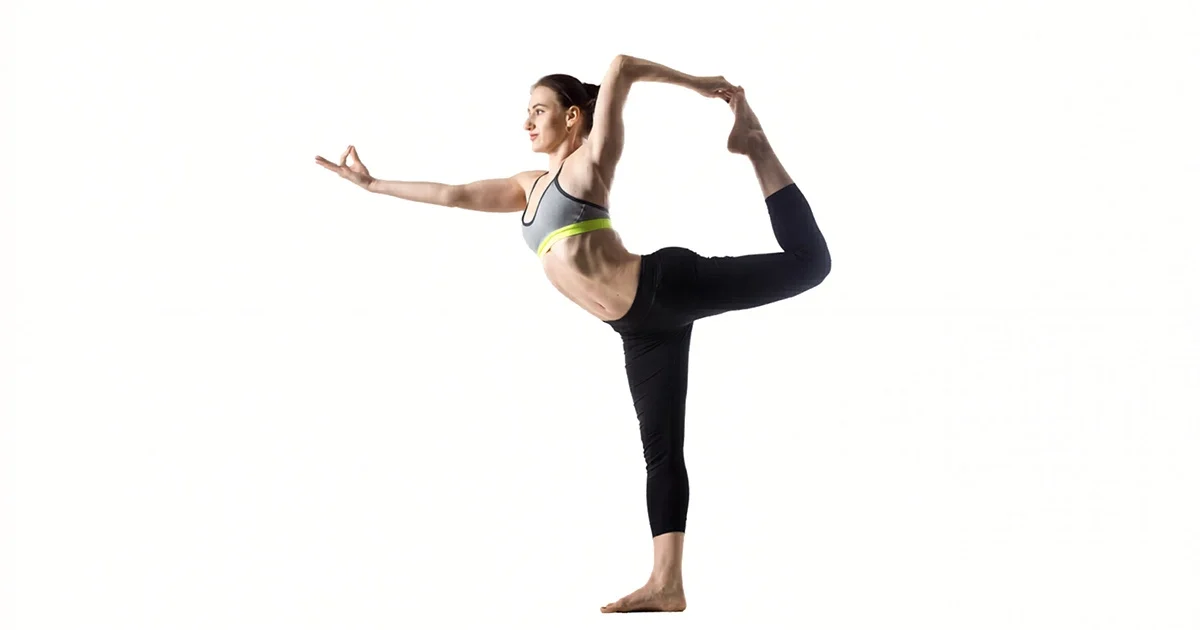
A yoga practitioner demonstrates perfect alignment in Natarajasana, focusing on a single point while extending the back leg into a graceful arc.
Blog
April 5, 2026By bharatyogas0 Comments

Natarajasana-Dancer Pose-Lord of the Dance

Natarajasana (Dancer Pose / Lord of the Dance)

Table of Contents

  1. Introduction
  2. How to Do Natarajasana
  3. Benefits
  4. Tips for Better Practice
  5. Why Learn with a Yoga Teacher or Instructor
  6. Cautions and Contraindications
  7. Conclusion
  8. FAQS

Introduction

Natarajasana stands out as one of the most iconic and frequently photographed elements within advanced standing yoga poses. The standing balance on one leg, the other leg lifted and arched behind, the arm reaching back to hold the foot, the whole body in a graceful backbending arc — it reads as beautiful in a way that not all yoga postures do.

What the photos don’t capture is how much it falls apart in the first hundred attempts.

Nataraja is another name for Shiva in his form as Lord of the Dance — the cosmic dancer whose movement creates and destroys the universe. The pose embodies that dynamic, unstable, movement-filled quality. It is a highly demanding option among complex yoga balance poses, serving as a balance pose, a backbend, a hip flexor stretch, a shoulder opener, and a concentration exercise simultaneously.

Getting all of those things to happen at the same time takes time. The balance requires stable single-leg standing. The backbend requires thoracic (the middle and upper back section of the spine) and lumbar (the lower back region of the spine) flexibility. The foot-hold requires shoulder flexibility. Each of these can be the limiting factor, and they’re all needed at once.

How to do Dancer Pose with correct alignment

Stand in Tadasana. Fix the gaze on a still point at eye level.

Shift the weight onto the right foot. Bend the left knee and lift the left foot behind you. Reach back with the left hand and grasp the inner left ankle or the top of the left foot — the hand holding from the inside of the foot.

Inhale and raise the right arm overhead, palm facing forward or inward.

Now the simultaneous action: press the left foot back and upward into the hand while the hand resists forward. This creates the arc of the body — the foot pressing back creates the backbend, which lifts the chest, which creates the shape. If the hand just holds passively, the pose collapses.

The torso leans forward slightly as the back leg rises. The right arm reaches forward and up. Hold for 20 to 45 seconds. Lower on an exhale and repeat on the left side.

If you are just starting out with this complex posture, seeking out Lord of the Dance pose modifications for beginners—such as resting your extended hand against a wall—will help stabilize your structure.

Benefits

Single-leg balance and hip stability. The standing leg works very hard in Natarajasana. All the ankle, knee, and hip stabilizers of the standing leg engage throughout the hold. This builds functional single-leg stability that transfers to gait, running, and most sport movements.

Deep hip flexor and quadriceps stretch. The raised and back-extending leg gets a significant stretch along the front of the thigh — rectus femoris and iliopsoas — as it moves into extension. The depth of this stretch increases as the foot pushes higher, making the hip flexor opening more progressive than in many other postures.

Thoracic and lumbar backbend. The whole spine extends into a backbend as the foot presses back. The chest lifts, the thoracic spine opens, the lumbar extends. This is a dynamic backbend that the foot’s pressing action creates rather than a passive shape.

Shoulder flexibility. Reaching the arm back and holding the inner ankle requires the shoulder to be in significant internal rotation with the arm behind the body. This is a range of shoulder motion that most people limit and that Natarajasana specifically works on.

Concentration under complexity. Managing balance, backbend, arm reach, and the breathing that keeps it all from locking up simultaneously is an exercise in distributed attention that no simple posture provides.

Tips for Better Practice

  • Press the foot back into the hand. This is the most important instruction in the pose and the one most beginners miss. Passively holding the foot doesn’t create the backbend. The active pressing of the foot against the resisting hand is what arcs the spine and lifts the chest.
  • Use a strap if the hand doesn’t reach the foot. Loop a strap around the ankle and hold the strap. This is not a lesser version — it’s the version that allows the pose to work for people whose shoulder flexibility isn’t yet sufficient for the direct hold.
  • Hinge the torso forward. As the back leg rises, the torso naturally inclines forward to counterbalance. This is correct, not a fault. Work with it rather than fighting to stay vertical.
  • The standing knee should be soft, not locked. A locked knee is vulnerable in a balance pose. A soft, gently engaged knee is stable.
  • Fall without frustration. Natarajasana falls down. Everyone falls in this pose, including advanced practitioners. The falling is part of the practice — how you return to it is the work.

Why Learn with a Yoga Teacher or Instructor

The “press the foot back” instruction changes the whole experience of the pose, and it’s one that’s hard to understand from a written description alone. A teacher demonstrating and verbally cueing the foot-press action while watching whether it’s actually happening produces the pose more quickly than any amount of solo practice without that cue.

Teachers also help with the strap use, the torso hinge, and the drishti — and can set up appropriate preparatory postures (Warrior III, single-leg balance work, hip flexor stretches) that build the components of Natarajasana before they’re needed all at once.

Cautions and Contraindications

  • Lower back injuries: The lumbar extension in the backbend is significant. Work within a comfortable range and don’t push the back leg high if the lower back protests.
  • Knee injuries (standing leg): The standing leg’s sustained load under balance challenge can aggravate knee instability. Practice near a wall.
  • Shoulder injuries: The arm-reaching-back position is an unusual shoulder orientation. Rotator cuff or labral issues may be aggravated.
  • Ankle instability (standing leg): Use a wall for support until the ankle is adequately stable for single-leg balance.

Conclusion

Natarajasana doesn’t arrive. It visits, briefly, and then leaves when the concentration breaks or the balance shifts. The practice is learning to make the visits more frequent and slightly longer, not to pin it down permanently.

That quality of arriving and departing — of catching the pose for a moment before it goes — has something genuinely dance-like about it. The Lord of the Dance is always moving. So is this pose.

FAQS

Q: I keep falling out of Dancer Pose. How do I build balance?

A: Fix your gaze on one still point before you even lift the leg. Then kick back into your hand rather than just holding the foot passively — the active push-pull between the foot and hand creates stability.

Q: My shoulder hurts when I reach the arm overhead in Dancer. What’s wrong?

A: The overhead arm usually means the shoulder is being externally rotated in a position it may not have the mobility for. Back off and work on shoulder flexibility separately before pushing the full expression.

Q: What’s the purpose of kicking into the hand?

A: The backward kick is what opens the pose. Without it, you’re just balancing on one leg. The opposition between the standing leg grounding down and the raised leg kicking back creates the arch and the lift.

Q: Is Dancer Pose good for balance in everyday life?

A: Single-leg balance training has real carryover — proprioception, ankle stability, and hip stability all improve. Dancer Pose works those systems intensely.

Q: How flexible do I need to be for Natarajasana?

A: Moderate to advanced hip flexor flexibility and decent shoulder mobility. Start with the basic version (foot at the hip level) before reaching for the full backbend expression.

Q: Who should avoid this pose?

A: People with shoulder injuries, lower back problems, or ankle instability. Those with serious knee issues should also be careful with the standing leg.

READ MORE
  • 1
  • 2
  • 3
  • …
  • 6

Links

About us
Disclaimer
Terms and Conditions
Privacy Policy
Cancellation Policy
Refund Policy

Contacts

Info@bharatyogas.com

Subscribe

    In Socials

    Fb.
    X.
    Ins.
    Lk.

    Bharatyogas

    Copyright © 2026 Bharatyogas.com. All Rights Reserved