logotype
  • Asanas
  • Pranayamas
  • Meditation
  • Blog
  • About Us
  • Contacts
make an appointment
logotype
logotype
  • Asanas
  • Pranayamas
  • Meditation
  • Blog
  • About Us
  • Contacts
Blog001
HomeBlog001
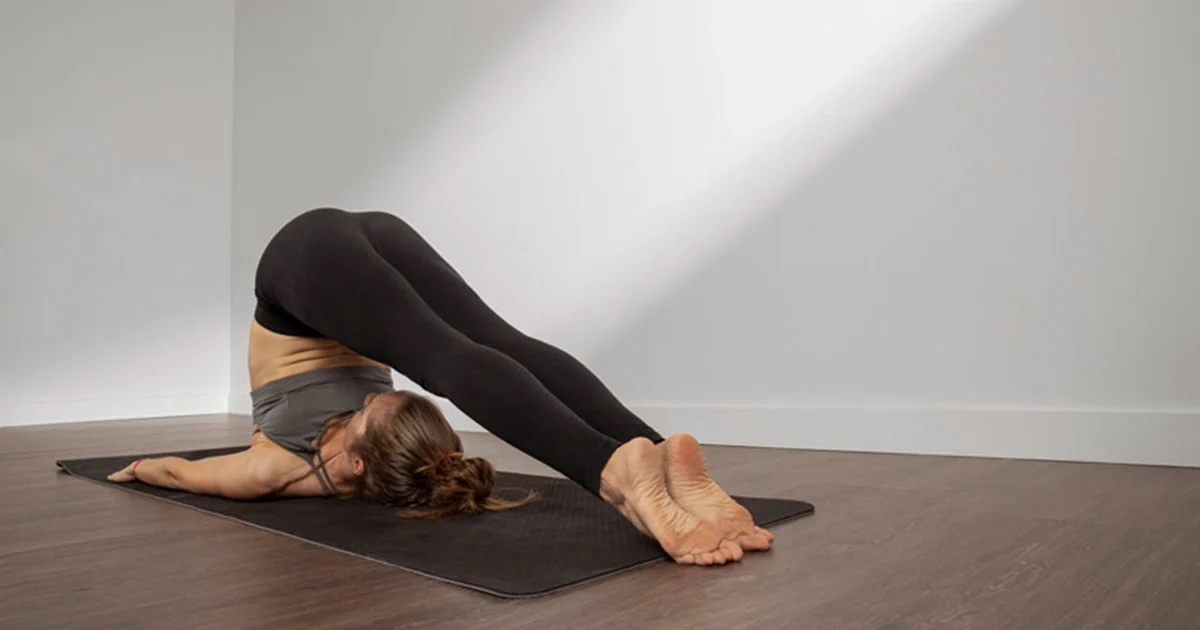
A yoga practitioner keeping their shoulders supported and spine long while demonstrating proper alignment in Halasana.
BlogLife StyleTrendingYoga
May 14, 2025By bharatyogas0 Comments

Halasan-Plow Pose

Halasana (Plow Pose)

Table of Contents

  1. Introduction
  2. How to Do Halasana
  3. Benefits of Halasana
  4. Tips for Better Practice
  5. Why Learn with a Yoga Teacher or Instructor
  6. Cautions and Contraindications
  7. Conclusion
  8. FAQS

Introduction

Halasana is one of those poses that looks peaceful from the outside — the legs sweeping overhead, the body folded quietly — while being more demanding and more nuanced than it appears.

Hala means plow in Sanskrit. The body takes the shape of a traditional plow: the feet on the ground behind the head, the body curved over itself, the weight distributed across the upper back and shoulders.

It’s an inversion, a spinal stretch, and a compression posture all at once. Practiced with care and proper preparation, it’s deeply therapeutic. Practiced carelessly, particularly with weight falling on the cervical spine, it’s genuinely risky.

This is one of the poses in yoga that most clearly requires teacher guidance before being practiced independently. That guidance is not overcaution — it’s the appropriate response to a posture that involves the neck under load.

How to Do Halasana

Lie on your back, arms alongside the body, palms down. Take a breath and on the exhale, use the core to lift the legs to 90 degrees. Support the hips with the hands as they begin to move overhead — bring the palms to the mid-back.

Continue the arc, letting the legs travel overhead and down toward the floor behind the head. The toes may touch the floor, or they may hover above it — both are fine. Don’t force the feet to the floor.

The weight is on the upper back and shoulders. The neck should feel no compression or pressure. If there’s neck pressure, the setup is wrong and you need to come out.

Arms: either remain with hands on the mid-back for support, or extend the arms along the floor and optionally clasp the hands, pressing the arms down to lift the chest higher.

Hold for 30 seconds to 2 minutes. To come out, use the hands on the back for support and roll down slowly on an inhale — one vertebra at a time if possible.

The setup detail that matters most: place a folded blanket under the shoulders (not under the head and neck). This elevates the shoulders so the cervical spine has natural curve rather than being flattened under the weight of the legs.

Benefits of Halasana

Full posterior chain stretch. The hamstrings, glutes, spinal erectors, and cervical extensors all stretch together in Halasana. The depth of this combined stretch is difficult to achieve in other postures.

Thoracic spine decompression. With the weight on the upper back and the legs overhead, the thoracic vertebrae are distracted (pulled apart) gently. Many practitioners feel the mid-back release during Halasana in a way that no other posture creates.

Inversion benefits. The heart is above the head, reversing the direction of blood flow through the major vessels. This creates mild stimulation of the carotid baroreceptors, which can reduce heart rate and calm the nervous system. The inversion also increases circulation to the abdominal organs and brain.

Abdominal organ compression. The folded position compresses the abdominal region, which is said to support digestive function and abdominal organ health.

Calming effect. Halasana has a strong calming quality — many practitioners find it one of the most reliably quieting postures in yoga. It’s often placed near the end of a practice for this reason, and many traditions recommend it before sleep.

Tips for Better Practice

  • Use the shoulder blanket setup every time. A folded blanket (firm, approximately 2 to 3 inches high) under the shoulders is not optional safety theater — it’s the modification that makes the pose safe for the cervical spine. Without it, the neck is under considerably more compressive load.
  • Don’t turn the head while in Halasana. Any rotation of the cervical spine under load is potentially dangerous. Eyes look upward or toward the knees; the head stays still.
  • The feet do not need to touch the floor. Pressing the feet to the floor when the hamstrings aren’t ready forces the lumbar spine into flexion under load, which is not the goal. Feet hovering is correct for most beginners.
  • Don’t compare sides. The degree of symmetry (or asymmetry) in how the legs meet the floor can be surprising. Don’t try to compensate or force evenness.

Why Learn with a Yoga Teacher or Instructor

Halasana genuinely benefits from teacher guidance more than most postures. The cervical spine alignment, the blanket setup, the correct distribution of weight across the upper back versus the neck — these are details that are hard to self-assess and that matter significantly for safety.

A teacher will also help students distinguish between productive stretch discomfort (the pull of the hamstrings, the opening of the upper back) and warning signals (pressure in the neck, tingling in the arms or hands). The warning signals are the ones that mean come out immediately.

For students with existing neck issues, a teacher can determine whether Halasana is appropriate at all and what modifications might make it accessible.

Cautions and Contraindications

  • Cervical disc herniation or cervical spondylosis: Halasana places the cervical spine under significant compressive load. This may be absolutely contraindicated or require specific modification depending on the individual. Get clearance from a spine specialist.
  • High blood pressure: Inversions are generally contraindicated with uncontrolled hypertension.
  • Glaucoma and other eye pressure conditions: Inversions increase intraocular pressure. Check with an ophthalmologist.
  • Pregnancy: Absolutely contraindicated. The inversion, abdominal compression, and supine position are all inappropriate.
  • Menstruation: Many yoga traditions recommend avoiding inversions during menstruation. This is worth discussing with an experienced teacher.
  • Recent neck, shoulder, or upper back injury: Skip Halasana until cleared by a physiotherapist.

Conclusion

Halasana is a posture that asks for patience and respect. The cervical spine is not a place to experiment carelessly. But approached with the right setup, the right preparation, and competent instruction, Plow Pose is one of yoga’s more therapeutically rich postures — a deep full-body stretch with a calming effect that few other postures match.

Take it seriously. Do it carefully. It’s worth both.

FAQS

Q: Is Halasana safe for everyone?

A: No. It puts significant weight on the cervical spine. People with neck issues, high blood pressure, or glaucoma should avoid it.

Q: My feet don’t reach the floor. Is that okay?

A: Yes. Stop where your flexibility allows and support your back with your hands. Forcing the feet to the floor by rounding the spine is not worth it.

Q: Can I stay in Halasana for a long time?

A: Short holds (30 to 60 seconds) are typical. Extended holds in an unsupported Halasana can strain the neck. Supported variations allow longer stays.

Q: What does Halasana do?

A: Stretches the back of the spine, neck, and hamstrings. Often calming, partly because of the gentle compression on the throat.

Q: Can I do Halasana during menstruation?

A: Many teachers recommend avoiding inversions during menstruation. This is debated, but conservative practice suggests skipping it.

Q: Should I warm up before Halasana?

A: Yes. The hamstrings and spine need preparation. Don’t go into a cold Halasana.
READ MORE
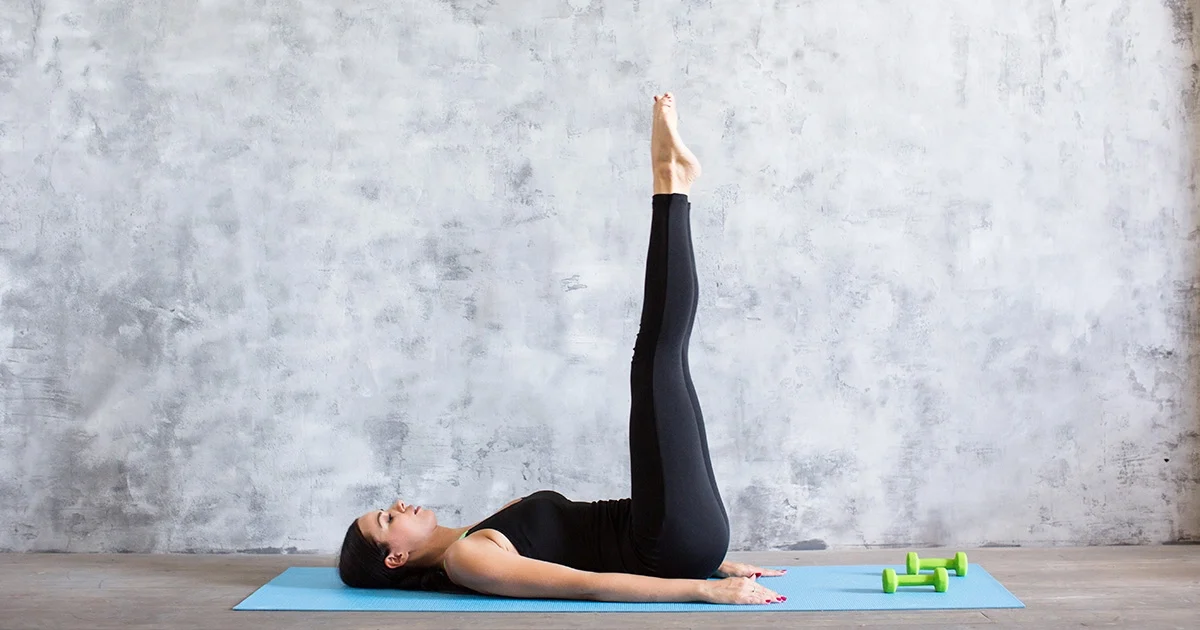
A yoga practitioner demonstrates a flat lower back and legs extended vertically at a ninety degree angle in Ardha Halasana.
BlogLife StyleYoga
May 13, 2025By bharatyogas0 Comments

Ardha Halasana-Half Plough Pose

Ardha Halasana (Half Plow Pose) The Safer Gateway to Halasana

Table of Contents

  1. Introduction
  2. How to Do Ardha Halasana
  3. Benefits
  4. Tips for Better Practice
  5. Why Learn with a Yoga Teacher or Instructor
  6. Cautions and Contraindications
  7. Conclusion
  8. FAQS

Introduction

Halasana (Plow Pose) is a deep inversion that requires the legs to travel fully overhead, toes touching the floor behind the head. It’s a significant posture that demands hamstring flexibility, spinal mobility, and most importantly, proper setup to protect the cervical spine.

Ardha Halasana is the halfway point. Ardha means half. The legs rise to 90 degrees — perpendicular to the floor, pointing straight up — rather than continuing over the head. The inversion effect is real, the core and hip flexor engagement is substantial, and the cervical spine is in a much safer position than in the full pose.

For many practitioners, Ardha Halasana is the appropriate version — not a consolation prize, but the version that matches their current hamstring flexibility, spinal mobility, and comfort with inversion. For those building toward full Halasana, it’s an essential preparation. For those who should never do full Halasana due to cervical spine issues, it’s a way to access the inversion benefits without the risk.

How to Do Ardha Halasana

Lie on your back with arms alongside the body, palms pressing into the floor. Bend the knees to the chest.

On an exhale, extend the legs upward to 90 degrees. The legs are straight, feet flexed or pointed, thighs pressing toward the ceiling. Arms press down into the floor for support.

This is the pose. The back stays on the floor. The pelvis may lift slightly — this is fine — but the lower back shouldn’t arch aggressively away from the floor. The legs are vertical, the core is engaged.

Hold for 30 seconds to 2 minutes.

For those working with a blanket (preparing for full Halasana): use the same blanket setup as Sarvangasana — shoulders elevated, head on the floor — before lifting the legs. This setup positions the body correctly if the legs eventually begin moving toward the floor.

To come down: lower the legs slowly on an inhale, maintaining control throughout. Never drop the legs — the sudden shift in weight can strain the lower back.

Benefits

Inversion benefits without cervical risk. The legs-vertical position creates mild inversion of the pelvis and lower trunk relative to the floor, increasing blood flow to the abdominal organs and reducing lower limb fluid accumulation. The cervical spine is in a neutral position throughout, unlike in full Halasana.

Core and hip flexor strengthening. Holding the legs at 90 degrees requires sustained engagement of the core (particularly the lower abdominals) and the hip flexors. The demand is real and the build is progressive.

Hamstring stretch. The perpendicular leg position creates a gravity-assisted hamstring stretch that, held over time, produces measurable flexibility gains. This is one of the more comfortable hamstring stretches because the weight of the legs does the work without any muscular forcing.

Spinal decompression. With the legs elevated, the lumbar spine is freed from the compressive load of the legs’ weight. For people with lower back compression from prolonged standing, this positional change produces noticeable relief.

Preparation for Halasana. The hip flexor strength, hamstring flexibility, and comfort with the supine legs-elevated position are all developed in Ardha Halasana, making the progression to full Plow more accessible and safer when appropriate.

Tips for Better Practice

  • Press the palms firmly into the floor. This stabilizes the upper body and helps the core manage the leg weight without straining the lower back.
  • Keep the legs active. Passive, floppy legs in the perpendicular position create more work for the lower back. Active, engaged legs (engaged quads, active feet) are easier to hold.
  • Don’t let the lower back arch aggressively off the floor. If the lumbar spine is pulling up sharply, the core isn’t managing the leg weight well. Lower to a 70-degree leg angle and work back up gradually.
  • Breathe throughout. Hip flexor fatigue makes breath-holding tempting. Resist.

Why Learn with a Yoga Teacher or Instructor

For students planning to progress toward full Halasana, a teacher can monitor the readiness — hamstring flexibility, spinal mobility, core strength — and sequence the progression appropriately rather than rushing it. They can also ensure the shoulder blanket setup is used correctly if the legs are eventually going to travel overhead.

For students using Ardha Halasana as a standalone therapeutic practice (for inversion benefits without Halasana’s cervical risk), a teacher can design the appropriate duration and integration into a sequence.

Cautions and Contraindications

  • Herniated lumbar disc: Leg elevation increases intradiscal pressure through hip flexor engagement. Get physiotherapy clearance.
  • Pregnancy: Supine leg lifts are generally avoided after the first trimester.
  • High blood pressure or glaucoma: Even mild pelvic inversion raises pressure in the head and eyes. Consult a doctor.
  • Hip flexor strain: The sustained engagement may aggravate active hip flexor injuries.

Conclusion

Ardha Halasana does more than it gets credit for. The inversion effect, the core and hip flexor work, the hamstring stretch, and the spinal decompression are all real and useful — and they’re available without the cervical risk of full Plow.

For most practitioners, this is the version that should be in regular rotation. For those progressing toward Halasana, it’s the preparation that makes the full pose accessible. Either way, it earns its place.

FAQS

Q: How is Ardha Halasana different from Halasana?

A: In the half version, the legs go only to 90 degrees overhead — straight up, not all the way to the floor behind the head. Much less neck compression.

Q: Is it safer than full Halasana?

A: For most people, yes. The cervical spine bears less weight and the hamstrings get a gentler stretch.

Q: What does Ardha Halasana strengthen?

A: The abdominal muscles work to hold the legs at 90 degrees. It’s also a hamstring and lower back stretch.

Q: Can beginners do Ardha Halasana?

A: With a warm core and gentle entry, yes. It’s more beginner-friendly than full Halasana.

Q: Who should avoid it?

A: People with neck injuries, herniated discs, or high blood pressure. Same cautions as the full pose, just less intensely applied.

Q: How long should I hold it?

A: 30 to 60 seconds. Bring the legs down slowly — don’t just let them drop.

READ MORE
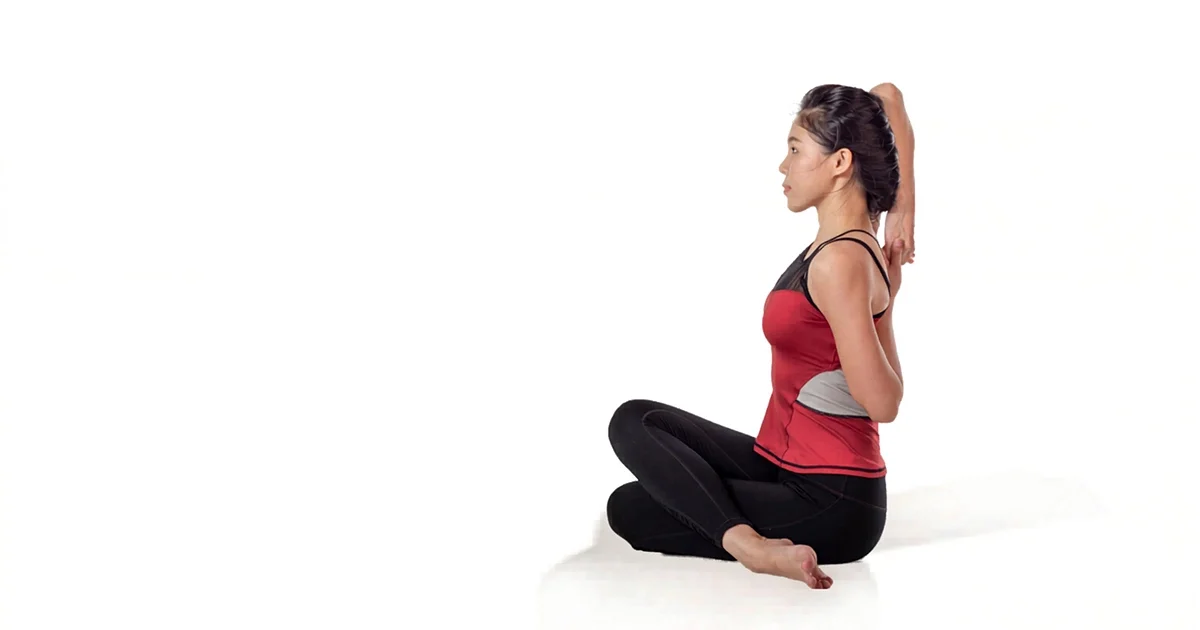
A yoga practitioner demonstrates proper spine elongation and stacked knee alignment in Gomukhasana.
BlogLife StyleTrendingYoga
March 27, 2025By bharat Yog0 Comments

Gomukhasana-Cow Face Pose

Gomukhasana (Cow Face Pose)

Table of Contents

  1. Introduction
  2. How to Do Gomukhasana
  3. Benefits
  4. Tips for Better Practice
  5. Why Learn with a Yoga Teacher or Instructor
  6. Cautions and Contraindications
  7. Conclusion
  8. FAQS

Introduction

Gomukhasana is one of yoga’s more anatomically clever postures. It looks like a seated pose that opens the hips, and it does — but simultaneously, the arm position creates one of the more effective shoulder and chest stretches in the practice. Two major areas of chronic tension addressed in one shape.

Go means cow, mukha means face or mouth, asana means posture. The stacked knees supposedly resemble the lips of a cow; the raised elbow is one ear. The analogy is a stretch, but the pose isn’t.

What makes Gomukhasana particularly useful is that it addresses asymmetry. Almost everyone is tighter on one side than the other — one hip opens more readily, one shoulder has better range of motion. Gomukhasana makes this imbalance impossible to ignore and, practiced consistently, works to reduce it.

How to Do Gomukhasana

Sit on the floor with legs extended. Bend the right knee and slide the right foot to the outside of the left hip. Then bend the left knee and stack the left knee directly on top of the right knee, bringing the left foot to the outside of the right hip. Both knees should be stacked in the midline, one above the other, with the feet out to opposite sides.

This is the leg position. For many people with tight hips, getting both knees to stack will take time. A folded blanket under the sit bones helps. Some people need to start with one leg in the full position and the other leg extended.

Now the arms: raise the right arm overhead, bend the elbow, and let the right hand fall between the shoulder blades. Reach the left arm out to the side, bend the elbow behind the back and reach upward, working the left hand toward the right hand. If the hands meet, clasp fingers. If they don’t, use a strap.

Hold for 30 to 60 seconds. Release, uncross the legs, and switch to the other side — left leg on top, arms reversed.

Benefits

Deep hip external rotation stretch. The stacked-knee position stretches the piriformis, gluteus medius, and other external rotators of the hip on the side of the lower leg. For people with tight hips from sitting, this is a significant and specific stretch that many other hip openers don’t provide.

IT band and outer hip release. The position also creates length in the iliotibial band on the lower-leg side, which is particularly useful for runners and cyclists who develop IT band syndrome.

Shoulder and triceps stretch. The raised arm bending behind the head stretches the triceps and the shoulder in internal rotation. The lower arm reaching up behind the back stretches the anterior shoulder and pectoral region. Together, both arms in Gomukhasana provide a comprehensive shoulder girdle stretch.

Thoracic spine opening. The arm position naturally opens the thoracic spine as the shoulders work in opposite directions. People with thoracic stiffness often feel a release through the mid-back as the pose settles.

Symmetry assessment and work. Because almost everyone is tighter on one side, the pose functions as a diagnostic tool — it shows exactly where the imbalances are — and as the corrective work to address them. Holding the tighter side a little longer is a practical modification.

Tips for Better Practice

  • Don’t force the knee stack. If the knees can’t stack without pain or significant strain, work with one leg in position and one extended. The hip stretch is still available; it just takes more time to develop.
  • Sit on a blanket. Elevating the hips helps the pelvis tilt forward, which makes both the leg position and the upright spine easier.
  • Use a strap for the arms. The shoulders don’t need to reach each other to get the stretch benefit. A strap allows both arms to work at the appropriate tension without the shoulder having to force range it doesn’t have.
  • Check that both sit bones are grounded. The hip of the top leg tends to lift off the floor as a compensatory movement. Keep it down.
  • Hold the tighter side longer. Most people have a noticeably tighter combination — one leg, one arm arrangement — and spending an extra 20 to 30 seconds there is practical corrective work.

Why Learn with a Yoga Teacher or Instructor

The knee stacking is the aspect where teacher guidance matters most. Forcing the knees into a stack when the hips are very tight can create medial knee stress — the rotational force that the tight hip can’t accommodate ends up at the knee joint instead. A teacher can see when this is happening and help the student find the modification that allows the hip stretch without the knee strain.

The arm position also benefits from teacher input: which shoulder has more limitation, how to use the strap effectively, and whether the thoracic position is appropriate for the student’s spine.

Cautions and Contraindications

  • Knee injuries: The rotational force at the knee in the full leg position can be significant with tight hips. Use the modification (one leg extended) if there’s any knee discomfort.
  • Hip replacement: Post-surgical movement restrictions vary by individual and surgical approach. Get clearance from the surgeon before attempting deep hip external rotation.
  • Shoulder impingement or rotator cuff tears: The arm positions in Gomukhasana load the shoulder in internal rotation and combined with the arm reaching overhead. These positions may aggravate existing shoulder pathology.
  • Sacroiliac joint dysfunction: The asymmetrical hip position can stress the SI joint in some individuals. Monitor carefully.

Conclusion

Gomukhasana is one of yoga’s more comprehensive single postures. Hips and shoulders in one shape — two areas where most people carry significant chronic tension, addressed simultaneously. The asymmetry it reveals is genuinely useful information, and the consistent practice of working both sides is practical corrective work that accumulates meaningfully over time.

It deserves more attention than it typically gets

FAQS

Q: What does Gomukhasana stretch?

A: The outer hip and glute of the bottom leg, plus the shoulder and tricep of the upper arm. It’s a dual stretch that hits areas most other poses miss.

Q: My arms don’t connect behind my back. What do I do?

A: Use a strap. Hold one end above and grab it from below. Over time, the gap closes.

Q: My knee hurts in Gomukhasana. Should I push through?

A: No. Knee pain in this pose often comes from forcing the hip into a position it’s not ready for. Sit on a block to reduce the angle or skip it.

Q: Is Gomukhasana good for IT band tightness?

A: The outer hip stretch can help with IT band-related tightness over time. It’s not a quick fix, but consistent practice helps.

Q: How long should I hold Gomukhasana?

A: 1 to 2 minutes per side gives the connective tissue time to respond.

Q: Can I do just the legs without the arm position?

A: Yes, absolutely. The two parts of the pose are independent. Do what’s available to you.

READ MORE
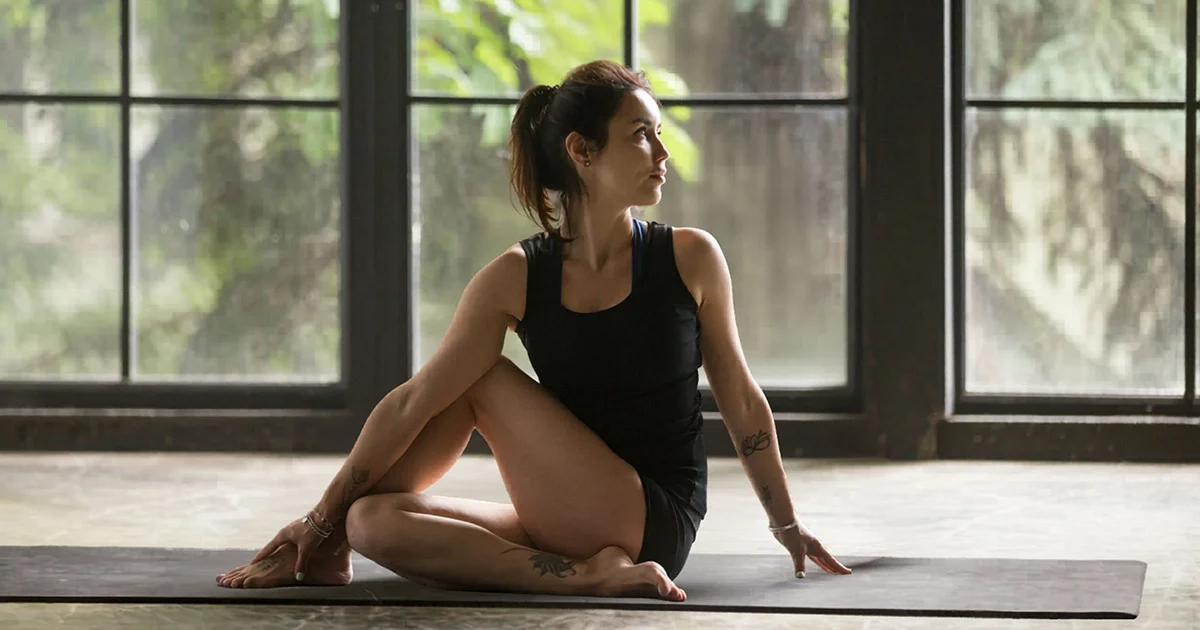
A yoga practitioner demonstrates grounded sitting bones and an upright spine while holding Ardha Matsyendrasana.
BlogLife StyleYoga
March 26, 2025By bharatyogas0 Comments

Ardha Matsyendrasana-Half Lord of the Fishes Pose

Ardha Matsyendrasana (Half Lord of the Fishes Pose)

Table of Contents

  1. Introduction
  2. How to Do Ardha Matsyendrasana
  3. Benefits
  4. Tips for Better Practice
  5. Why Learn with a Yoga Teacher or Instructor
  6. Cautions and Contraindications
  7. Conclusion
  8. FAQS

Introduction

Most seated twists in beginner yoga are gentle, almost polite. Ardha Matsyendrasana is not polite. It’s a full spinal rotation — from the sacrum up through the cervical spine — that most people find significantly more challenging than it looks when someone else is doing it.

The pose is named after the sage Matsyendranath, one of the founding figures of Hatha yoga. Ardha means half — the full Matsyendrasana is a deeper, more complex variation that requires extreme hip flexibility. This half version is what most practitioners work with, and it’s demanding enough.

What separates Ardha Matsyendrasana from gentler seated twists like Vakrasana is the depth of rotation it demands and the hip position it requires. The bent knee of the grounded leg, the foot of the upper leg placed flat outside the opposite knee, the arm leverage pressing against the raised knee — all of it conspires to rotate the thoracic and lumbar spine significantly more than most people expect.

It’s uncomfortable the first few times. That discomfort, when it’s in the right place — the muscles along the spine and the outer hip — is the feeling of genuine work happening.

How to Do Ardha Matsyendrasana

Sit on the floor with both legs extended. Bend the right knee and slide the right foot to the outside of the left hip, so the right heel is near the left outer hip. The right leg is now folded under you, or if this is uncomfortable, the right leg can remain extended.

Now bend the left knee and place the left foot flat on the floor to the outside of the right knee. The left knee points upward.

This is the base. Sit as tall as you can. Take an inhale to lengthen the spine — think of creating space between each vertebra before the rotation begins. This lengthening is not optional; a short, compressed spine twisted is very different from a long spine rotated.

On the exhale, rotate to the left. Bring the right elbow to the outside of the left knee, or wrap the right arm around the left knee entirely. Place the left hand on the floor behind you. Use it to push the floor away, which helps lift the spine, not to drag yourself deeper into the rotation.

Turn the head to look over the left shoulder if the neck is comfortable.

Hold for 30 to 60 seconds. Inhale to unwind, return to center, and repeat on the opposite side.

Benefits

Thoracic and lumbar rotation. The spine rotates more in the thoracic region than anywhere else, and Ardha Matsyendrasana demands genuine thoracic rotation. People who sit at desks all day move almost exclusively in the sagittal plane — forward and backward. The rotational mobility that Ardha Matsyendrasana develops is one that most daily movement patterns completely skip.

Outer hip stretch. The piriformis and deep hip external rotators of the bottom leg stretch as the body rotates away from them. For people with piriformis-related sciatic discomfort, this stretch is often directly relieving.

Intervertebral disc health. The facet joints along the spine — the small joints that allow rotation between adjacent vertebrae — are mobilized with each twist. Regular twisting practice keeps these joints from stiffening, which tends to happen with age and inactivity.

Abdominal organ stimulation. The rotation compresses the abdominal organs on one side while releasing them on the other. Traditional yoga texts describe this as supporting liver, kidney, and digestive function. The mechanical reality of compression and release has a credible basis in promoting blood flow to these organs.

Shoulder opening. As the arm wraps around the raised knee and the chest rotates, the posterior shoulder and upper back stretch. The hand behind the back creates counter-traction that lifts the spine while opening the front shoulder on the opposite side.

Tips for Better Practice

  • Lengthen before you rotate. Every time. The inhale that creates spinal length is not breathing ceremony — it’s the physical space that makes a safe, deep rotation possible. A compressed spine twisted puts asymmetric load on the discs; a long spine twisted mobilizes the facets and stretches the paraspinal muscles properly.
  • Sequence the twist upward. Rotate from the navel first, then the ribcage, then the shoulders, then the head. Most people rotate from the top down, which twists the neck without doing much for the thoracic spine. Work bottom to top.
  • Don’t use the arm to force rotation. The elbow pressed against the knee stabilizes the pose. The rotation comes from the spine, not from leveraging the arm against the leg.
  • Keep both sit bones grounded. The sit bone on the rotation side tends to lift as the pelvis compensates for limited spinal rotation. When it lifts, you’ve gone further than the spine can rotate with stability. Back off slightly.
  • Stay with the discomfort for 30 to 45 seconds before switching sides. The release that comes from holding a twist for a full breath cycle is qualitatively different from the sensation of the first few breaths.

Why Learn with a Yoga Teacher or Instructor

The sequencing of the rotation — base of spine first, working upward — is the key technical point that most people don’t do without being taught it specifically. A teacher will cue you to rotate from the navel, then the chest, then the shoulders, and watch whether you’re actually doing it or just cranking the neck and calling it a twist.

Teachers also watch for the pelvis lifting on the rotation side, which signals the twist is exceeding what the spine can do with stability. This compensation is difficult to feel from the inside and easy to see from the outside.

For students with disc issues, a teacher experienced in therapeutic yoga can determine the appropriate range and duration of rotation that mobilizes without aggravating.

Cautions and Contraindications

  • Lumbar disc herniation: Spinal rotation loads the discs asymmetrically. The degree of risk depends on where the herniation is and how significant it is. Work with a physiotherapist to determine what range of twisting is appropriate.
  • Pregnancy (second and third trimester): Deep abdominal compression through twisting toward the raised knee is contraindicated as the uterus grows. Open twists (rotating away from the raised knee) are sometimes appropriate — check with a prenatal yoga teacher.
  • Recent abdominal surgery: The abdominal compression and increased intra-abdominal pressure are contraindicated until well past surgical recovery.
  • Severe sacroiliac joint dysfunction: Asymmetric pelvis positioning can aggravate SI joint problems in some individuals.
  • Knee pain in the folded position: If sitting with the bottom leg folded is painful, try sitting with both legs extended and only the upper leg crossed over.

Conclusion

Ardha Matsyendrasana reveals where your spinal rotation actually lives — and for most people, the answer is “mostly in the neck, not much in the thoracic spine.” That revelation is useful. The consistent practice of rotating the spine properly, from below upward, building over weeks and months, produces real mobility gains in the thoracic region that make virtually everything else feel easier.

Two minutes per side. Do it daily. The results are quiet and cumulative and worth every second.

FAQS

Q: What are the benefits of Ardha Matsyendrasana?

A: Spinal rotation, hip flexibility, and — often claimed — digestive stimulation from the compression on the abdominal organs.

Q: My back won’t rotate much. How do I improve it?

A: Don’t force it. Use the breath — inhale to lengthen the spine, exhale to rotate a little further. Consistency over weeks will open the rotation.

Q: Which direction should I twist first? A: Traditionally, right side first (clockwise twist). This follows the direction of the large intestine.

Q: Who should avoid this pose?

A: People with disc herniation, spinal surgery, or during pregnancy. Light twists earlier in pregnancy may be okay, but get guidance.

Q: How long should I hold Ardha Matsyendrasana?

A: 30 to 60 seconds per side, with smooth breathing throughout.

Q: My sitting bones lift off the floor when I twist. Is that a problem?

A: Ground both sitting bones before twisting. Prop one with a blanket if needed. Twisting with uneven hips creates imbalanced spinal rotation.

READ MORE
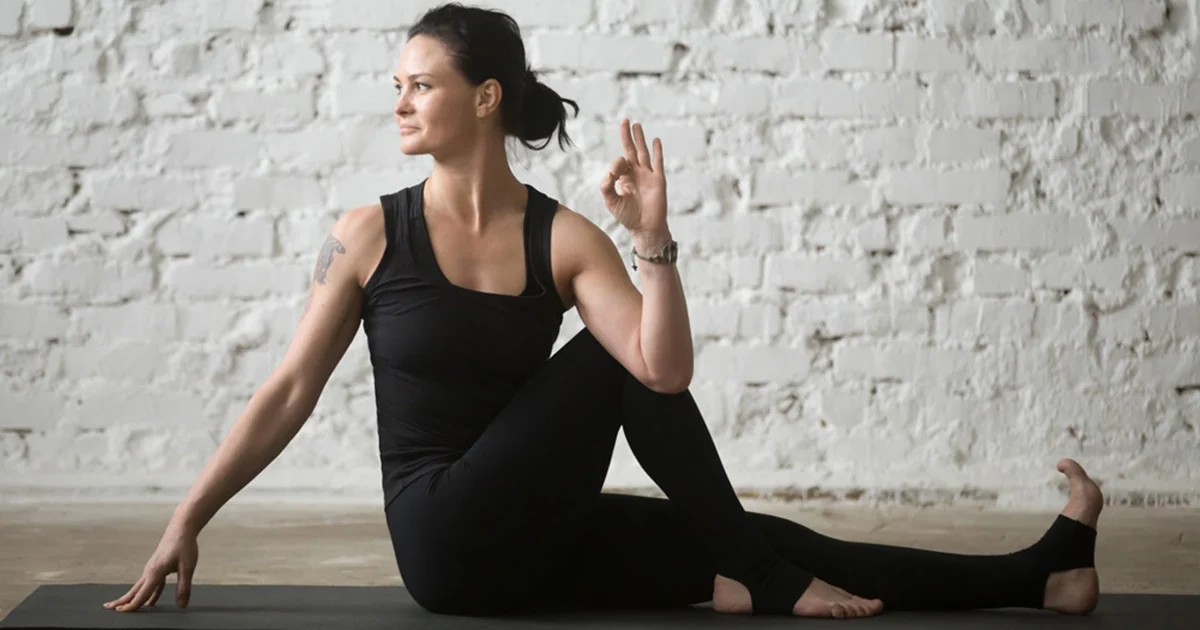
A yoga practitioner demonstrates an upright spine and proper shoulder alignment while holding Vakrasana Seated Twist Pose.
BlogLife StyleYoga
March 25, 2025By bharatyogas0 Comments

Vakrasana-Twisted Pose

Vakrasana (Twisted Pose) The Spinal Twist That Beginners Actually Need

Table of Contents

  1. Introduction
  2. How to Do Vakrasana
  3. Benefits of Vakrasana
  4. Tips for Better Practice
  5. Why Learn with a Yoga Teacher or Instructor
  6. Cautions and Contraindications
  7. Conclusion
  8. FAQS

Introduction

Seated spinal twists are some of yoga’s most practical postures. They address the rotational stiffness that builds up in the spine over years of predominantly forward-and-backward movement — walking, sitting, bending — with very little side-to-side or rotational action.

Vakrasana is the version that beginners can actually do. Not a simplified approximation of a harder pose, but a complete posture in its own right — accessible, effective, and genuinely useful for spinal health.

Vakra means curved or twisted in Sanskrit. The pose is a seated twist that rotates the thoracic and lumbar spine, stretches the outer hip of the bent leg, and gently compresses the abdominal organs on one side while lengthening those on the other.

It prepares the body for more demanding twists like Ardha Matsyendrasana, and for many people it’s the version that remains most appropriate throughout their practice.

How to Do Vakrasana

Sit on the floor with both legs extended. Bend the right knee and place the right foot flat on the floor to the outside of the left knee (or beside it, if that’s more comfortable).

Sit as tall as you can. Take an inhale and lengthen through the spine — this creates the space the twist needs. As you exhale, rotate the torso to the right.

Bring the left arm to the outside of the right knee. This can mean resting the left elbow on the outside of the knee, wrapping the left forearm around the right shin, or simply placing the left hand on the right thigh. Find the version that lets you rotate without the back rounding.

Place the right hand on the floor behind you. Use it to push the floor away and lift the spine, not to pull yourself deeper into the twist.

Turn the head to look over the right shoulder if the neck is comfortable.

Hold for 30 to 60 seconds. Inhale to unwind and return to center. Repeat on the left side.

Benefits of Vakrasana

Thoracic and lumbar rotation. The spine rotates most freely in the thoracic region and has more limited rotation in the lumbar. Vakrasana works both, with the thoracic doing the primary work. Regular practice maintains the rotational mobility that tends to decrease with age and sedentary habits.

Outer hip stretch. The piriformis and gluteus medius — the muscles of the outer hip on the side of the bent leg — stretch when the knee is drawn across the body and the twist deepens. For anyone with sciatic pain that originates from piriformis tightness, this stretch is often directly helpful.

Abdominal organ massage. The rotation of the trunk compresses the abdominal organs on one side and releases them on the other. This is traditionally said to support digestion, liver function, and kidney health. The mechanical reality of compression and release does create a kind of internal massage, though the specific organ benefits are more traditional claim than confirmed science.

Intervertebral joint mobility. The facet joints along the spine are mobilized by rotation. Keeping these joints mobile through regular twisting practice reduces stiffness and may reduce the cumulative risk of degenerative joint changes.

Shoulder and chest opening. As the torso rotates, the upper shoulder on the twisting side opens backward, creating a stretch across the chest and anterior shoulder.

Tips for Better Practice

  • Lengthen before you twist. The inhale that extends the spine before the rotation isn’t just breath work — it creates the physical space that makes the twist safe and effective. A collapsed spine twisted is just compressed. A long spine twisted is mobile.
  • The twist sequences upward. Rotate from the navel first, then the ribcage, then the shoulders, then finally the head. Twisting from the top (neck) down is a common error that creates strain without producing spinal rotation.
  • Keep both sit bones grounded. It’s common for the sit bone on the side of the twist to lift. When it does, you’ve gone farther than the spine can go — the pelvis is compensating. Back off slightly.
  • The back hand lifts the spine; it doesn’t drag the body further into the rotation. If the hand is pressing down hard to force rotation, the twist is too deep.

Why Learn with a Yoga Teacher or Instructor

The sequencing of the twist — base of spine first, moving upward — is something most beginners don’t do intuitively. Teachers help students feel the difference, which is both a safety issue and an effectiveness one. A twist that starts at the neck and works down does nothing for the thoracic spine; a twist that starts at the belly and works up is where the mobility gains happen.

Teachers also watch the pelvis. When a student’s sit bone lifts on the twisting side, a teacher will catch it and ask them to back off slightly, which teaches the body what a stable, grounded twist actually feels like.

Cautions and Contraindications

  • Herniated lumbar discs: Rotation loads the disc asymmetrically. Work with a physiotherapist to determine what range of rotation is safe. Many disc conditions can tolerate gentle twists; fewer can tolerate aggressive ones.
  • Pregnancy: After the first trimester, avoid postures that compress the abdomen. Vakrasana twists toward the bent knee, which can compress the uterus. Open twists are preferable during pregnancy.
  • Recent abdominal surgery: The abdominal compression in the twist is contraindicated until cleared by a surgeon.
  • Osteoporosis of the spine: Forceful twisting with osteoporotic bone carries fracture risk. Work with a teacher experienced in modifications for bone density issues.

Conclusion

Vakrasana is the kind of pose that doesn’t photograph well but works reliably. The spinal rotation, the hip stretch, the abdominal compression — these are practical benefits that accumulate over regular practice and show up in daily life as reduced stiffness, better range of motion, and less of that particular kind of back tightness that comes from moving in only two directions for most of your waking hours.

Do it daily. It costs two minutes and returns more than that.

FAQS

Q: What is Vakrasana good for?

A: It’s a basic seated twist — good for the spine’s rotational mobility and often cited as beneficial for digestive function.

Q: Is it safe for people with lower back problems?

A: Gentle twists can actually help with some back issues, but severe disc problems or acute pain are reasons to be careful. Twist from the thoracic spine rather than forcing rotation in the lumbar.

Q: How is Vakrasana different from Ardha Matsyendrasana?

A: Vakrasana is simpler — one leg stays extended. Ardha Matsyendrasana has a more complex leg position and deeper twist.

Q: How long should I hold Vakrasana?

A: 30 to 60 seconds per side. Always do both sides.

Q: Can pregnant women do Vakrasana?

A: Light twists in the first trimester may be okay, but twisting becomes increasingly restricted as the belly grows. Skip it from the second trimester onward.

Q: When is the best time to practice Vakrasana?

A: On an empty stomach, like most twists. Morning practice works well.

READ MORE
yoga for heart
BlogLife StyleYoga
September 22, 2024By bharatyogas0 Comments

Yoga for High Blood Pressure

High blood pressure, or hypertension, is a significant health concern affecting millions globally. It increases the risk of severe health problems, such as heart disease and stroke. Yoga offers a natural and holistic method to manage hypertension by promoting relaxation, improving circulation, and reducing stress. Incorporating yoga postures (asanas), pranayama (breathing techniques), and meditation into your routine can help regulate blood pressure and improve overall health. However, practicing cautiously is important, especially if you have high blood pressure.

Benefits of Yoga for High Blood Pressure

  • Stress Relief: Yoga reduces stress hormones like cortisol, helping to lower blood pressure.

  • Improved Circulation: Yoga improves blood flow and oxygenation, reducing strain on the heart.

  • Cardiovascular Support: Regular yoga practice helps regulate heart rate, improves cholesterol levels, and promotes relaxation of blood vessels.

  • Weight Management: Yoga aids in maintaining a healthy weight, reducing the risk of high blood pressure.

  • Emotional Balance: Yoga enhances mental clarity and emotional balance, helping to lower anxiety and stress-related hypertension.

Yoga Asanas for High Blood Pressure

Certain yoga poses can be especially beneficial for individuals with high blood pressure. These asanas focus on relaxation, gentle stretching, and steady breathing to calm the mind and reduce stress.

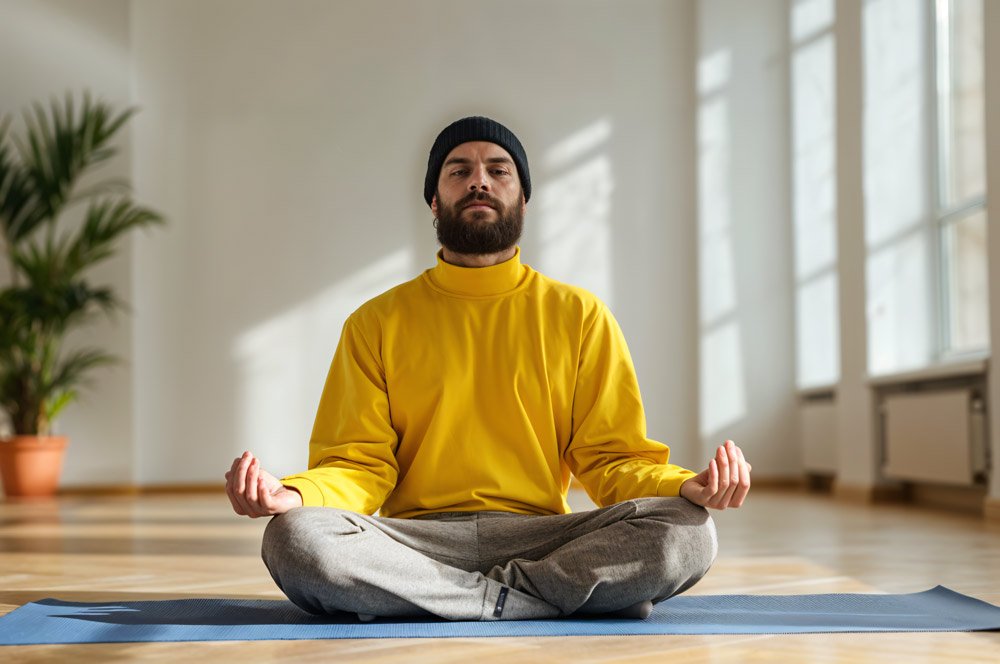
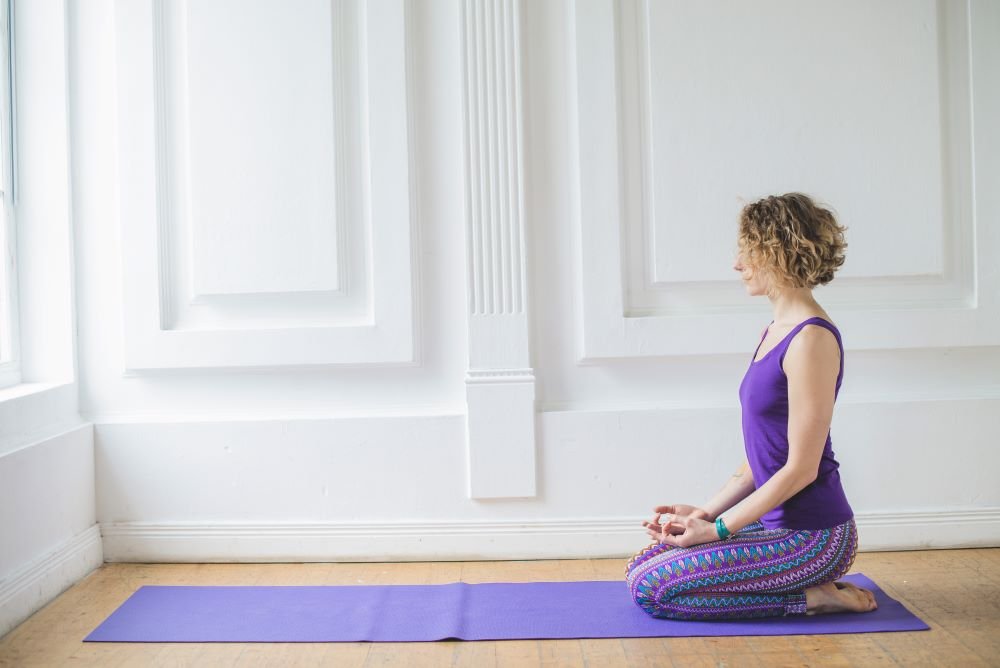
1. Sukhasana (Easy Pose): A seated pose that encourages deep, mindful breathing and relaxation, helping to relieve mental stress.

Yoga for High Blood Pressure

2.Vajrasana (Thunderbolt Pose): A kneeling posture that improves digestion and promotes mental clarity, balancing both mind and body.

Yoga Asanas for High Blood Pressure

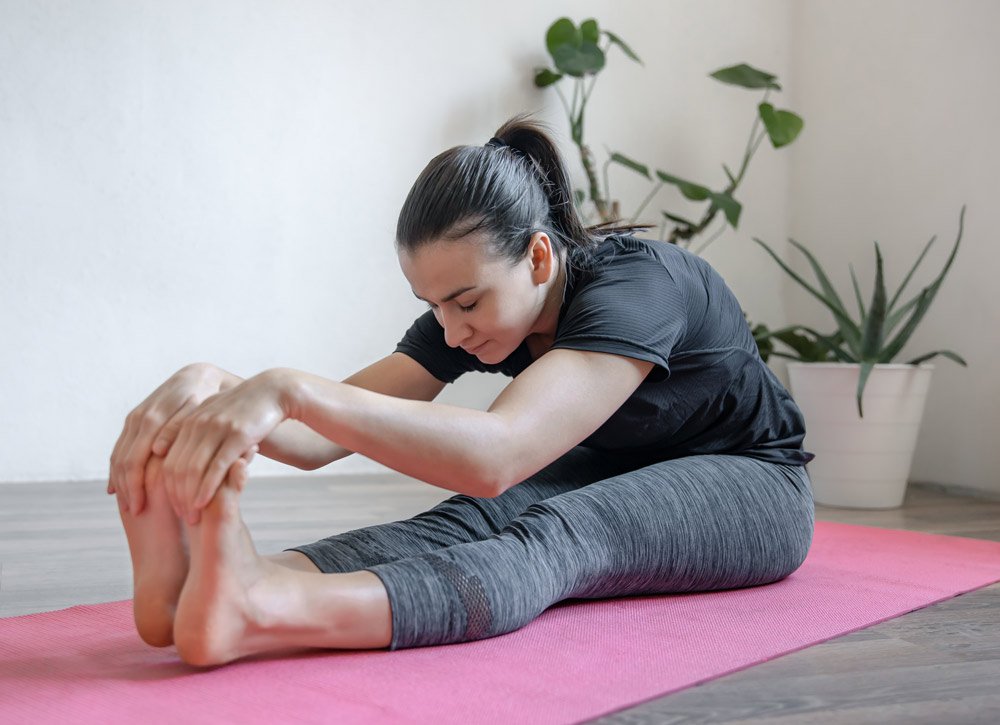
3. Paschimottanasana (Seated Forward Bend): This forward bend stretches the spine and hamstrings while promoting relaxation and reducing anxiety

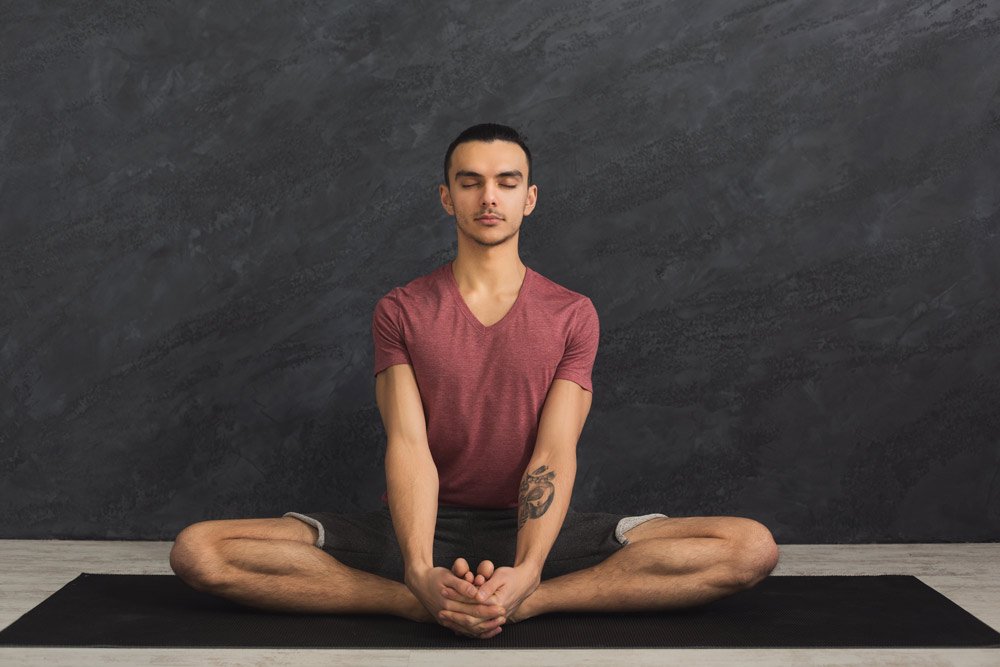
4. baddha Konasana (Bound Angle Pose): A seated pose that opens the hips and helps calm the nervous system, lowering blood pressure.

Yoga Asanas for High Blood Pressure

5. Janu Sirsasana (Head-to-Knee Forward Bend): A forward bend that stretches the hamstrings and spine, promoting relaxation and reducing stress.

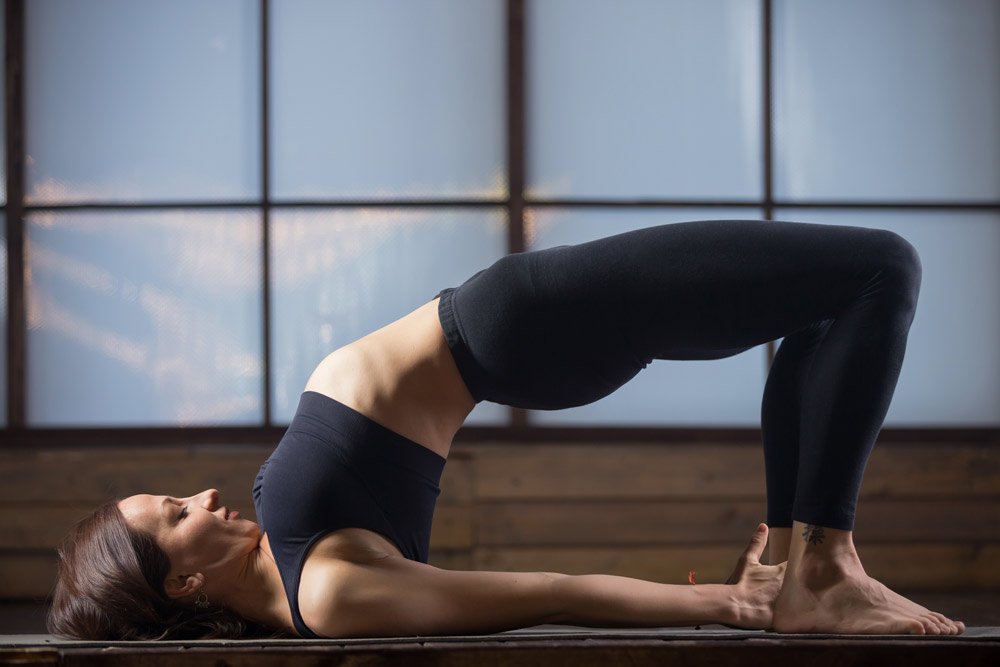
6. Setu Bandhasana (Bridge Pose): A gentle backbend that opens the chest and improves circulation, reducing stress and lowering blood pressure.

Yoga Asanas for High Blood Pressure

7. Viparita Karani (Legs-Up-The-Wall Pose): This restorative inversion helps improve blood circulation and reduces pressure on the heart while inducing relaxation.

bharatyogas.com

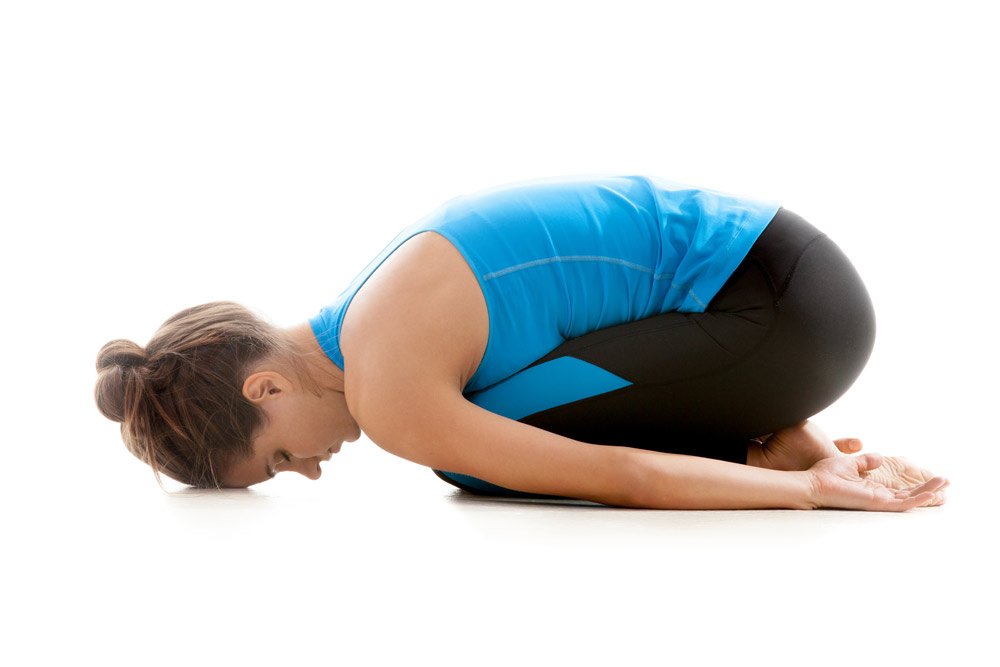
8. Balasana (Child’s Pose): A resting pose that calms the nervous system, promotes deep relaxation, and lowers stress levels.

Yoga Asanas for High Blood Pressure

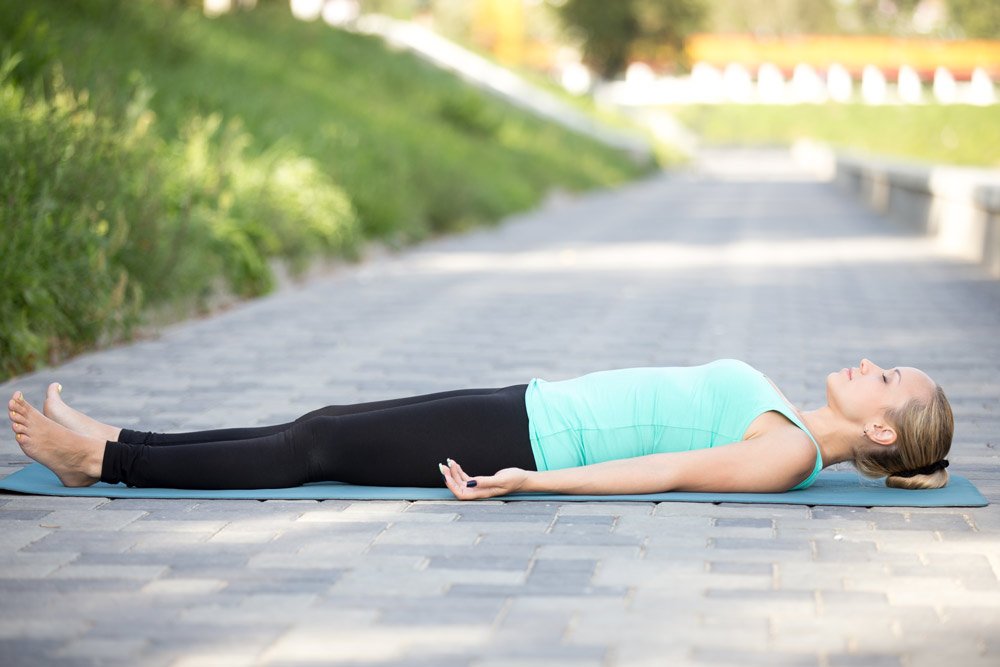
9. Shavasana (Corpse Pose): A deeply relaxing pose that allows the body to rest completely, reducing stress and regulating blood pressure.

Yoga Asanas for High Blood Pressure
Cautions for Asanas
  • Avoid Full Inversions: Poses such as Sirsasana (Headstand) and Sarvangasana (Shoulder Stand) increase blood pressure and should be avoided.

  • Modify Deep Backbends: Intense backbends like Chakrasana (Wheel Pose) can raise blood pressure, so it’s advisable to modify or avoid them unless guided by an instructor.

  • Transition Slowly: Move between poses gently to avoid sudden changes in heart rate and blood pressure.

Pranayama for High Blood Pressure

Pranayama and yogic breathing, plays a key role in managing high blood pressure. Through breath regulation, it calms the nervous system and promotes relaxation, helping to lower blood pressure naturally.

Yoga Asanas for High Blood Pressure
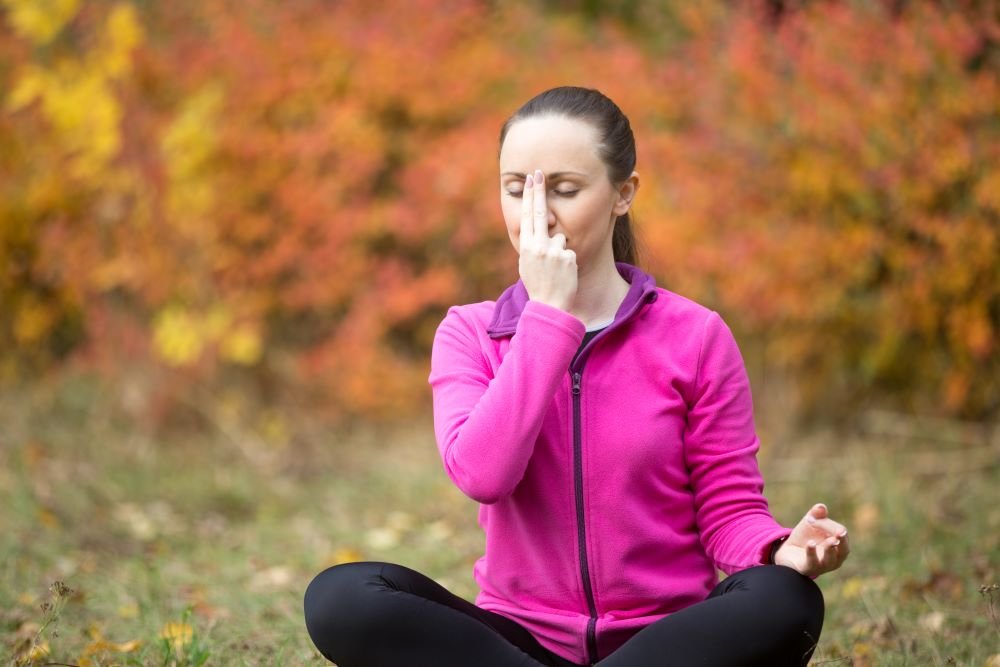
  1. Nadi Shodhan (Alternate Nostril Breathing): This balancing breathing technique purifies the energy channels and calms the nervous system, reducing stress and stabilizing blood pressure.

  2. Bhramari Pranayama (Bee Breathing): This practice involves producing a humming sound during exhalation, which calms the mind and helps lower blood pressure.

  3. Sheetali Pranayama (Cooling Breath): A cooling breath technique that reduces body heat, soothes the mind, and promotes relaxation, which can help lower blood pressure.

  4. Diaphragmatic Breathing: Slow, deep breathing into the diaphragm promotes relaxation, calms the heart rate, and helps lower blood pressure naturally.

Precautions for Pranayama

  • Practice Slowly and Gently: Focus on slow, steady breathing to avoid overstimulation of the heart or nervous system.

Meditation for High Blood Pressure

Meditation is highly effective for reducing stress and anxiety, both of which contribute to high blood pressure. A regular meditation practice can help lower stress hormones and promote emotional balance, leading to reduced blood pressure levels.

Yoga Asanas for High Blood Pressure
  1. Meditation: Simple mindfulness meditation, which involves focusing on the breath or a single point of focus, helps calm the mind, reduce stress, and lower blood pressure.

  2. Guided Meditation: This involves following a guided relaxation process, which helps release mental and physical tension and promotes deep relaxation, lowering blood pressure.

  3. Yoga Nidra (Yogic Sleep): A deeply relaxing meditation technique that guides you into a state of conscious rest. Yoga Nidra is effective for reducing stress and managing high blood pressure by calming both the body and mind.

Precautions for Meditation

  • Start with Short Sessions: Begin with 10-15 minute sessions and gradually increase the duration as you grow comfortable with the practice.

  • Ensure Comfort: Sit down in a comfortable position to avoid physical discomfort, which can cause stress during meditation.

  • Consistency is Key: Regular meditation, even for short durations, can yield significant benefits for reducing blood pressure over time.

Conclusion

Yoga offers a gentle yet powerful way to manage high blood pressure through a combination of asanas, pranayama, and meditation. These practices work together to reduce stress, enhance circulation, and promote relaxation, helping to regulate blood pressure naturally. As always, consult your healthcare provider before starting a new yoga routine, especially if you have severe hypertension or are on medication. With the right approach, yoga can support long-term cardiovascular health and overall well-being.

READ MORE
bharatyogas.com
Blog
March 17, 2024By bharatyogas0 Comments

Happiness with Yoga

Yoga is a profound tool that offers invaluable benefits for physical health, mental peace, and equanimity, contributing to a fulfilling life. Here are some significant advantages of incorporating yoga into your daily routine for a happy life:

1. Physical Health:

Practicing yoga provides invaluable benefits for physical health. Through the practice of yoga postures (asanas) and breathing techniques (pranayama), the body strengthens, and the flow of vital energies becomes more balanced.

2. Mental Peace:

The practice of meditation, mindfulness, and maintaining mental steadiness through yoga fosters mental peace and stability. Yoga helps bring equanimity to your mental state and distances you from turbulent thoughts.

3. Self-awareness and Empowerment:

Through the practice of yoga, you can cultivate self-awareness and empowerment. Developing your strengths and putting them into practice can help you achieve your goals.

4. Respectful Relationships:

The practice of yoga enhances mutual respect and deepens relationships. Equanimity and patience cultivated through yoga can contribute to healthier and more harmonious relationships.

5. Joyful Living:

Yoga promotes a holistic approach to life, encouraging balance and mindfulness in all aspects. By integrating yoga into your daily routine, you can experience a deeper sense of joy and contentment in your life.

Embrace the practice of yoga not just as a physical exercise but as a way of life, and witness the transformation it brings to your well-being and happiness.

READ MORE
bharatyogas.com
BlogYoga
March 17, 2024By bharatyogas0 Comments

The Ancient Roots of Yoga

The Ancient Roots of Yoga in India

Yoga, a profound system of physical, mental, and spiritual practices, has flourished for millennia within the rich tapestry of Indian culture. Delve into the depths of its history, from its ancient origins to its modern-day resurgence.

Ancient Origins:

Yoga finds its earliest mentions in the sacred texts of ancient India, including the Rigveda, dating back over 5,000 years. In these ancient hymns, the sages contemplate the nature of existence and the interconnectedness of all things, laying the philosophical groundwork for yoga’s development.

The Upanishads and Early Philosophy:

During the pre-classical period, the Upanishads emerged as a philosophical response to the Vedas, delving deeper into the nature of reality, the self (Atman), and the ultimate truth (Brahman). It is within these texts that we find the early conceptualizations of yoga as a path to self-realization and liberation (Moksha).

The Yoga Sutras of Patanjali:

The sage Patanjali compiled the Yoga Sutras, a seminal text that systematically codified the philosophy and practices of classical yoga. In this profound work, Patanjali outlines the eight limbs of yoga, providing a comprehensive framework for spiritual growth and inner transformation.

The Evolution of Yoga Schools:

Throughout India’s history, numerous yoga schools and traditions emerged, each offering unique approaches to yoga practice and philosophy. From the Hatha Yoga Pradipika to the Bhagavad Gita, these texts and teachings enriched the tapestry of yoga, emphasizing physical postures (asanas), breath control (pranayama), meditation (dhyana), and ethical principles (yamas and niyamas).

Embracing the Essence of Yoga:

As we reflect on the millennia-old journey of yoga in India, we are reminded of its timeless wisdom and universal appeal. Whether practiced on the banks of the Ganges or in urban yoga studios around the world, yoga continues to inspire and uplift countless souls, inviting us to embark on a journey of self-discovery, inner peace, and profound connection with the divine.

READ MORE
bharatyogas.com
Blog
March 17, 2024By bharatyogas0 Comments

Path of yoga

The path of yoga

bharatyogas.com

deeply rooted in Indian tradition, offers a holistic approach to physical, mental, and spiritual well-being. Here’s an overview of its content:

1. Patanjali’s Yoga Sutras: This foundational text outlines the philosophy and practices of yoga. It consists of 196 aphorisms that guide practitioners on the path to self-realization through the eight limbs of yoga.

2. Eight Limbs of Yoga:
Yama: Ethical principles guiding one’s behavior towards others, including non-violence, truthfulness, non-stealing, continence, and non-covetousness.
Niyama: Personal observances focused on self-discipline, cleanliness, contentment, self-study, and surrender to a higher power.
Asana: Physical postures designed to improve strength, flexibility, and balance while preparing the body for meditation.
Pranayama: Breath control techniques aimed at regulating the flow of prana (life force energy) in the body, enhancing vitality and mental clarity.
Pratyahara: Withdrawal of the senses from external stimuli, allowing the practitioner to turn their focus inward.
Dharana: Concentration techniques to cultivate single-pointed focus, leading to a state of meditation.
Dhyana: Meditation, the practice of sustained and focused attention, leading to a deeper state of awareness and inner peace.
Samadhi: The ultimate goal of yoga, a state of profound spiritual absorption and union with the divine.

3. Hatha Yoga: A branch of yoga that emphasizes physical postures (asanas) and breath control (pranayama) to purify the body and prepare it for meditation. Hatha yoga aims to balance the solar and lunar energies within the body, leading to a state of equilibrium.

4. Raj Yoga: Also known as the royal path, Raja Yoga encompasses the practices of meditation, concentration, and self-discipline to achieve mastery over the mind. It is based on Patanjali’s Yoga Sutras and emphasizes mental purification and self-awareness.

5. Bhakti Yoga: The path of devotion, Bhakti Yoga involves cultivating a deep love and devotion towards a personal deity or the divine. Practitioners express their devotion through prayer, chanting, and selfless service (seva), aiming to surrender their ego to the divine will.

6. Karma Yoga: The yoga of selfless action, Karma Yoga involves performing one’s duties and responsibilities without attachment to the outcomes. By offering the fruits of their actions to a higher ideal or for the welfare of others, practitioners purify their minds and cultivate a sense of equanimity.

7. Jnana Yoga: The path of wisdom, Jnana Yoga involves self-inquiry and contemplation to attain knowledge of the self (atman) and the ultimate reality (Brahman). Practitioners seek to transcend the limitations of the ego and realize their true nature as pure consciousness.

8. Kundalini Yoga: Kundalini Yoga focuses on awakening the dormant energy (kundalini) located at the base of the spine through a combination of physical postures, breathwork, mantra, and meditation. The awakening of kundalini is said to lead to spiritual enlightenment and union with the divine.

By integrating these various paths and practices, practitioners of yoga seek to achieve harmony and balance in all aspects of their lives, leading to greater self-awareness, inner peace, and spiritual growth.

READ MORE
  • 1
  • …
  • 4
  • 5
  • 6

Links

About us
Disclaimer
Terms and Conditions
Privacy Policy
Cancellation Policy
Refund Policy

Contacts

Info@bharatyogas.com

Subscribe

    In Socials

    Fb.
    X.
    Ins.
    Lk.

    Bharatyogas

    Copyright © 2026 Bharatyogas.com. All Rights Reserved