logotype
  • Asanas
  • Pranayamas
  • Meditation
  • Blog
  • About Us
  • Contacts
make an appointment
logotype
logotype
  • Asanas
  • Pranayamas
  • Meditation
  • Blog
  • About Us
  • Contacts
March 2026
Home2026March
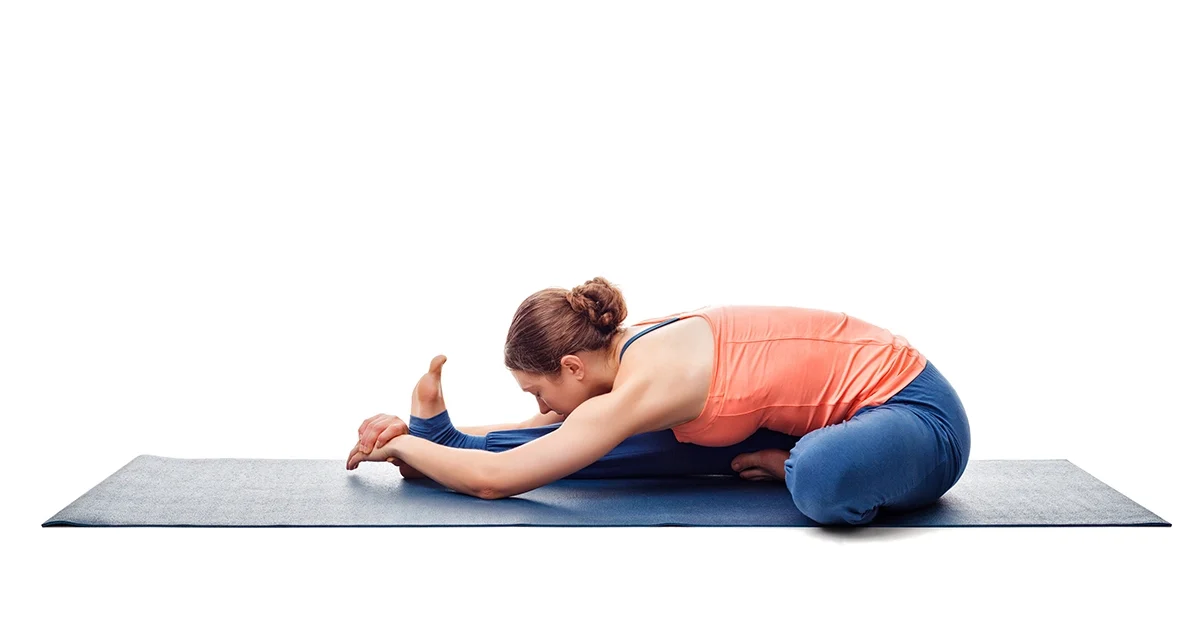
A yoga practitioner demonstrates proper chest rotation and safe knee alignment while holding Janushirsasana.
BlogLife StyleTrendingYoga
March 22, 2026By bharatyogas0 Comments

Janu Sirsasana-Head-to-Knee Pose

Janushirsasana (Head-to-Knee Pose) The Forward Fold That Teaches You About Your Own Asymmetry

Lorem ipsum dolor sit amet, consectetur adipiscing elit. Ut elit tellus, luctus nec ullamcorper mattis, pulvinar dapibus leo.

Table of Contents

  1. Introduction
  2. How to Do Janushirsasana
  3. Benefits
  4. Tips for Better Practice
  5. Why Learn with a Yoga Teacher or Instructor
  6. Cautions and Contraindications
  7. Conclusion
  8. FAQS

Introduction

Most people assume their body is roughly symmetrical. Then they try Janushirsasana on both sides and discover it isn’t, at all.

Janu means knee, shirsa means head. The pose is a one-legged seated forward fold — one leg extended, one knee bent with the foot drawn to the inner thigh, the torso folding over the extended leg. It looks like a simpler version of Paschimottanasana, and in some ways it is. But the asymmetry of the base leg position creates a different set of demands: one hip in external rotation, one hip flexing into the fold, the torso rotating slightly toward the extended leg.

That slight rotation is what makes Janushirsasana distinct and useful. It adds a spinal twist component to the forward fold, working the lateral back muscles on the side of the fold differently than a bilateral forward bend does. And it makes the difference between your two sides impossible to miss.

How to Do Janushirsasana

Sit with both legs extended. Bend the right knee and draw the right foot to the inner left thigh — heel close to the groin, sole of the right foot resting on the inner left thigh, right knee resting toward the floor (or on a block or blanket if it doesn’t reach).

Check the alignment: the left leg extends straight ahead. The torso is roughly centered or slightly angled toward the left leg — not dramatically rotated, but with a slight inclination.

Inhale and lengthen the spine upward. Exhale and hinge forward from the left hip, folding the torso over the extended left leg. Reach for the left foot — ankle, shin, or foot — whatever is accessible today. Use a strap if needed.

With each inhale, lengthen. With each exhale, soften the fold deeper. The forehead can rest on the knee if flexibility allows; if not, let it hang.

Hold for 1 to 2 minutes. Come up slowly on an inhale. Switch sides.

Benefits

Unilateral hamstring stretch. Stretching one hamstring at a time allows a different depth and a different quality of stretch than bilateral work. The hip of the extended leg is in a different position when the other knee is bent, which often allows the pelvis to tilt more freely and the stretch to reach further up into the posterior hip.

Hip external rotation stretch (bent leg). The folded knee in Janushirsasana requires the hip to externally rotate — placing a stretch on the piriformis, the glutes, and the inner thigh of the bent leg depending on how the foot is positioned. This is additional hip work not present in standard seated forward bends.

Lateral spinal work. Because the torso angles slightly toward the extended leg, the quadratus lumborum and lateral obliques on one side elongate while the other side works to maintain the fold. Over time, this addresses lateral imbalances in the back that bilateral forward bends don’t expose.

Asymmetry assessment. This is genuinely useful. Most people have one side that folds more easily, one hip that rotates more freely, one shoulder that pulls back more. Janushirsasana makes these differences apparent, which is the first step toward addressing them.


Calming effect. Like all seated forward folds, Janushirsasana tends to quiet the nervous system. The asymmetric position also requires slightly more active attention than bilateral poses, which keeps the mind present in a way that can be genuinely meditative.

Tips for Better Practice

  • The bent knee side matters. Don’t just fold toward the extended leg and ignore what’s happening with the bent one. The open-hip position of the bent leg should be active — the knee releasing toward the floor (or blanket) through the weight of gravity, not forced.
  • Sit on a blanket if the pelvis rolls backward on either side. The blanket is especially useful in Janushirsasana because the hip position on the bent-knee side often tilts the pelvis differently than in a bilateral forward fold.
  • Stay longer on the tighter side. If the left side folds significantly more than the right, hold the right side for an extra 30 seconds consistently. This is more effective than doing equal time forever.
  • Use a strap. A strap looped around the extended foot allows the arms to hold tension without the shoulders rounding dramatically forward, which preserves the length of the spine during the fold.
  • Note what you feel without judgment. The comparison between sides is information, not a ranking. Treat it as data.

Why Learn with a Yoga Teacher or Instructor

The spinal rotation toward the extended leg is subtle and frequently overdone or underdone. Teachers can help students find the appropriate slight inclination of the torso rather than exaggerating it into a strong twist (which defeats the forward fold) or ignoring it entirely (which makes Janushirsasana just a one-legged Paschimottanasana).

Teachers also watch the hip position of the bent-knee side, which commonly rolls out of the appropriate external rotation — the knee lifting off the blanket or floor — without the student noticing. Keeping this hip in the correct orientation requires awareness that’s easier to develop with guidance.

Cautions and Contraindications

  • Knee pain in the bent-leg position: The knee in external rotation can stress medial knee structures when the hip is very tight. Use a blanket under the bent knee rather than forcing it toward the floor.
  • Hamstring tears (active): Rest until healed.
  • Herniated lumbar disc: Spinal flexion under load. Get physiotherapy clearance.
  • Sciatic pain: Monitor carefully. The one-sided position affects the sciatic nerve differently than bilateral forward bends. If symptoms worsen, stop.
  • Pregnancy: Wide stance modification with limited depth in later trimesters.

Conclusion

Janushirsasana is an honest pose. It shows you exactly what’s different between your two sides, stretches the places that need it without letting the tighter side hide behind the more flexible one, and asks for the patient breath work that all seated forward folds require.

Practice it with genuine attention to both sides. The symmetry work it does — quietly, consistently — is one of the more practical long-term benefits in the whole seated sequence.

FAQS

Q: Does my head need to actually touch my knee?

A: No — the name describes the intention, not a strict requirement. Fold as far as your hamstrings allow. Rounding the back to force contact defeats the purpose.

Q: Is Janushirsasana the same as Paschimottanasana?

A: Similar, but you fold over one leg at a time while the other leg is bent to the side. It’s an asymmetrical pose that also stretches the inner groin of the bent leg.

Q: Can it help with tight hamstrings?

A: Yes — regular practice will improve hamstring length. Use a strap if you can’t reach.

Q: Who should avoid Janushirsasana?

A: People with knee injuries (especially in the bent leg) or hamstring tears.

Q: Should I do both sides equally?

A: Yes — always balance both sides. It’s common for one side to be tighter than the other.

Q: How long should I hold it?

A: 30 to 90 seconds per side.
READ MORE
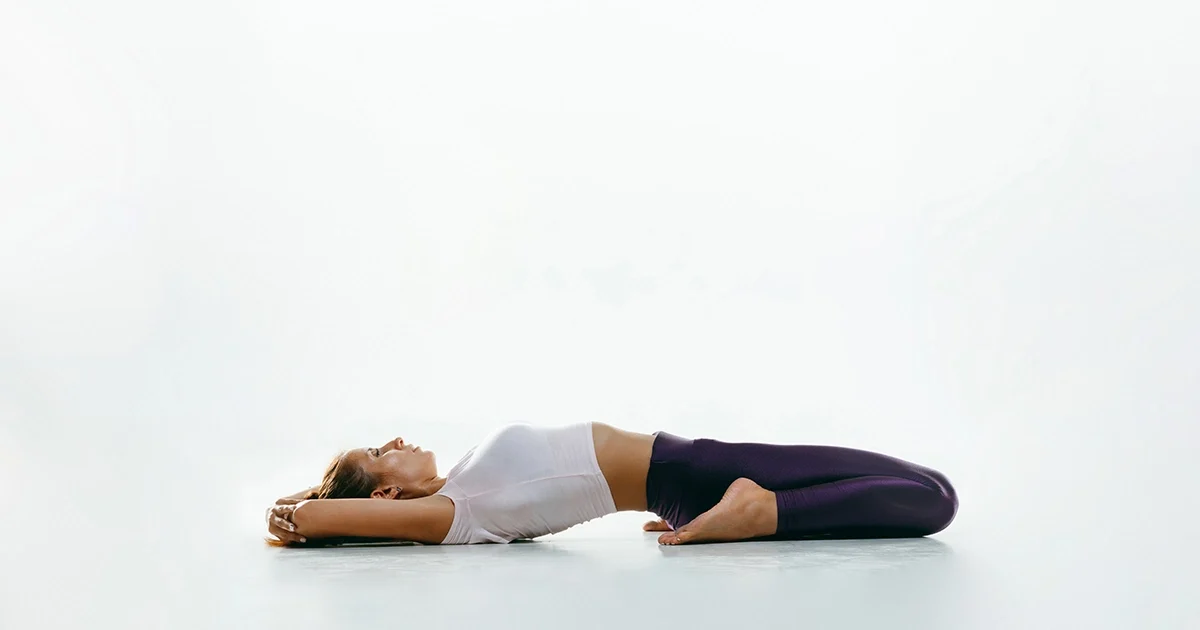
A yoga practitioner demonstrates proper chest extension and supported leg alignment in Supta Vajrasana Reclining Thunderbolt Pose.
BlogLife StyleTrendingYoga
March 21, 2026By bharatyogas0 Comments

Supta Vajrasana-Reclining Thunderbolt Pose

Supta Vajrasana (Supine Thunderbolt Pose) The Backbend That Lives Inside a Kneeling Pose

Table of Contents

  1. Introduction
  2. How to Do Supta Vajrasana
  3. Benefits
  4. Tips for Better Practice
  5. Why Learn with a Yoga Teacher or Instructor
  6. Cautions and Contraindications
  7. Conclusion
  8. FAQS

Introduction

Supta Vajrasana starts where Vajrasana leaves off. You’re kneeling, sitting on your heels — and then you lie back, dropping the torso toward the floor behind you, creating a significant backbend through the lumbar spine, thoracic spine, and chest.

Supta means supine or lying down. Vajra means thunderbolt. Together, the pose takes the stable, grounded kneeling position of Vajrasana and adds a full spinal extension that most people aren’t expecting from a kneeling posture.

It’s the combination of the backbend and the quad/hip flexor stretch that makes this pose especially useful. The quadriceps and hip flexors stretch deeply in the kneeling base position; the backbend adds the thoracic and lumbar extension that opens the chest and anterior spine simultaneously. Getting both at once is efficient in the best way.

This is an intermediate pose, not a beginner one. The lumbar load is significant, and it should be approached after proper warm-up and with the ankle and knee flexibility that Vajrasana itself requires.

How to Do Supta Vajrasana

Begin in Vajrasana — kneeling with the hips resting on the heels, tops of the feet flat on the floor. Take a moment to check that the spine is upright and the knees feel comfortable.

Place the hands on the floor behind you. Slowly begin to lean back, walking the hands further back as the torso descends. The elbows come to the floor one at a time, and then the crown of the head, and then the back of the head and the upper back lower toward the floor.

In the full pose, the back of the head rests on the floor (or on a folded blanket for those with neck sensitivity), the arms extend alongside the body or in a comfortable position, and the hips remain on the heels (or as close as possible). The spine creates a full backbend from the sacrum through the cervical region.

Hold for 20 to 45 seconds initially. To come out — and this matters — press the elbows into the floor, engage the core, and slowly reverse the path you took to get in. Don’t sit up abruptly; rise through the same sequence of elbows, hands, and gradual return to upright.

Benefits

Deep quadriceps and hip flexor stretch. The kneeling base position stretches the rectus femoris and iliopsoas along the front of the thigh from the knee all the way up to the lumbar spine. For anyone who sits for hours — and that’s most people — this stretch addresses one of the most persistently tight areas of the body.

Full thoracic and lumbar backbend. The supine recline in the kneeling position creates a sustained backbend that opens the thoracic spine specifically. Many backbends concentrate the movement in the lumbar region; Supta Vajrasana, done with attention to distributing the extension, opens the less-flexible thoracic region more substantially.

Ankle and foot stretch. The tops of the feet press into the floor throughout the pose. For people with stiff ankles and insteps, this is a significant stretch that daily walking and shoe-wearing rarely provides.

Chest and respiratory expansion. With the chest fully open and the sternum lifted toward the ceiling (or wall behind you), the lungs can expand more completely than in any upright or forward-folded position.

Preparation for deeper backbends. The hip flexor length and thoracic mobility that Supta Vajrasana develops are prerequisites for poses like Ustrasana and Chakrasana. It belongs in the progression toward those more demanding backbends.

Tips for Better Practice

  • Come out slowly. The most common injury risk in this pose is sitting up too quickly, which can strain the lower back and create a sharp transition that aggravates the lumbar. Reverse through the elbows, then hands, then gradually return upright.
  • Use a bolster if the full backbend to the floor is too deep. Place a bolster or rolled blanket behind the knees so the spine rests on it at an incline rather than reaching the floor. This reduces the lumbar load while still providing the backbend.
  • If the knees are uncomfortable in the kneeling position, place a folded blanket between the thighs and calves to reduce the degree of knee flexion.
  • Keep the knees together or hip-width apart throughout. They tend to splay as the body reclines, which changes the load on the lower back. Keep them in position.
  • Breathe into the chest. The expansion available in this position is significant. Use it.

Why Learn with a Yoga Teacher or Instructor

The entry and exit of Supta Vajrasana are the most important moments in the pose from a safety standpoint, and both benefit from someone watching. Teachers see when the lower back is taking the full load of the recline rather than distributing it through the whole spine, and can slow students down through the transitions that most people rush.

For students using this pose therapeutically — for quadriceps flexibility, thoracic mobility, or as part of a backbend progression — a teacher can set appropriate depth, duration, and propping to make the practice both effective and safe.

Cautions and Contraindications

  • Knee injuries: Any significant knee pathology — ligament damage, meniscal tears, post-surgical knees — may be aggravated by the deep knee flexion of the kneeling base position. Use generous propping between thighs and calves, and monitor carefully.
  • Lumbar disc herniation or spondylolisthesis: The sustained lumbar extension under load in this pose is significant. Get physiotherapy clearance before practicing.
  • Ankle injuries or severe stiffness: Introduce gradually with blanket support under the tops of the feet.
  • Cervical disc problems: Use a folded blanket under the head so the neck doesn’t hyperextend unsupported onto the floor.
  • Pregnancy: Skip after the first trimester.

Conclusion

Supta Vajrasana is demanding in ways that are easy to underestimate until you’re in the full position. The quadriceps stretch is profound. The backbend is real. The ankle and foot work is something most people’s bodies have needed for a long time.

Approached carefully and built up gradually, it’s one of the more comprehensive single postures in a seated-kneeling sequence. The exit deserves as much attention as the entry — both matter for doing it well.


FAQS

Q: What is Supta Vajrasana?

A: Starting from Vajrasana, you recline backward until the back is on the floor, arms extended overhead. It’s a deep quadriceps and hip flexor stretch with a chest opening.

Q: It’s very intense for my knees. How do I modify?

A: Use props — bolsters, blankets, or blocks under the back — to reduce how far you recline. Never force this pose.

Q: Who should avoid Supta Vajrasana?

A: Anyone with knee pain, ankle tightness, or lumbar conditions. This is not a beginner pose.

Q: Can I do Supta Vajrasana if I can’t sit comfortably in Vajrasana?

A: No. You need to be stable and comfortable in Vajrasana before attempting the reclined version.

Q: What are the benefits?

A: Deep quadricep and psoas stretch, chest and shoulder opening, and spinal extension.

Q: How long should I hold it?

A: 30 to 60 seconds. Come out slowly and sit in a neutral position to rest the knees.

READ MORE
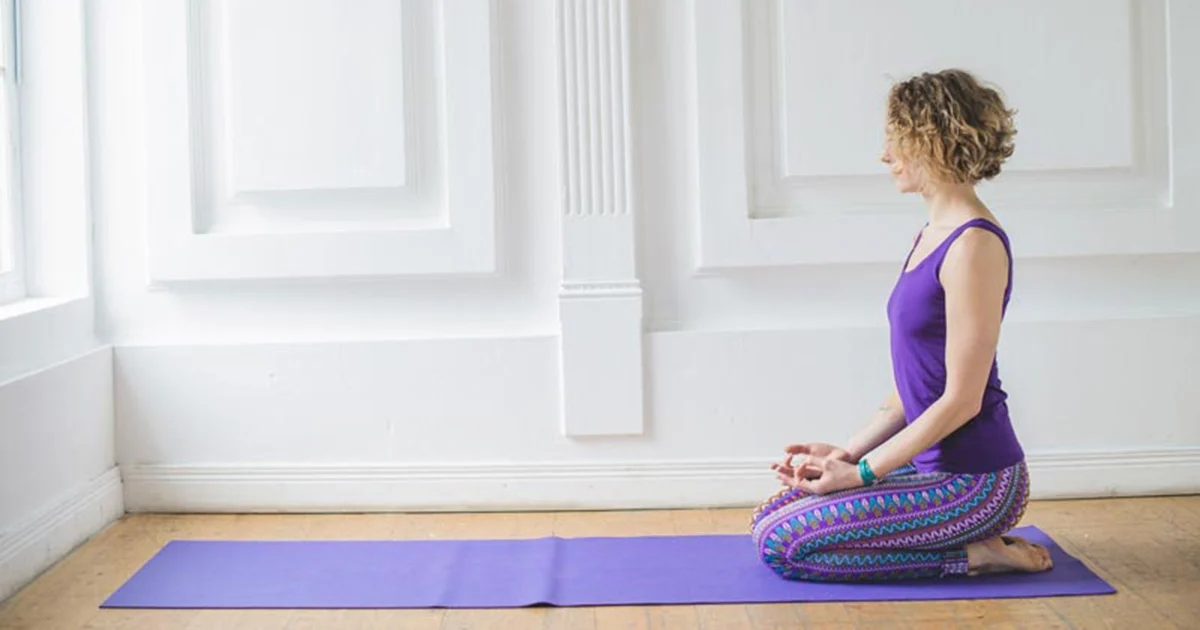
A yoga practitioner keeping an upright spine and stacked joints while demonstrating proper alignment in Vajrasana Thunderbolt Pose.
BlogLife StyleTrendingYoga
March 20, 2026By bharatyogas0 Comments

Vajrasana-Thunderbolt Pose

Vajrasana (Thunderbolt Pose) The One Yoga Pose You Can Do Right After Eating

Table of Contents

  1. Introduction
  2. How to Do Vajrasana
  3. Benefits of Vajrasana
  4. Tips for Better Practice
  5. Why Learn with a Yoga Teacher or Instructor
  6. Cautions and Contraindications
  7. Conclusion
  8. FAQS

Introduction

Almost every yoga pose comes with a version of the same instruction: practice on an empty stomach, ideally three to four hours after your last meal. Then there’s Vajrasana, which breaks this rule entirely and is actually recommended right after eating.

That alone makes it worth knowing.

Vajra in Sanskrit means thunderbolt or diamond — hard, indestructible, grounded. The name captures what this seated posture is meant to create: a stable, firm base from which breath, attention, and stillness can build. It’s one of the few yoga postures specifically prescribed for digestion, and it doubles as a meditation seat that doesn’t require extreme hip flexibility.

Vajrasana is deceptively simple. You’re kneeling. Your back is straight. You breathe. But those of us who’ve tried to sit in it for five minutes without fidgeting know it asks for more than it appears to.

How to Do Vajrasana

Start by kneeling on the floor. Bring your knees together (or hip-width apart if that’s more comfortable). Sit your hips back onto your heels, so the tops of the feet press flat into the floor and the big toes touch behind you.

Rest both hands on your thighs, palms facing down. Check the spine — it should be upright, not slumped. Imagine a thread pulling the crown of your head gently upward. Shoulders relax away from the ears. Chin stays level.

Close your eyes or soften your gaze downward. Breathe slowly and naturally.

Start with 2 to 3 minutes and build from there. Some practitioners sit in Vajrasana for 10 to 15 minutes after meals. For meditation or pranayama, the pose can be held considerably longer once the ankles and knees have adapted to it.

If the tops of the feet feel very stiff, a rolled blanket tucked under the ankles (not the knees) gives relief. If the sit bones don’t comfortably reach the heels, a folded blanket between the thighs and calves reduces the demand on the knees and quads.

Benefits of Vajrasana

Digestive support. This is the standout practical benefit and what separates Vajrasana from most other poses. Kneeling after eating increases blood circulation to the digestive organs and reduces the post-meal sluggishness that plagues a lot of people. Many traditional yoga texts specifically recommend sitting in Vajrasana for 5 to 15 minutes after lunch or dinner. Whether you attribute this to blood flow, reduced diaphragmatic pressure, or some combination, a lot of people find it genuinely effective.

Ankle and foot flexibility. The tops of the feet and ankles stretch thoroughly in this position. For people who sit in chairs all day and walk in padded shoes, the instep and ankle tend to be stiff in ways they don’t notice until they try to kneel. Vajrasana gradually opens these areas.

Quadriceps stretch. The thigh muscles lengthen in the kneeling position. This is a stretch that most people skip entirely in conventional exercise.

Stable meditation seat. For practitioners who find cross-legged sitting uncomfortable, Vajrasana is a practical alternative that keeps the spine naturally upright without muscular effort. Over time, as the ankles and knees adapt, it becomes one of the more sustainable positions for extended seated practice.

Lower back awareness. Because the lumbar spine naturally extends in Vajrasana (the kneeling position encourages a gentle lumbar curve), many people find their lower back pain reduces when they sit here rather than in a chair. It’s not a cure, but the positional change is real.

Tips for Better Practice

  • Build time gradually. Two minutes feels manageable; ten feels like a long time until it doesn’t. Add a minute each week rather than pushing duration too fast.
  • Tuck the toes under (toes on the floor, heels raised) for 30 seconds before sitting back onto the heels. This stretches the plantar fascia and makes the full pose considerably more accessible.
  • Keep the sit bones evenly weighted on both heels. It’s common to unconsciously lean to one side.
  • If practicing after meals, 5 minutes is enough to get the digestive benefit. You don’t need to sit for a long time for this specific use.
  • Don’t slump. The whole value of Vajrasana as a meditation seat collapses when the spine rounds. If you can’t maintain an upright spine, use props.

Why Learn with a Yoga Teacher or Instructor

The props question is where a teacher genuinely helps. Blanket under the ankles, blanket between thighs and calves, block under the hips — there are multiple modifications for different kinds of tightness, and a teacher can see what you need rather than you guessing. They’ll also check whether the spine is truly upright or just feels like it from the inside (often very different things).

For practitioners using Vajrasana as a base for pranayama or meditation, a teacher can introduce breath work that uses the stability of the pose as its foundation, which deepens the overall practice considerably.

Cautions and Contraindications

  • Knee injuries: Vajrasana places the knee in full flexion. Any recent knee ligament injury, surgical repair, or joint inflammation may make this pose painful or harmful. Use props to reduce flexion angle, or skip it until cleared by a physio.
  • Severe ankle stiffness: Introduce the pose very gradually. Forcing the instep flat when the ankle is very stiff causes discomfort in the wrong places.
  • Varicose veins: Prolonged kneeling can restrict circulation in the lower legs. Keep holds short (2 to 3 minutes) and move between this and other postures.
  • Foot numbness: If the feet go numb quickly, come out of the pose, flex and shake the feet, and try again with props to reduce the compression on the instep. Some numbness is normal initially, persistent or sharp tingling is a sign to modify.

Conclusion

Vajrasana earns its place in daily practice because it works on multiple levels without requiring much from the body. It’s the pose you do when you’ve just eaten and want to sit quietly for a few minutes. It’s the pose you sit in for morning breathwork when full lotus isn’t accessible yet. It’s the pose that stretches the ankles you’ve been ignoring for years.

None of that is dramatic. But consistent, quiet usefulness is exactly what a daily practice needs.

FAQS

Q: Can I sit in Vajrasana after eating?

A: Yes — it’s one of the few yoga poses recommended after meals. It’s thought to support digestion, and research does suggest it may help reduce post-meal blood sugar spikes.

Q: My feet go numb in Vajrasana. Is that okay?

A: Short-term tingling is common, especially for beginners. Come out of the pose if numbness persists. Over time, as your joints loosen, it usually improves.

Q: Can people with knee problems do Vajrasana?

A: It’s often not suitable for knee injuries. If you have knee pain, try sitting on a block placed between your thighs and calves, or skip it entirely.

Q: Is Vajrasana good for back pain?

A: For some people, yes — it keeps the spine erect without strain. For others with severe lumbar issues, it can be uncomfortable. Try it cautiously.

Q: How long should I sit in Vajrasana? A: 5 to 10 minutes is common. Some practitioners sit for 30 minutes or more, but start short and increase gradually.

Q: Can children sit in Vajrasana?

A: Yes, it’s safe for healthy children and often easier for them than for adults.

READ MORE
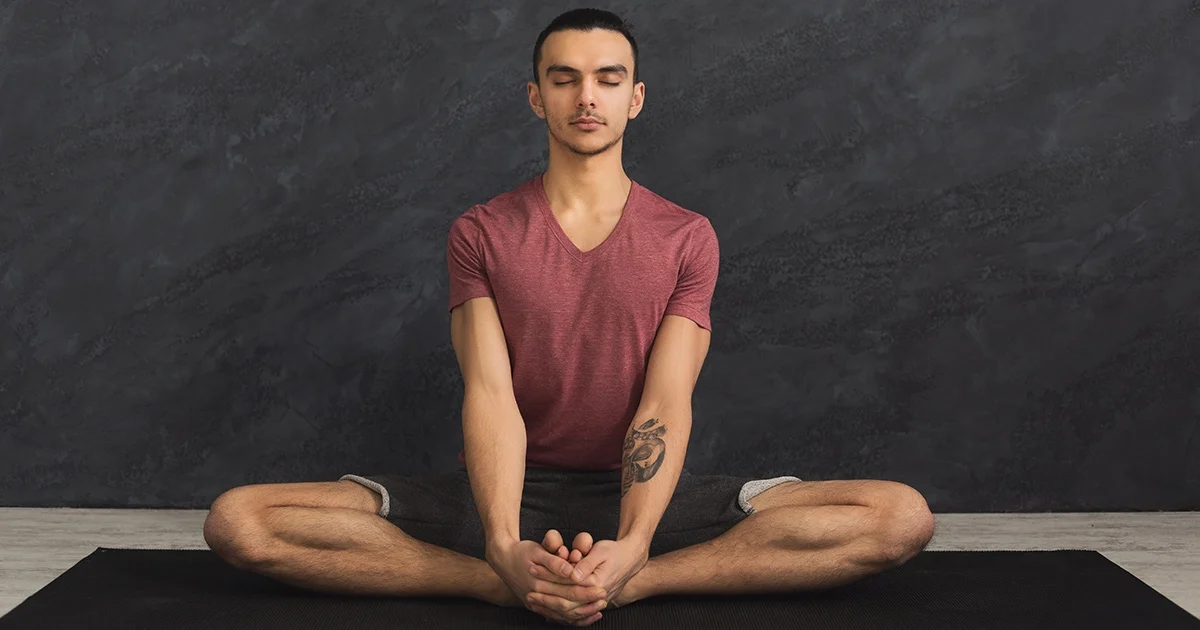
A yoga practitioner keeping a long spine and level pelvis while demonstrating safe alignment in Baddha Konasana.
BlogLife StyleTrendingYoga
March 17, 2026By bharatyogas0 Comments

Baddha Konasana-Butterfly Pose

Baddha Konasana (Butterfly Pose)

Table of Contents

  1. Introduction
  2. How to Do Baddha Konasana
  3. Benefits
  4. Tips for Better Practice
  5. Why Learn with a Yoga Teacher or Instructor
  6. Cautions and Contraindications
  7. Conclusion
  8. FAQS

Introduction

Watch a child sit on the floor for five minutes and they’ll end up in something close to Baddha Konasana without being taught it — knees out, feet together, body upright or folded forward. It just happens. The hips allow it.

Watch most adults attempt the same thing and you get knees hovering a foot off the floor, a lower back rounding immediately, and a fairly urgent desire to go back to the chair.

That gap between the child and the adult is years of chair-sitting, shoe-wearing, and the systematic shortening of the inner thigh and groin musculature that modern life produces. Baddha Konasana is one of the most direct ways to begin reversing it.

Baddha means bound or caught. Kona means angle. The pose creates a bound angle at the hip — soles together, knees wide, the hip joint in its maximum range of external rotation. The butterfly name comes from the way the knees can flap gently like wings in the teaching method sometimes used for children.

How to Do Baddha Konasana

Sit with legs extended. Bend both knees and draw the soles of the feet together, heels close to the pelvis. Hold the feet or ankles with both hands, or clasp the shins.

Sit tall first — the spine should be upright and long before any forward fold attempt. If the pelvis immediately rolls backward (lower back rounding), sit on a folded blanket to elevate the hips and allow the pelvis to tilt forward.

Let the knees open and drop toward the floor. Don’t push them down. Gravity does the work over time; forcing them down with the hands or elbows applies load to the knee joint rather than stretching the inner thigh.

For an upright version: stay here and breathe, focusing on length in the spine and gradual release in the inner groin.

For the forward fold version: hinge from the hip crease (not the waist), keeping the spine long as the torso moves toward the feet. The forehead can eventually rest on the feet; most people stay comfortably at various distances above them.

Hold for 1 to 5 minutes. Longer holds produce more lasting change.

Benefits

Adductor lengthening. The inner thigh muscles — adductor longus, adductor brevis, adductor magnus, gracilis, and pectineus — all attach along the inner femur and pelvis. They work to pull the legs together. In the wide-knee position of Baddha Konasana, they’re in maximum stretch. Regular, sustained practice lengthens these muscles in ways that brief, active stretching doesn’t.

Hip external rotation. The piriformis, obturator internus, and the other deep external rotators of the hip work to keep the knee externally rotated in this position. Over time, holding the pose develops flexibility in these muscles, which opens the hip for deeper external rotation in other postures — including seated meditation positions.

Pelvic floor awareness. The wide-leg seated position creates a natural connection to the pelvic floor. Many yoga traditions use Baddha Konasana in sequences focused on pelvic floor health, both for developing awareness and for the appropriate combination of lengthening and engagement.

Pregnancy support. Under the guidance of a qualified prenatal yoga teacher, Baddha Konasana is one of the most consistently recommended postures during pregnancy. The hip opening, pelvic floor work, and inner thigh stretch all have practical relevance to the late stages of pregnancy and to labor.

Accessible meditation seat preparation. The hip external rotation developed through regular Baddha Konasana practice is the same rotation required for Padmasana (Lotus Pose). Practicing this systematically builds toward more demanding seated postures without forcing the knee.

Tips for Better Practice

  • Sit on a folded blanket if your pelvis immediately tucks. The blanket changes the hip geometry enough that the spine can stay upright without a constant muscular fight. This is the most practical modification in the pose and the one that makes the longest holds possible.
  • Don’t push the knees down. The hands or elbows pressing the knees toward the floor bypasses the inner thigh stretch and loads the knee joint instead. Let gravity work. Over months, the knees lower on their own.
  • Stay in the upright version first. The forward fold is secondary. Getting the spine genuinely upright and the inner groin beginning to open in the seated version is more important than collapsing forward with a rounded back.
  • Breathe specifically into the inner groin area. It sounds strange but works: consciously directing the breath toward the area of stretch, imagining the exhale releasing a little more tension, produces a more effective hold than passive sitting.
  • Compare sides. Most people have one knee significantly lower than the other. Notice this — it’s information about hip asymmetry that’s useful to know.

Why Learn with a Yoga Teacher or Instructor

The “don’t push the knees down” instruction is counterintuitive enough that many people need to hear it from a teacher before they actually stop doing it. Teachers can also observe whether the forward fold is coming from the hip crease or the lumbar spine — a distinction that matters both for the effectiveness of the stretch and for lower back safety.

For pregnant practitioners especially, a teacher with prenatal yoga training can adapt the pose appropriately for each trimester, including breath work and duration modifications that make it genuinely supportive rather than just traditional advice applied carelessly.

Cautions and Contraindications

  • Knee injuries: The wide external rotation position can stress the medial collateral ligament when the hip is very tight. Support the knees on folded blankets rather than letting them hang unsupported.
  • Adductor strains: Don’t stretch an injured muscle. Rest first, then return gradually.
  • Hip replacements: Hip external rotation range may be surgically restricted. Get clearance from the surgeon before practicing.
  • SI joint dysfunction: The asymmetric sitting that occurs when one hip is tighter than the other can sometimes aggravate sacroiliac joint problems. Monitor carefully.

Conclusion

Baddha Konasana is one of yoga’s slower poses — the kind where progress is measured in months, where the knees drop a centimeter over a season of practice, where the inner thighs release gradually rather than dramatically.

That slowness can be frustrating. It can also be a reminder that the body opens at its own pace, and that the practice is about showing up consistently rather than achieving anything quickly. The hips know. Give them time.

FAQS

Q: How to protect knees in butterfly pose if my hips are very tight?

A: You must support your knees by placing folded blankets or yoga blocks directly underneath your outer thighs. Specifically, letting your knees hang unsupported in space applies dangerous leverage to the joint capsules and strains the inner knee ligaments.

Q: Is Baddha Konasana an effective posture to include in yoga for hip opening and flexibility?

A: Yes, it targets the deep external rotators and inner thigh muscles brilliantly. However, because these muscle groups open slowly over months and seasons, you must prioritize pelvic alignment and avoid forcing your knees toward the floor.

READ MORE
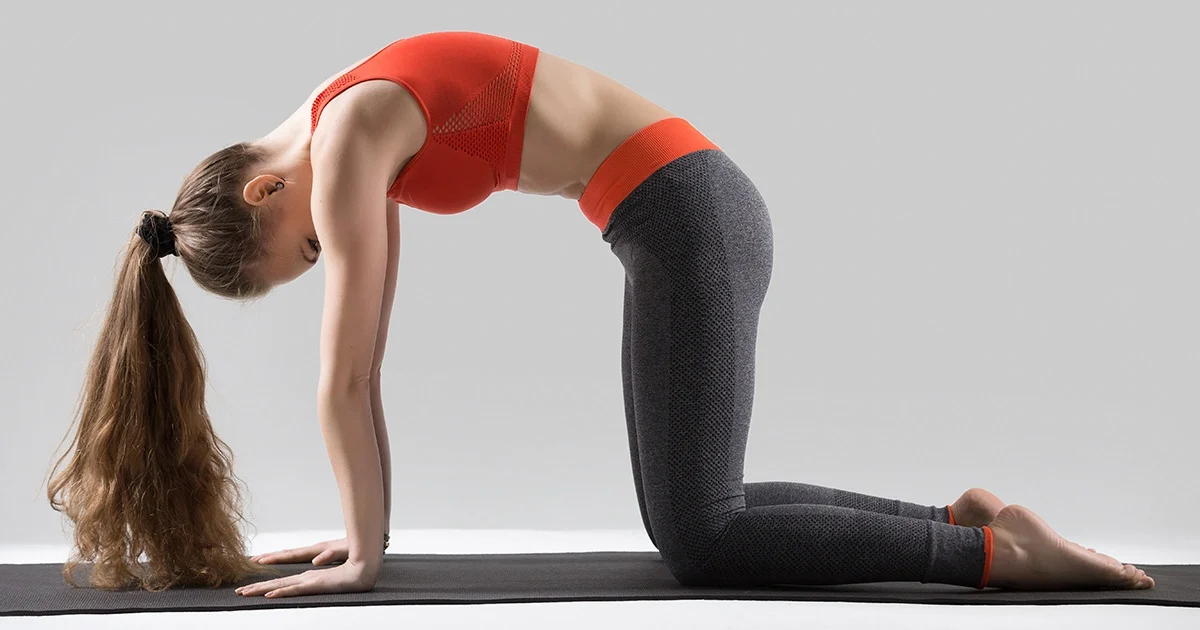
A yoga practitioner demonstrates proper upper back rounding and core activation in Marjariasana Cat Pose on a mat.
BlogLife StyleTrendingYoga
March 16, 2026By bharatyogas0 Comments

Marjariasana-Cat Pose

Marjariasana (Cat Pose)

Table of Contents

  1. Introduction
  2. How to Do Marjariasana
  3. Benefits
  4. Tips for Better Practice
  5. Why Learn with a Yoga Teacher or Instructor
  6. Cautions and Contraindications
  7. Conclusion

Introduction

Marjariasana is almost always taught with Bitilasana (Cow Pose) as a pair. Cat-Cow. The spine arches one direction, then the other, coordinated with the breath. It’s one of the first things beginners learn and one of the things experienced practitioners keep doing indefinitely, because the spinal mobility work it provides is consistently useful regardless of how far the overall practice has developed.

Marjari means cat. The pose takes the rounded, arching posture of a stretching cat — back curving upward, head dropping, pelvis tucking. Every cat owner has seen the shape. It’s instantly recognizable.

On its own, Marjariasana is a spinal flexion posture that rounds the back while the hands and knees support the body on all fours. Combined with Bitilasana (spinal extension), it creates a full-range spinal mobility sequence that warms the spine, coordinates movement with breath, and prepares the body for everything that follows.

How to Do Marjariasana

Come to a tabletop position on all fours: wrists under shoulders, knees under hips, spine in a neutral position. Fingers spread wide, pressing into the floor through the whole hand.

On an exhale, tuck the tailbone under, draw the navel toward the spine, and round the entire back upward toward the ceiling. The spine forms a long arc from tailbone to crown. The head drops, the chin comes toward the chest, the eyes look toward the navel.

This is Cat Pose.

The rounding is complete — not partial. The tailbone tucks, the lumbar rounds, the thoracic rounds, the cervical rounds. Every level of the spine participates. Hold for a breath, or transition immediately into Cow Pose on the next inhale for the flowing Cat-Cow sequence.

In the full flowing practice: exhale into Cat, inhale into Cow, and repeat 5 to 10 cycles with the movement fully coordinated to the breath.

Benefits

Spinal flexion mobility. The lumbar spine has limited natural flexion range compared to the thoracic. Marjariasana creates full spinal flexion under a supported, non-weight-bearing condition (the hands and knees support the body), which makes it safe for most people and effective for maintaining the range of motion that tends to decrease with age.

Core engagement. Drawing the navel toward the spine in Cat Pose activates the deep core — transversus abdominis, multifidus — in the flexed position. This is different from the extension-phase core work of many yoga postures and provides a more complete core strengthening pattern.

Back muscle release. The rounding of the spine in Cat Pose stretches the spinal erectors, rhomboids, and the muscles along the full length of the back. For anyone who holds tension in the back — which is most people — this stretch in a supported position is immediately relieving.

Neck mobilization. The dropping of the head in Cat Pose moves the cervical spine into flexion in a supported, load-free position. This is one of the safest ways to maintain cervical flexion mobility, which decreases significantly with age and phone use.

Breath coordination. The exhale in Cat is not incidental. The exhalation naturally activates the core muscles (the diaphragm and pelvic floor lower simultaneously during the exhale), which makes the core engagement in Cat more automatic and complete when paired with breath. Learning to coordinate breath with movement — the foundation of vinyasa — starts here.

Tips for Better Practice

  • Round every section of the spine, not just the lumbar. Most people round well through the lower back but keep the upper back relatively flat. Press through the upper back specifically — imagine the space between the shoulder blades widening and rising.
  • Don’t hang the head passively. Let it drop with intention, chin genuinely moving toward the chest. The cervical flexion is part of the pose.
  • Press into all four corners of both hands. The wrists should be active, not passive. This protects the wrists and keeps the shoulder engagement appropriate.
  • Slow the breath down. Rushing Cat-Cow turns it into a mechanical exercise. Slowing it down — 4 to 5 seconds of exhale into Cat, 4 to 5 seconds of inhale into Cow — makes it spinal mobility work with real nervous system benefit.
  • Keep the knees directly under the hips and the wrists under the shoulders throughout the movement. The tablettop geometry shouldn’t shift as the spine moves.

Why Learn with a Yoga Teacher or Instructor

Teachers watch for the incomplete rounding that most beginners do — lower back and pelvis participating, upper back staying relatively flat. Cuing the thoracic spine specifically to round and the space between the shoulder blades to widen is something most people need to hear several times before the thoracic segment joins the rest of the spine in the movement.

For students with spinal conditions — disc issues, stenosis, scoliosis — a teacher can determine the appropriate range of motion and ensure the movement is therapeutic rather than aggravating.

Cautions and Contraindications

  • Wrist injuries: Use fists or come to the forearms to reduce wrist load.
  • Knee problems: Place a folded blanket under the knees for padding. If kneeling is genuinely painful, the pose isn’t appropriate in its current form.
  • Severe lumbar disc herniation (with flexion sensitivity): Some disc presentations worsen with spinal flexion. Get physiotherapy guidance on whether Cat-Cow is appropriate.
  • Late pregnancy: The all-fours position is generally comfortable and recommended in pregnancy, but the deep core engagement of Cat (navel toward spine) should be moderated in later pregnancy. A gentler version without strong abdominal draw-in is appropriate.

Conclusion

Marjariasana is one of those postures that’s easy to dismiss because it looks too simple to matter. It doesn’t look like much. But the spinal flexion it provides, the core engagement it creates, and the breath coordination it teaches — consistently, gently, daily — accumulate into real benefits that underpin everything else the practice does.

Do it every morning. Two minutes of Cat-Cow before anything else. The spine will be more ready for whatever follows.

FAQS

Q: What’s the difference between Marjariasana and Bitilasana?

A: They’re paired — Marjariasana is the cat (spine rounds upward, chin tucks), Bitilasana is the cow (spine drops, chest lifts). They’re almost always done together.

Q: Is the cat-cow flow good for lower back pain?

A: Yes — it’s one of the most commonly recommended movements for lower back stiffness. The gentle rhythm mobilizes the lumbar and thoracic spine.

Q: How many rounds of cat-cow should I do?

A: 5 to 10 cycles is typical in a warmup. Follow your breath.

Q: Who should be careful with Marjariasana?

A: People with wrist injuries may need to place fists or forearms on the mat instead.

Q: Can pregnant women do Marjariasana?

A: Yes — it’s one of the safer and more recommended poses during pregnancy, especially for back comfort.

Q: Should I make the movement as extreme as possible?

A: Not necessarily. Move through your natural range. Forcing the arch or curl doesn’t add benefit.

READ MORE
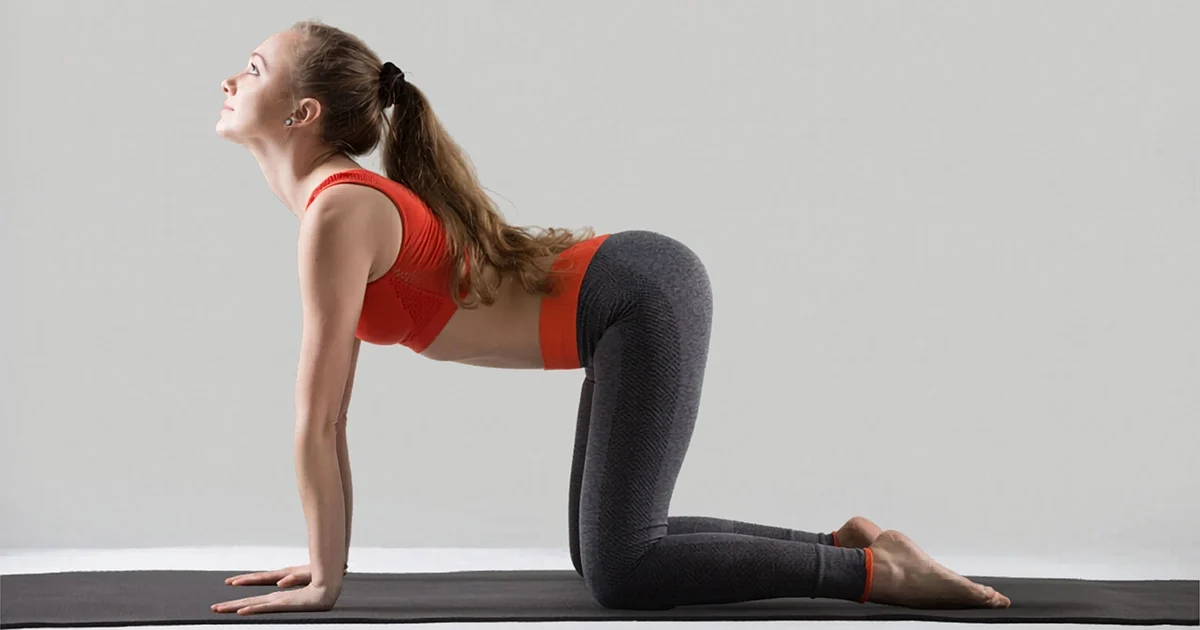
A yoga practitioner keeping their shoulders stacked over the hands while demonstrating proper alignment in Bitilasana Cow Pose.
BlogLife StyleTrendingYoga
March 15, 2026By bharatyogas0 Comments

Bitilasana-Cow Pose

Bitilasana (Cow Pose)

Table of Contents

  1. Introduction
  2. How to Do Bitilasana
  3. Benefits
  4. Tips for Better Practice
  5. Why Learn with a Yoga Teacher or Instructor
  6. Cautions and Contraindications
  7. Conclusion
  8. FAQS

Introduction

Bitilasana is the inhale to Marjariasana’s exhale. Cat and Cow work together so naturally that it can feel strange to write about one without the other. But Bitilasana has its own specific mechanics, its own particular benefits, and its own set of things that go wrong when practiced without attention.

Bitila means cow. The shape does resemble a cow’s back from the side — the spine dropping into extension, the head and tail both rising, the belly hanging low. It’s not the most flattering comparison for a yoga pose, but it’s accurate.

Where Cat is spinal flexion, Cow is spinal extension. Where Cat draws the navel toward the spine, Cow lets the belly drop. Where Cat drops the head, Cow lifts it. The two movements together create the full range of spinal mobility in the sagittal plane, and the breath coordination between them is one of the most fundamental pairings in yoga practice.

How to Do Bitilasana

From a neutral tabletop position — wrists under shoulders, knees under hips — on an inhale, let the belly drop toward the floor as the spine extends. The sit bones lift, the tailbone rises, the lumbar curves into extension. The chest opens, the head lifts, the gaze moves forward and slightly upward.

This is Cow Pose. The full spine extends from tailbone to crown. The curve is even and distributed — not a sharp hinge in the lumbar with the rest of the spine flat, but a smooth arc through every spinal segment.

Hold for the length of the inhale, then exhale into Cat. The movement flows: inhale into Cow, exhale into Cat, 5 to 10 slow cycles. The spine moves through its full sagittal range with each cycle, coordinated to the breath.

Benefits

Spinal extension and backbend warm-up. Bitilasana is one of the safest spinal extension exercises available — the hands and knees support the body, the load is distributed, and the spine moves through extension without the compressive forces present in standing or prone backbends. It’s the ideal first backbend in any sequence.

Hip flexor activation. As the tailbone lifts and the pelvis tilts into anterior tilt, the hip flexors engage slightly. This is different from the release that backbends like Ustrasana provide — here the hip flexors are working, not stretching — but it’s a useful activation pattern.

Thoracic extension. The challenge in Cow, as in all backbends, is getting the thoracic spine to participate. Most people initiate from the lumbar and leave the thoracic relatively flat. Practicing Cow with deliberate attention to the mid-back — lifting the chest, separating the shoulder blades slightly, letting the sternum drop toward the floor — develops the thoracic extension mobility that deeper backbends require.

Neck extension in a supported position. Lifting the head in Cow creates cervical extension under the support of the hands and knees. For people with stiff cervical spines, this gentle, load-free extension is a safe way to maintain or recover range of motion.

Breath pattern reinforcement. The inhalation that drives Cow Pose is diaphragmatic and natural. Learning to let the belly drop on the inhale — not hold it in, not brace it — is something many people unlearn through years of “suck it in” cultural conditioning. Cow Pose retrains the natural breath pattern.

Tips for Better Practice

  • The chest should drop toward the floor, not just the lower back. Cow Pose is frequently executed as a lumbar extension only, with the mid-back staying neutral. Press down through the sternum toward the floor (without collapsing — think “lower the chest while keeping the arms straight”) and the thoracic extension will come.
  • Don’t crunch the neck. The head lifts in Cow, but the cervical extension shouldn’t feel compressed or strained. The gaze moves forward and slightly up, not straight up toward the ceiling with a sharp neck crank.
  • Coordinate the tailbone with the head. The sit bones and the head both rise on the inhale. If the tailbone lifts but the head doesn’t, or vice versa, the movement is partial.
  • Slow the sequence down. Ten slow, full-breath Cat-Cows are more valuable for spinal health than twenty rushed ones.
  • Press through all four corners of the hands. The wrist loading in tabletop position is significant enough to warrant attention. Active hands protect the wrists.

Why Learn with a Yoga Teacher or Instructor

The thoracic participation issue is the main thing teachers address in Cow Pose. Most students move only through the lumbar, which gets overworked while the thoracic remains stiff. A teacher can place a hand on the mid-back and cue the student to move into that hand on the inhale, which gives immediate physical feedback about what thoracic extension feels like.

Breath coordination — genuinely letting the movement follow the breath rather than moving and adding breath as an afterthought — is also something teachers refine through specific cueing that makes the difference between a mechanical exercise and a genuine spinal mobility practice.

Cautions and Contraindications

  • Wrist injuries: Forearm support or fist modification reduces wrist load.
  • Knee discomfort in tabletop: Folded blanket under the knees.
  • Lumbar disc herniation (extension-sensitive): Some disc conditions worsen with extension. Get physiotherapy clearance. Partial range of motion Cow, staying below the threshold of symptom provocation, may be appropriate.
  • Neck injuries: Reduce the cervical extension in Cow Pose — keep the gaze forward rather than upward.

Conclusion

Bitilasana earns its place in every practice, every day. The spinal extension it creates in a supported, safe position is exactly what the body needs after hours of sitting in flexion. The breath coordination it reinforces is foundational to everything vinyasa and pranayama build on.

Cat and Cow together. Exhale and inhale. Flexion and extension. The most complete two-pose spinal sequence in yoga.

FAQS

Q: What does Bitilasana stretch?

A: The front of the torso, hip flexors, and throat. As a back extension, it’s a gentle opening for the spine.

Q: Can I do Bitilasana with a stiff lower back?

A: Yes, but keep the movement small. A tiny backbend is still effective. Don’t collapse into the lumbar.

Q: How long should I hold Bitilasana?

A: In a flow with Marjariasana, you move on each breath — there’s no hold per se. In a held practice, 20 to 30 seconds works.

Q: Is it suitable for beginners?

A: Yes — it’s one of the most accessible poses in yoga.

Q: My lower back crunches in Cow Pose. Should I worry?

A: If it’s painless, it’s usually joint noise from the facets moving. Reduce the depth of the backbend if it concerns you.

Q: Can I do Bitilasana on my forearms instead of hands?

A: Yes — forearm support takes wrist pressure off and still allows the spinal movement.

READ MORE
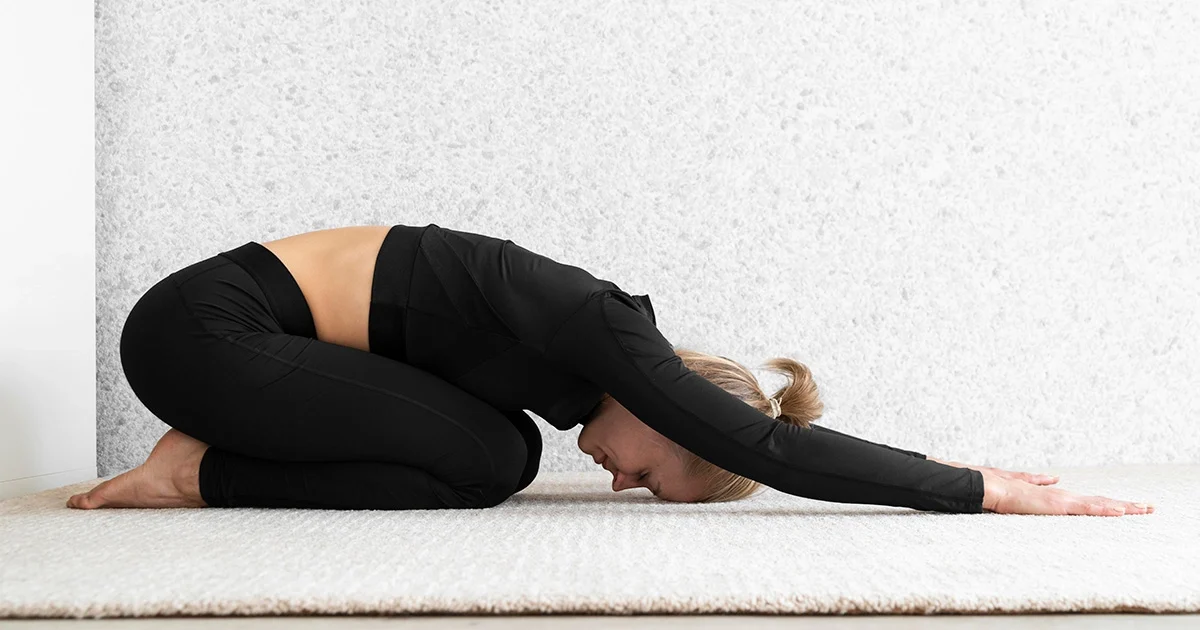
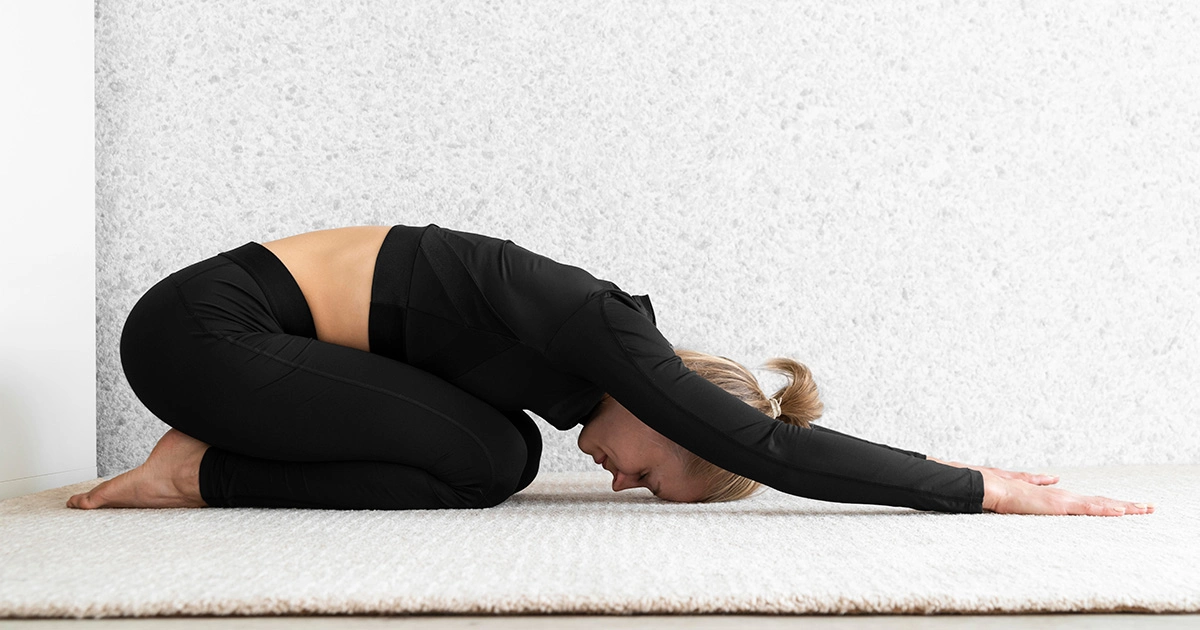
A yoga practitioner demonstrates relaxing alignment and deep spinal decompression while resting in Balasana.
BlogLife StyleTrendingYoga
March 12, 2026By bharatyogas0 Comments

Shishuasana-Child’s Pose

Shishu Asana (Child's Pose)

Table of Contents

  1. Introduction
  2. How to Do Shishu Asana
  3. Benefits
  4. Tips for Better Practice
  5. Why Learn with a Yoga Teacher or Instructor
  6. Cautions and Contraindications
  7. Conclusion
  8. FAQS

Introduction

Every yoga teacher says it eventually: “If you need to rest, come into Child’s Pose.” It’s the universal permission slip — drop out of the sequence, breathe, come back when you’re ready.

That reputation as the default rest pose is also why it doesn’t get taken seriously. People collapse into it for ten seconds, think they’ve rested, and push back into the next posture. It becomes a pause button. Which is a waste, because it’s genuinely doing something — assuming you actually stay in it.

Shishu means child. The shape mimics the fetal resting position: knees bent, hips back toward heels, forehead on the floor. Done properly — meaning with a real hold, not a ten-second cameo — it decompresses the lumbar spine, calms the nervous system, and stretches the hips and lower back in ways that a lot of other poses don’t quite reach.

How to Do Shishu Asana

Start kneeling. Bring the knees together or hip-width apart. Sink the hips back toward the heels and fold the torso forward over or between the thighs. Forehead goes to the floor — or on a block or blanket if the floor isn’t reachable yet.

Arms can go two ways: extended forward alongside the ears for a more active shoulder stretch, or resting alongside the body with palms facing up near the feet for a quieter, more passive shape.

Once you’re in, let the weight go. Forehead down. Shoulders dropped. Belly soft. Breath slower than it was.

Stay for 1 to 5 minutes. Not ten seconds — minutes.

Wide-knee variation: Tight hips often prevent the torso from lowering comfortably between the thighs. Spreading the knees wider solves this — the belly drops through and the fold opens up. This is also the version that works during pregnancy, when the belly needs room.

Benefits

Spinal decompression. The lumbar spine gently flexes in this position, and the vertebrae separate slightly. For anyone spending long hours sitting or standing, this feels tangible within the first minute of a real hold. The key word being real — the nervous system doesn’t shift in ten seconds.

Hip and lower back stretch. The hips flex, the glutes stretch, the muscles along the sacrum and lumbar lengthen. Tight hips respond to this slowly, but they respond. A few honest minutes of Child’s Pose changes how the lower body feels.

Nervous system calming. Forehead down, eyes closed, belly lightly compressed by the thighs — the parasympathetic nervous system gets activated fairly reliably. Heart rate drops. Mental noise quiets. It’s one of the more direct routes to the rest-and-digest state, particularly for people whose stress response runs hot.

Counterpose. After backbends — Ustrasana, Dhanurasana, Chakrasana — the spine wants the opposite direction. Child’s Pose provides it immediately and without effort. After long standing sequences, it gives the legs and back a genuine break rather than just a change of position.

Breath awareness. When the belly presses against the thighs, each inhale becomes visible as the ribs expand sideways and into the back. Diaphragmatic breathing becomes something you feel rather than something a teacher has to describe. That’s more useful than most verbal instruction.

Tips for Better Practice

Stay longer than you want to. Two minutes is where real rest starts. Three is where the hips and lower back actually release. The urge to come out early is usually just restlessness — notice it, stay anyway.

Get a blanket under your forehead. If it doesn’t reach the floor, your neck is working and the pose isn’t restful. Physical comfort here isn’t a luxury — it’s the condition that makes rest possible.

Roll a blanket between the thighs and calves. This is the single most useful modification for people with tight quads or knee discomfort. It changes the pose from something to endure to something that actually works.

Let the shoulders go more than once. In the arms-forward version, people often think they’ve released their shoulders when there’s another layer waiting. Send the shoulder blades outward and let the chest melt. It’s usually there if you look for it.

Breathe into the back body. In Child’s Pose, the back ribs expand on the inhale. Directing breath there turns a passive rest posture into active spinal mobility work — a small shift that changes the texture of the whole thing.

Why Learn with a Yoga Teacher

The point of a teacher in Child’s Pose isn’t instruction — the shape isn’t complicated. It’s what they can do with their hands.

A steady press on the sacrum encourages it toward the floor and heels, deepening the hip and lower back release in a way that’s simply not self-administerable. Hands on the upper back guide breath into the back ribs. A touch on the shoulders gives them permission to drop. These are subtle contacts, but practitioners routinely discover they were holding tension they didn’t know was there — and it takes someone else’s hands to find it.

Cautions and Contraindications

Knee injuries: A blanket roll between the thighs and calves reduces how far the knee flexes. If kneeling causes pain regardless of props, skip the pose.

Pregnancy: Use the wide-knee variation. Later in pregnancy, a bolster under the chest may also help.

High blood pressure: Prolonged holds with the head below the heart may not be appropriate. Check with a doctor for longer stays.

Ankle injuries or stiffness: A rolled blanket under the ankles reduces the plantar flexion demand considerably.

Conclusion

The tendency is to rush through Child’s Pose — treat it as the gap between the real poses, take ten seconds, move on. That misses what’s actually on offer when you stay. The decompression is real. The nervous system shift is real. None of it happens quickly; it needs a few minutes and genuine stillness, which is harder than it sounds.

Most people aren’t that good at stopping. Child’s Pose, done well, practices exactly that.

A yoga practitioner demonstrates relaxing alignment and deep spinal decompression while resting in Balasana.

FAQs

Q: Is Shishu Asana the same as Balasana?

Largely yes — in Indian yoga traditions the names are used interchangeably. Both describe the kneeling forward fold with forehead to the floor.

Q: When should I use Child’s Pose?

Whenever you need to. There’s no rule about when it’s permitted. Tired, dizzy, overwhelmed, or just not ready for the next posture — come into it.

Q: My knees are uncomfortable. What helps?

A folded blanket between the thighs and calves fixes this for most people. If the knees are still uncomfortable, try the wide-knee variation.

Q: Is it actually good for stress and anxiety?

Yes. The combination of forward fold, forehead contact, and slowed breath activates the parasympathetic nervous system — not over weeks of practice, but within the pose itself, in a few minutes.

Q: Can I do Child’s Pose in bed?

You can. A soft mattress changes how the body settles, but the shape still provides spinal flexion and hip opening. Worth doing even without a mat.

Q: Who should avoid Shishu Asana?

People with knee injuries, severe ankle stiffness, or very late pregnancy where even the wide-knee version is uncomfortable.

READ MORE
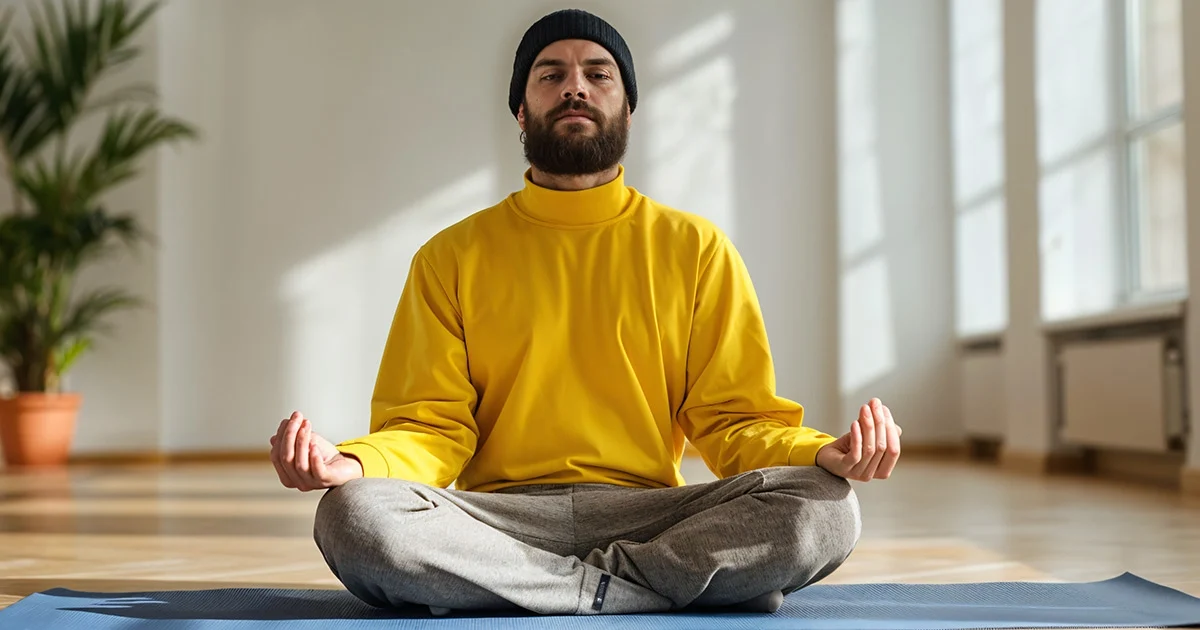
A yoga practitioner demonstrates proper pelvis propping and neutral spinal alignment while seated in Sukhasana.
BlogLife StyleTrendingYoga
March 11, 2026By bharatyogas0 Comments

Sukhasana-Easy Pose

Sukhasana (Easy Pose) Nothing Easy About Sitting Well

Table of Contents

  1. Introduction
  2. How to Do Sukhasana
  3. Benefits
  4. Tips for Better Practice
  5. Why Learn with a Yoga Teacher or Instructor
  6. Cautions and Contraindications
  7. Conclusion
  8. FAQS

Introduction

The name is a trap. Sukha means ease or comfort. Asana means posture. Easy Pose. You sit cross-legged on the floor and breathe. How hard could it be?

For children, not very. For adults who’ve spent decades sitting in chairs, it’s often genuinely uncomfortable within a few minutes — the hips ache, the lower back rounds, the knees hover well off the floor, and the whole thing feels wrong in a way that’s embarrassing given that it’s supposed to be the beginner’s seat.

That discomfort is useful information. It reveals exactly what years of chair-sitting has done to the hips, the inner thighs, the hip flexors, and the lower back’s ability to maintain a neutral curve without support. Sukhasana shows you where the work is needed.

And done correctly — with appropriate props, genuine spinal lift, and consistent practice — it’s one of the more sustainable meditation and pranayama seats available. Not because it becomes comfortable overnight, but because the work to make it comfortable is exactly the work that makes the rest of the practice better.

How to Do Sukhasana

Sit on the floor with legs crossed — one shin in front of the other, not the pretzel of Padmasana, just crossed shins. The feet can be in front of you rather than tucked in if that’s more accessible.

Check the pelvis. The sit bones should press into the floor and the pelvis should be in a neutral position — not rolled backward (which rounds the lower back) and not excessively anteriorly tilted (which over-curves it). For most people with tight hips, sitting on a folded blanket or meditation cushion immediately helps the pelvis find this neutral position.

From a neutral pelvis, lift through the crown of the head. The spine stacks. The chest opens. The shoulders relax. The chin stays level.

This is Sukhasana. Hold it for 1 to 5 minutes for a seated practice, or for the duration of meditation or pranayama.

Benefits

Hip flexibility development. Sustained cross-legged sitting stretches the hip external rotators, the inner thighs, and the hip flexors in ways that chair-sitting never does. Over months of consistent practice, the hips open, the knees lower, and the position becomes progressively more comfortable — evidence of genuine flexibility change.

Accessible meditation and pranayama seat. For practitioners not yet ready for Padmasana or Siddhasana, Sukhasana provides an upright seated position that supports breathing practice and meditation without requiring extreme hip flexibility. It’s the entry point for all seated spiritual practice in yoga.

Postural training. Maintaining an upright spine in Sukhasana without a backrest requires and develops the postural muscles of the lower back, mid-back, and core. The effort required drops over months as the muscles adapt and the hips open, making the pose progressively less of a workout and more of a resting seat.

Grounding. The wide-base seated position with both sit bones on the floor creates a different quality of groundedness than any chair provides. Practitioners consistently report that sitting cross-legged on the floor for even 5 minutes has a settling effect on the nervous system that chair-sitting doesn’t replicate.

Tips for Better Practice

  • Use a blanket or cushion. Sitting on 2 to 4 inches of elevation changes the hip and pelvis geometry enough to make the pose significantly more comfortable and the spine significantly more upright. This is not a crutch; it’s anatomy. Use props appropriately.
  • Alternate which leg is in front. Most people have a habitual crossing preference. Working both sides keeps the hip flexibility developing symmetrically.
  • Check the spine regularly during longer holds. The back tends to round gradually over time in seated postures, and the roundings happens below conscious awareness. Building the habit of checking and correcting every few minutes is worthwhile.
  • If the knees are significantly above hip height and the lower back rounds immediately, the hips are too tight for effective Sukhasana today. Use a higher prop, or practice other hip openers first and return to cross-legged sitting as the hips open.
  • Breathe slowly and deliberately in the pose. Sukhasana is where the breath practice lives, and the quality of breath in the seated position is as important as the alignment.

Why Learn with a Yoga Teacher or Instructor

Teachers help students find the appropriate prop height — blanket thickness, cushion type — for their current hip flexibility. This is more specific than it sounds; a blanket that’s too thin doesn’t solve the pelvic tilt problem, and one that’s too thick creates a different set of alignment issues.

For students using Sukhasana as a meditation or pranayama seat, a teacher can refine the spinal alignment and hand position, and introduce the breath practices that the seated position supports. The difference between sitting in Sukhasana and practicing in Sukhasana is largely what a teacher provides.

Cautions and Contraindications

  • Knee injuries: Cross-legged sitting places the knee in a flexed, externally rotated position. If this is painful with knee pathology, sit in Vajrasana (if comfortable) or use a chair instead.
  • Severe hip tightness causing back pain: If sustained cross-legged sitting causes lower back pain despite propping, the hips are not yet ready. Work on hip opening postures and return as flexibility develops.
  • Sciatica: Some sciatic presentations are aggravated by cross-legged sitting. Monitor carefully.

Conclusion

Sukhasana is where most yoga practices begin and where meditation practices live. The work to make it genuinely comfortable — opening the hips, developing the back strength to maintain an upright spine, learning to breathe fully in the seated position — is foundational work that improves everything else.

It gets easier. Slowly, consistently, over months. And when it does, the quality of practice that becomes available in the seated position is worth everything the hip-opening work costs.

FAQS

Q: Is Sukhasana really as easy as it sounds?

A: For people with tight hips, sitting cross-legged on the floor is genuinely difficult. The knees are often higher than the hips, which makes the lower back strain. It’s “easy” relative to lotus, not necessarily easy in absolute terms.

Q: Should I sit on a block or blanket in Sukhasana?

A: If your knees are above your hips, yes — prop up the hips. It makes maintaining an upright spine much easier.

Q: How long can I sit in Sukhasana?

A: As long as you’re comfortable. For meditation, 20 to 60 minutes is common. Alternate which leg is in front each session.

Q: Is Sukhasana good for everyone?

A: It’s generally accessible, but people with knee or hip pain may need to adjust with props or use a chair.

Q: Does sitting in Sukhasana improve hip flexibility?

A: Over time, yes — regular seated practice does open the hips, especially if combined with active hip-opening poses.

Q: Can children sit in Sukhasana?

A: Kids tend to drop into it effortlessly. It’s one of those poses that gets harder as we age and get stiffer.

READ MORE
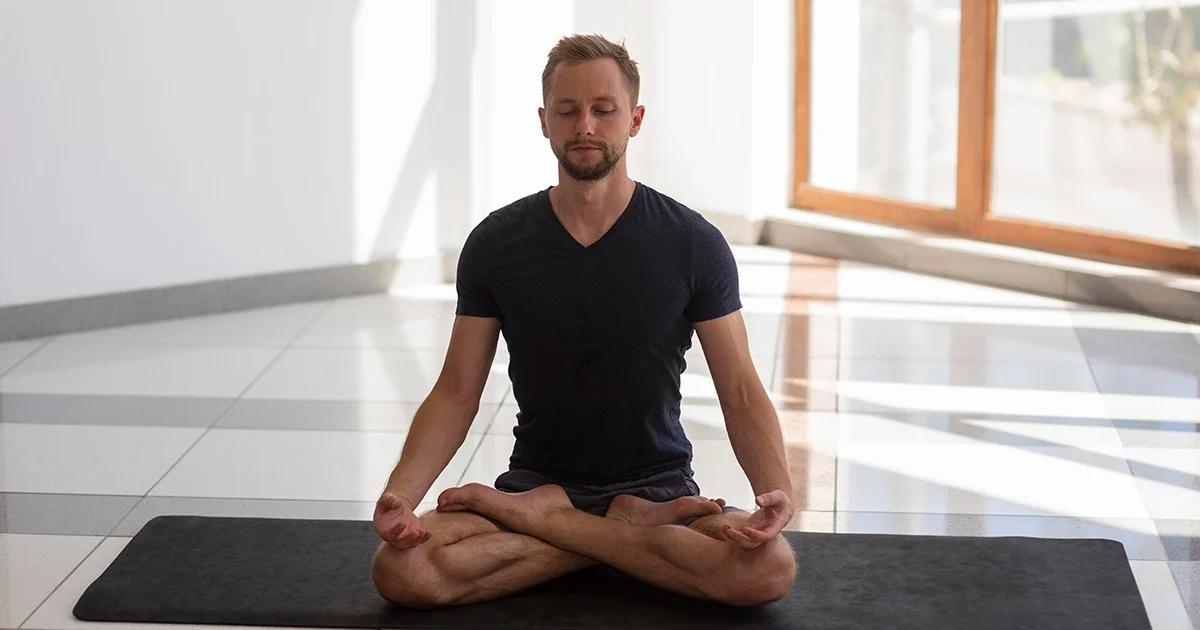
A yoga practitioner keeping a long, upright spine and level hips while demonstrating correct leg alignment in Padmasana.
BlogLife StyleTrendingYoga
March 10, 2026By bharatyogas0 Comments

Padmasana-Lotus Pose

Padmasana (Lotus Pose) The Pose Most People Should Stop Rushing Toward

Table of Contents

  1. Introduction
  2. How to Do Padmasana
  3. Benefits
  4. Tips for Better Practice
  5. Why Learn with a Yoga Teacher or Instructor
  6. Cautions and Contraindications
  7. Conclusion
  8. FAQS

Introduction

Padmasana is probably the most recognized yoga posture in the world — the cross-legged seated position with feet resting on opposite thighs, spine upright, the image of meditation itself. It appears on ancient temple sculptures, modern meditation apps, and every third yoga-related photograph online.

It’s also the pose most people try to force before their hips are ready for it, which causes knee injuries that set their practice back by months.

Padma means lotus. The legs folded into the position are said to resemble the petals of a lotus flower. More practically, the pose creates a stable, grounded base for extended seated practice — once the body is genuinely ready for it. The stability and the upright spine that Padmasana allows when practiced in a truly open hip are real and different from what simpler seated positions provide.

But the key phrase is “when the body is genuinely ready.” Padmasana requires substantial hip external rotation flexibility — more than most adults have without years of consistent hip-opening practice. Forcing the legs into position when the hips aren’t ready routes the rotational force to the knee, a joint that was not designed to rotate. Knee injuries in Padmasana are extremely common and entirely avoidable.

How to Do Padmasana

Sit in Dandasana (Staff Pose) with legs extended. Take the right leg first: bend the right knee and cradle the right shin in both hands, ankle in one hand and knee in the other. Gently rock the shin side to side to loosen the hip. Then, keeping the right ankle flexed to protect the knee, place the right foot on the left thigh — as high up toward the hip crease as comfortable.

Now the left leg: bend the left knee and, again keeping the ankle flexed, bring the left foot to rest on the right thigh.

The hips do the rotation. If the knees are high off the floor and there’s any discomfort in the knee joint specifically, this is the hip telling you it needs more external rotation range before the full pose is appropriate. Use half Lotus (one foot on thigh, one foot on floor) or Sukhasana instead.

Once both feet are placed, sit as tall as possible. The spine lifts. The hands rest on the knees in a mudra of choice, or palms face up in the lap. Close the eyes. Breathe.

Benefits

Stable meditation seat. For practitioners with adequate hip external rotation, Padmasana creates a lower, more stable base than cross-legged sitting. The geometry of the pose — wide base, stacked spinal column — allows the postural muscles to maintain an upright spine with less active effort than other seated positions. This matters for extended meditation or pranayama practice.

Hip external rotation. The position requires and, over time, develops external rotation at the hip joint. The piriformis, obturator internus, and other deep external rotators all stretch in the pose. Practiced consistently over months and years, Padmasana genuinely develops hip mobility.

Ankle and knee awareness. When properly aligned with the ankle flexed and the rotation occurring at the hip rather than the knee, the pose develops awareness of the distinction between hip rotation (appropriate) and knee rotation (inappropriate) — a kinesthetic distinction that improves movement quality across many other postures.

Grounding and stillness. The wide, stable base of Padmasana creates a physical quality of groundedness that practitioners consistently report. Whether this is mechanical (lower center of gravity, more contact with the floor) or neurological (the sustained sensory input from the position) or something else, the felt quality of settled stillness in a mature Padmasana is distinctive.

Tips for Better Practice

  • Flex the ankles. This is the single most important protection for the knee in this pose. A neutral or plantar-flexed (pointed) ankle allows the foot to slide off the thigh, which creates knee rotation strain. A dorsiflexed (flexed) ankle keeps the foot in place and protects the joint.
  • Do not force the legs down. The knees will lower over months and years of consistent hip opening practice. Pressing them down manually when the hips are tight sends rotational force to the knee. Don’t.
  • Build with Sukhasana, Bhadrasana, and Ardha Padmasana (half Lotus) before attempting full Lotus. These postures develop the hip external rotation gradually.
  • Practice hip openers deliberately: Pigeon Pose, Bhadrasana, Gomukhasana, Ardha Matsyendrasana. The hip flexibility required for Padmasana doesn’t come from sitting in Padmasana when you’re not ready — it comes from systematic hip opening work over time.
  • Alternate which foot goes on top. Most people have a preference. Working both sides equally is practical and prevents asymmetric hip development.

Why Learn with a Yoga Teacher or Instructor

This is one pose where teacher guidance is genuinely protective. Teachers know how to assess hip external rotation readiness and can tell immediately whether the rotation is coming from the hip (correct) or the knee (injurious). They’ll prescribe the appropriate preparatory postures and can set a realistic timeline — which is usually measured in months and years, not sessions.

For students who have already developed Padmasana, a teacher can refine the spinal alignment and mudra position that makes the pose useful for meditation and pranayama practice rather than just a shape held for its own sake.

Cautions and Contraindications

  • Knee injuries of any kind: Padmasana applies rotational and compressive force to the knee joint. Active knee conditions are a contraindication. Even after recovery, build back slowly with half Lotus before attempting the full pose.
  • Hip pathology (labral tears, FAI): The extreme hip external rotation required may be contraindicated with certain hip joint conditions. Get clearance from an orthopedic specialist.
  • Ankle injuries: The sustained plantar flexion of the foot on the thigh may be uncomfortable with ankle pathology. Monitor carefully.
  • Sciatic nerve irritation: Some presentations of sciatica are aggravated by the hip external rotation. Monitor and stop if symptoms worsen.

Conclusion

Padmasana is worth working toward — slowly, patiently, with proper hip preparation. The meditation seat it eventually provides is genuinely different from simpler cross-legged positions. The hip mobility it develops over years of consistent practice has value that extends well beyond the pose itself.

But knee injuries from rushing it are not worth the shortcut. The hips open at their own pace. Work with that pace, not against it. The lotus will come when it comes.

FAQS

Q: Is Padmasana necessary for meditation?

A: No. It’s traditional, but many experienced meditators use Sukhasana (easy pose), Siddhasana, or even a chair. Meditation quality has nothing to do with whether your feet are in lotus position.

Q: Can I force myself into Padmasana?

A: Absolutely not. Forcing lotus without hip flexibility is a reliable way to injure the knee. The hip needs to externally rotate for the pose to work safely.

Q: How do I work toward Padmasana safely?

A: Hip-openers over time — Gomukhasana, Baddha Konasana, Pigeon Pose. It can take months to years. There’s no shortcut.

Q: Who should never attempt Padmasana?

A: Anyone with knee injuries, hip replacements, or limited hip external rotation. The knee is not designed to carry the rotation that tight hips transfer to it.

Q: Is half lotus (Ardha Padmasana) a safer alternative?

A: Yes — it requires less hip rotation and carries less risk to the knee.

Q: How long should I sit in Padmasana?

A: Depends on your comfort. 10 to 30 minutes is common for meditation. Come out if you feel any knee strain.

READ MORE
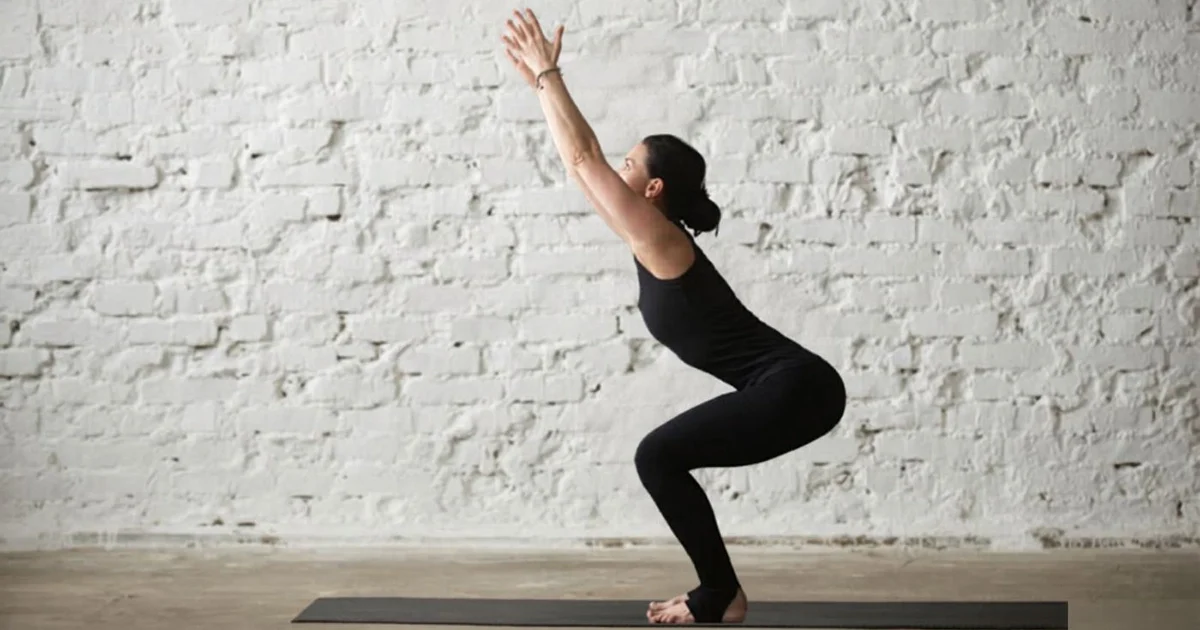
A yoga practitioner keeping their spine long and weight back in their heels while practicing proper alignment in Utkatasana.
BlogLife StyleTrendingYoga
March 9, 2026By bharatyogas0 Comments

Utkatasana-Chair Pose

Utkatasana (Chair Pose) The Pose That Humbles Everyone

Table of Contents

  1. Introduction
  2. How to Do Utkatasana
  3. Benefits
  4. Tips for Better Practice
  5. Why Learn with a Yoga Teacher or Instructor
  6. Cautions and Contraindications
  7. Conclusion
  8. FAQS

Introduction

Nobody looks forward to Utkatasana the way they look forward to, say, Child’s Pose. It’s uncomfortable in the way that real work is uncomfortable — thighs burning, torso leaning, arms getting heavy. Most beginners hold it for about 15 seconds before straightening their legs. Experienced practitioners hold it for a minute and still find it hard.

Utkata means fierce, powerful, or intense. The name is honest. This is a fierce posture — a squat-like shape that demands simultaneous strength from the quadriceps, glutes, and core while asking the spine to lengthen upward and the arms to reach overhead. Several things happening at once, none of them easy.

Despite the discomfort (or because of it), Utkatasana is one of yoga’s more functionally useful poses. The squat pattern it trains is one of the most basic movement patterns the body uses — sitting down, standing up, picking things up, climbing. The strength it builds is practical in the literal sense.

How to Do Utkatasana

Stand in Tadasana with feet together or hip-width apart, depending on your balance and ankle flexibility. Inhale and raise both arms overhead — palms facing each other, arms alongside the ears, or hands pressed together in prayer position.

On the exhale, bend the knees and sink the hips as if sitting back into a chair. The knees track over the second toe. The weight is in the heels and the mid-foot. The torso leans forward slightly — this is unavoidable and correct — but the spine stays long rather than collapsing.

The hips aim toward the height of the knees in the full expression; most beginners will find a more shallow squat position that still creates significant quadriceps demand.

Arms stay active: reaching upward, shoulders drawing away from the ears. The tendency is for the arms to droop as the legs get tired. Keep them lifted.

Hold for 30 to 60 seconds, breathing steadily. Rise on an inhale and return to Tadasana.

Benefits

Quadriceps and glute strengthening. The sustained hold in the squat position builds the quadriceps and glutes under time-under-tension. This is functional strength — the same muscle engagement used every time you sit down, stand up, or squat to pick something up. Utkatasana builds it without any equipment.

Core engagement. The torso leaning forward at the slight forward angle of the pose requires constant core engagement to prevent the lower back from collapsing. The deep stabilizers of the lumbar spine work throughout the hold.

Ankle and foot strengthening. The weight distribution in Utkatasana activates the intrinsic muscles of the feet and the muscles of the lower leg in ways that flat-foot standing doesn’t. Regular practice improves ankle stability.

Shoulder endurance. Holding the arms overhead against gravity for 30 to 60 seconds is isometric work for the shoulder stabilizers and upper trapezius. This builds endurance in the overhead position that transfers to everyday reaching and lifting tasks.

Heat and cardiovascular activation. Utkatasana generates more metabolic heat than most yoga postures. Practitioners notice their heart rate rising and their body temperature increasing during sustained holds. This makes it a useful warm-up component and cardiovascular contribution in yoga sequences.

Tips for Better Practice

  • Sit back and down, not just down. The hips should move backward as they lower, keeping the weight in the heels rather than rolling forward onto the toes. If the heels lift, the hips aren’t going back enough.
  • Track the knees over the second toe. They tend to fall inward (valgus collapse), particularly as the legs fatigue. This is the most common form breakdown in Utkatasana and the one most associated with knee discomfort.
  • Keep the spine long. The forward lean of the torso is fine and anatomically correct — you can’t squat with an upright torso without lifting the heels. But within that forward lean, the back should be flat, not rounded.
  • Breathe consistently. The quadriceps burn makes breath-holding tempting. Steady breathing manages the discomfort better than bracing.
  • Engage the inner thighs. A slight squeeze of the inner thighs (as if holding a block between the knees) helps stabilize the knee tracking and activates additional muscle groups.

Why Learn with a Yoga Teacher or Instructor

Knee tracking is the most important alignment point in Utkatasana and the hardest to self-monitor during the hold when the legs are already fatiguing. A teacher watching can see the valgus collapse before the practitioner feels it and can cue the correction before it becomes a habitual pattern.

Teachers also help with the weight distribution — heel vs. toe balance — and the torso position, making sure the lean is coming from the correct hip-hinge pattern rather than a rounding of the lower back.

Cautions and Contraindications

  • Knee injuries: The sustained squat position loads the patellofemoral joint. Those with kneecap tracking problems, meniscal tears, or post-surgical knees should approach with caution and keep the knee bend minimal.
  • Low back pain: Maintaining the spinal length while leaning forward is demanding. Those with acute lower back problems may find the pose aggravating.
  • Shoulder injuries: Overhead arm position may be inappropriate with rotator cuff pathology. Modify with hands on the hips instead.
  • High blood pressure or heart conditions: The cardiovascular demand is real. Monitor and keep holds shorter.

Conclusion

Utkatasana is the pose nobody enjoys and everyone needs. The functional squat strength it builds, the balance it demands, the heat it generates — these things are practically useful in daily movement in ways that many prettier yoga poses aren’t.

Hold it longer than you want to. That’s where the work happens. And the discomfort, when you breathe through it and keep the form, becomes something you can work with rather than just suffer through.

FAQS

Q: Is Utkatasana good for building leg strength?

A: Yes — it’s one of the more effective leg strengthening poses in yoga. Quadriceps, glutes, and calves all work hard, especially in longer holds.

Q: My heels lift in Chair Pose. Is that okay?

A: Not ideal — try to keep both heels grounded. Lifting heels often means you’re leaning too far forward. Shift the weight back slightly.

Q: How long should I hold Utkatasana?

A: 30 to 60 seconds. It burns. That’s the point.

Q: My lower back hurts in Utkatasana. What’s wrong?

A: Usually either arching too much at the lumbar or not engaging the core. Keep a slight tuck and lengthen the tailbone down.

Q: Can I use a wall for support in Chair Pose?

A: Yes — placing your back against a wall is a good way to learn the alignment before doing it freestanding.

Q: Who should be careful with Utkatasana?

A: People with knee injuries, especially patellofemoral issues. Make sure your knees track over your toes, not caving inward.

READ MORE
  • 1
  • 2
  • 3

Links

About us
Disclaimer
Terms and Conditions
Privacy Policy
Cancellation Policy
Refund Policy

Contacts

Info@bharatyogas.com

Subscribe

    In Socials

    Fb.
    X.
    Ins.
    Lk.

    Bharatyogas

    Copyright © 2026 Bharatyogas.com. All Rights Reserved